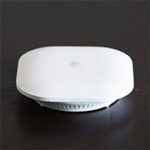
The EnGenius ECW120 is a part of the new Cloud managed wireless access points series and it’s the only ceiling-mount model that was left out of the WiFi 6 group. But, despite supporting the Wave 2 802.11ac WiFi standard, the AC1300-class access point still promises a large WiFi coverage, accompanied by a solid throughput (supporting both MU-MIMO and BeamForming), it can be powered by a PoE switch (with a flexible installation from up to 328 feet) and there is support for meshing (which is starting to feel like a standard feature now on all WAPs).
| EnGenius ECW120 | |
|---|---|
| EnGeniusTech.com | Check Product |
But the one element that could set it apart from its competitors is the Cloud managed platform which is offered completely free by Engenius – similarly to Zyxel, it seems that there will be a point when EnGenius will introduce more advanced features that will require a subscription plan.
I’ve had a quick look at the APs Cloud sections with the SkyKeyI and the non-Cloud Engenius EAP1250 (as well as a more in-depth analysis with the ECS1008P) and the Cloud management platform can clearly hold its own when put next to the Omada from TP-Link, the Cloud platform from Zyxel and to a certain extent even UniFi from Ubiquiti. When I had a look at the EAP1250, its local management software offered lots of features, but, if you decide to use the ECW120 locally, you only get the bare minimum, so, to get the best out of the device, you do need to add it to the EnGenius Cloud management platform.
Design and Build Quality
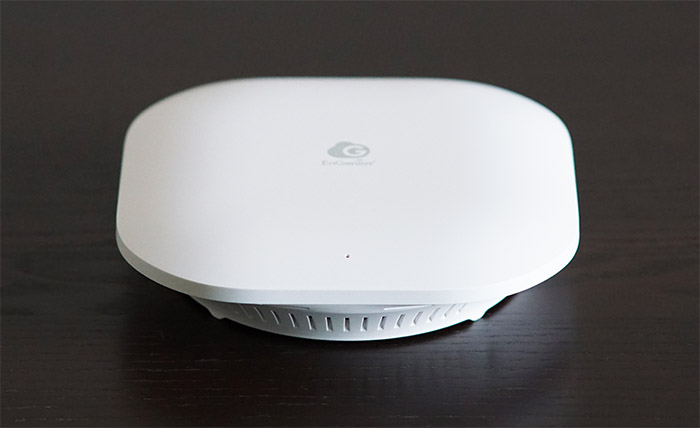
When I tested the EnGenius EAP1250, I was thoroughly impressed by just how small and compact it was (reminded me of those small first gen Open Mesh wireless access points) and, while the ECW20 is an AC1200 AP, EnGenius decided to make it look very similar to the other available devices on the market. The reason for that is because the wireless access point was built to be mounted either on the ceiling or on the wall, so a flush-mount aspect is going to be the best choice in order to maintain the desired unobtrusive nature. Of course, there are no external antennas and the chosen material is hard plastic which is covered by a white matte finish.
The top of the case curves a bit towards the edges (giving the access point an inflated look) and the bottom part expands towards the top, managing to achieve a sort of mushroom form. But, while the bottom is circular, the top is rectangular (with rounded corners), so it looks like a hybrid between the older Open Mesh A60 and perhaps a Zyxel NAP303.
In terms of size, the ECW120 measures 6.36 x 6.36 x 1.64 inches (LxWxH), so it’s smaller than both the TRENDnet TEW-825DAP and the TP-Link EAP245, but it is behind the ultra-compact EnGenius EAP1250 (at its 1.47 x 5.2 inches) – it’s also thicker than the UAP-AC-PRO and the reason for that is because it has an internal power supply (in case you don’t want to use PoE). This also means that the wireless access point will stick out a bit more when mounted on the ceiling.
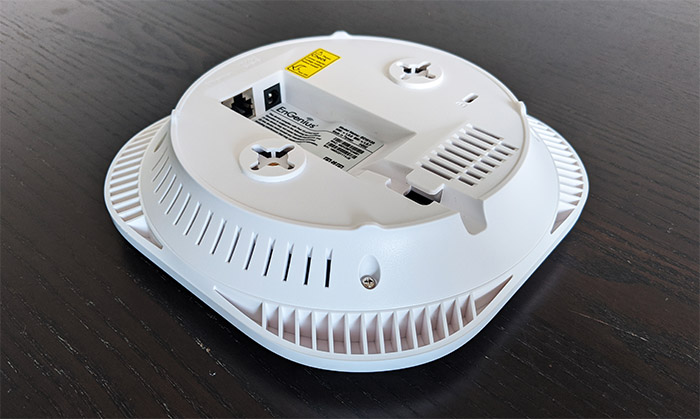
That being said, if you turn the device upside down, unlike the top side which is quite uneventful (besides the printed logo and the small LEDs), the bottom is filled with lots of ventilation areas to keep the internal temperature in check and there are two dedicated areas for mounting the AP and, besides the usual recessed sections for the screws, there are two sections for adding the spacers and T-rail connectors (available in the package), so you can easily attach the access point to a ceiling T-rail.
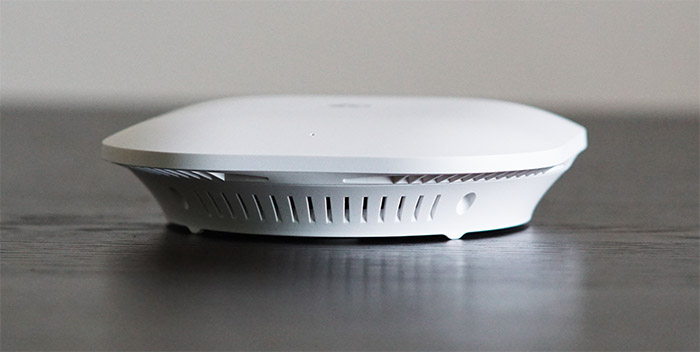
I did say before that there are lots of ventilation cut-outs and they did manage to keep the temperature down, even when I put a bit of stress on it (well, the case still got warm all around, but there were no signs that it may overheat). It’s worth noting that, if you decide to keep the device on the desk, it will move around since it lacks any silicone feet (and the weight is not enough to hold it in place – it weighs 0.80 lb).
Besides the mounting holes, there is a Kensington lock slot and in the middle, there is a rectangular area that goes deep inside the case ending up with an Ethernet port and a 12V DC power port (there is no power cord included in the package). The cables are guided towards the edge of the access point via a dedicated canal (with some plastic sections to keep the cable attached) and, while the space is quite narrow, two cables should barely fit. The Ethernet port is Gigabit and supports PoE (802.3af and 48V) which is nice and all, but a couple of Ethernet ports would have been even better – I know that it’s meant to end up on the ceiling where a wired client is not easy to connect, but, if you mount the ECW120 on the wall and you have a nearby lonely printer that could have been directly connected, well, you’ll going to have to put it close to the router instead. On the top of the wireless access point, there is a very small recessed Reset button (press and hold it with a pin for about 10 seconds to return the device to its factory settings) and five LEDs to show the status of the device and of the network.
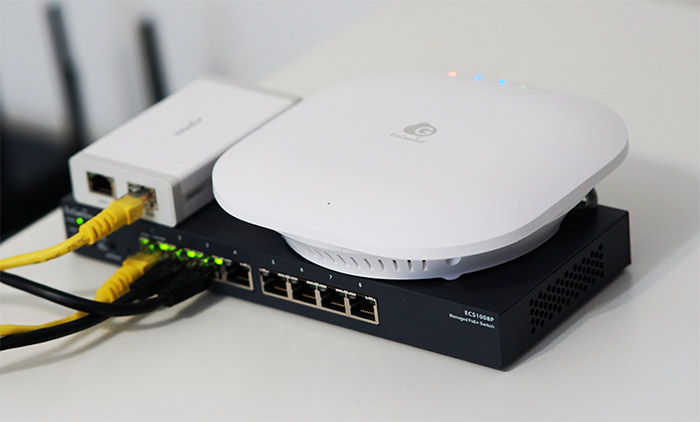
From the left, there’s the Power LED (it’s going to flash orange when it’s connecting to the Cloud and will become solid orange after the connection is successful), followed by the Ethernet LED (solid blue means that the port is connected to a switch or to the router; flashing blue indicates that the data is transmitting) and the two 2.4 and 5GHz LED indicators (solid blue/green indicates a connection to the Internet and flashing blue-green shows that the data is transmitting); lastly, there’s the Mesh LED which flashes blue when the Mesh feature is enabled. The different color LEDs do actually look quite cool on the white top of the EnGenius ECW120 and I do find this approach infinitely more intuitive than the single LED approach of some APs which is borrowed from the WiFi systems.
EnGenius ECW120: Internal Hardware
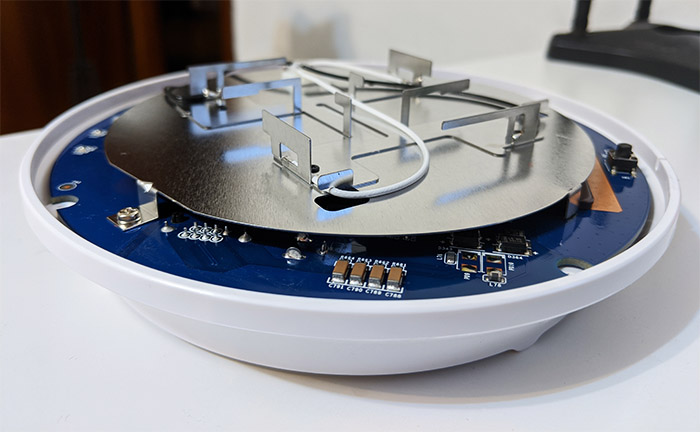
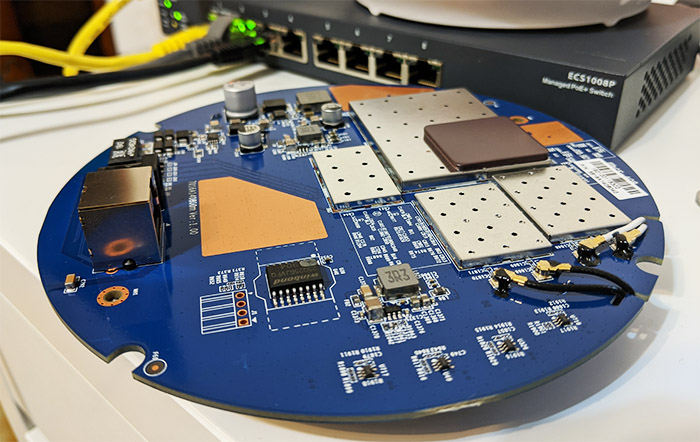
To have a look at the internal hardware, I took out the four screws from the bottom and, after removing the top part, I could see an intricate antenna model, while on the other side of the PCB, I could identify a Qualcomm IPQ4018 NE8512YC SoC (which support a large variety of Wave 2 802.11ac features), 32 MB of flah memory from Winbond (25Q256JVFQ), 128 MB of RAM (NANYA 1840 NT5CC128M16JR-EK) and a Qualcomm QCA8072 PK8503S6 10/100/100Mbps Ethernet transceiver.
There are also two Skyworks SKY85303 front-end modules (2.4GHz) and a couple of Skyworks SKY85748-11 SKY 748 front-end modules (5GHz).
The EnGenius ECW120 features a maximum theoretical data transfer rate of 400 Mbps on the 2.4GHz band and a maximum theoretical data transfer rate of 867 Mbps on the 5GHz band, so it is an AC1300-class wireless access point.
Setup and Software
The hardware installation is similar to the other wireless access points, but you do have a couple of options that you can explore: first, there’s the possibility to use a Power cable and then to simply run an Ethernet cable from the router to the only port on the ECW120, but it can also be powered on via PoE, meaning that you can connect the AP to a PoE switch or rely on a PoE adapter – EnGenius has made available some Cloud-compatible Ethernet switches for this exact scenario (from which, there’s the entry-level 8-port ECS1008P). After powering on the wireless access point and connected it to the router, you could check the local management software and to do so, you need to find out the IP address that it received from the router (the easiest way is to open the router’s UI and see the connected clients) and then insert it into the URL of any web browser.
This way, you will be asked to enter the username and password (it’s admin and admin – I don’t know why EnGenius doesn’t keep it consistent over all its devices since the ECS1008P switch used admin and password) and then you will be able to see the local management UI, which is not that spectacular, offering only the basics.
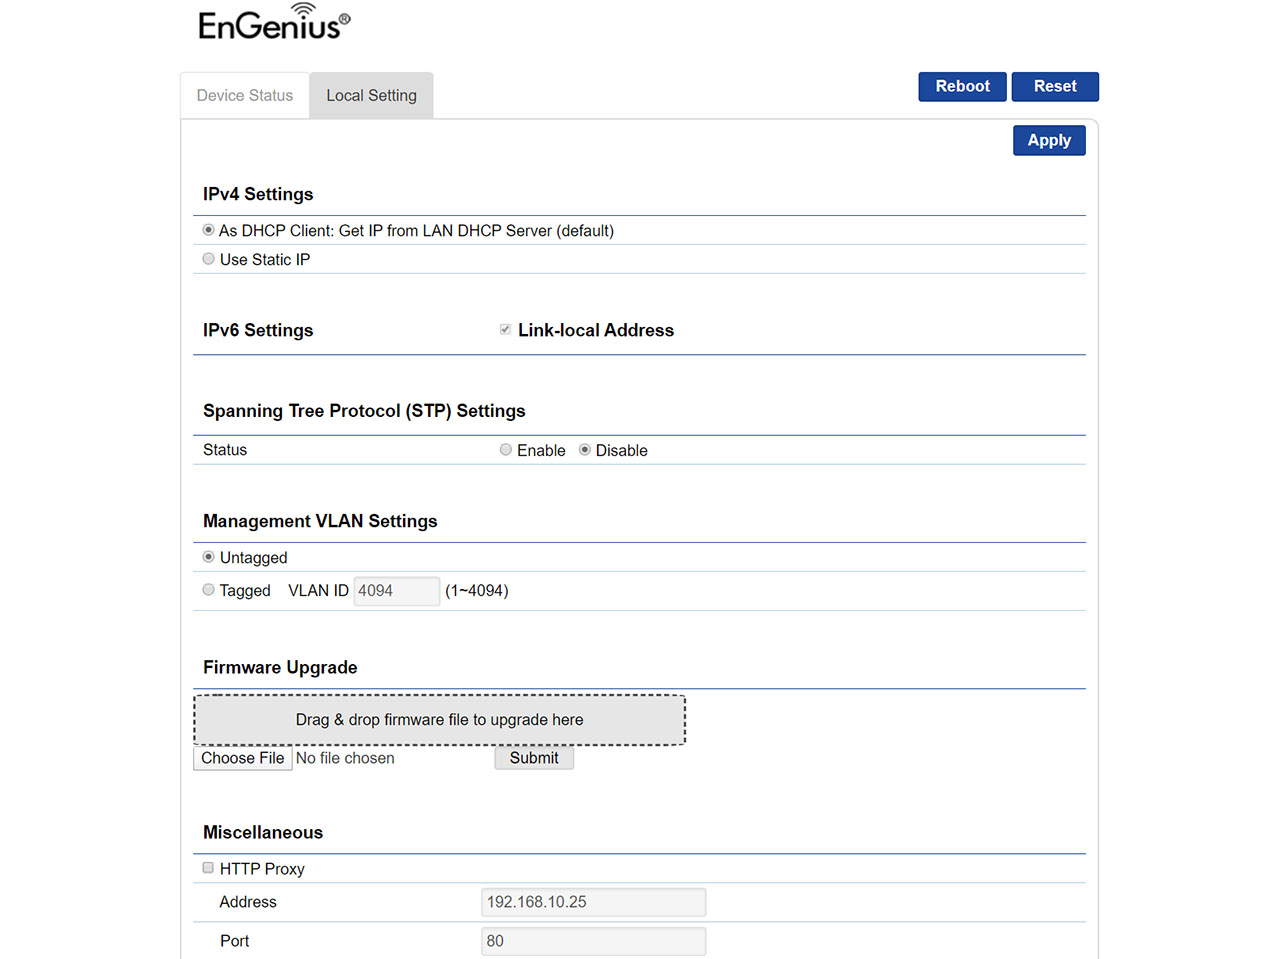
Specifically, there are two main sections, the first being the Device Status, where you can see some info about your Device, whether you are connected to the Cloud (and when you registered), as well as some Network Connectivity info. The second section is the Local Setting, where you can change the IPv4 Settings (DHCP Client or Static IP), the IPV6 Settings, enable the Spanning Tree Protocol, change the management VLAN Settings, upgrade the firmware and adjust some other Miscellaneous settings (HTPP and HTTPS Proxy). There is also the possibility to Reboot or Reset the ECW120 access point, but that’s about it for the local management, so let’s register the device to the Cloud platform.

Similarly to how I added the ECS1008P and the SkyKey, you have to either sign in into the browser based UI or log into the app (compatible with both iOS and Android OS) – I chose the former, so I was taken to the Organization > Inventory section; in case this is the first time, after registering an account on the Engenius Cloud, regardless whether you use the app or the browser UI, you will have to create an Organization (or use the default one) and a new Network. On the Inventory window, click on the top right corner on the ‘+ Register Device’ and then manually enter the Serial Number (if you use the app, you can simply scan the QR code from the bottom of the AP); doing so, will add the ECW120 to the Inventory list.
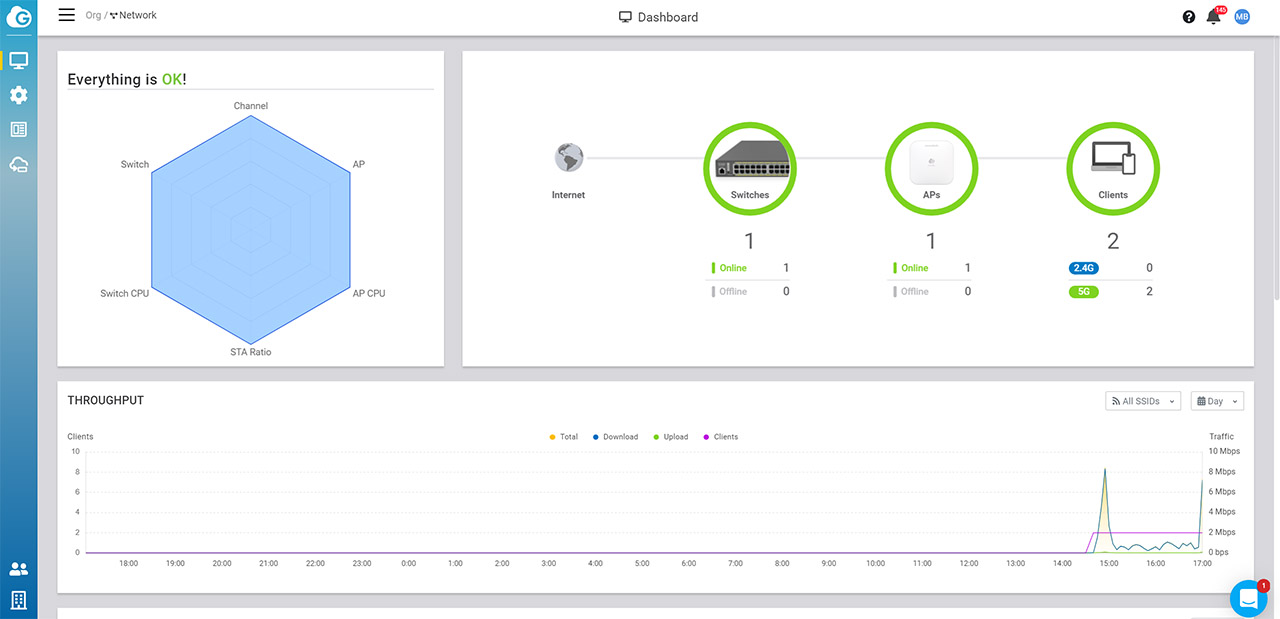
Afterwards, select the AP and click on ‘Assign to Network’ to pair the ECW120 to your preferred network. This way, the wireless access point will now appear on the Manage > Dashboard section under the APs icon and other areas will also become populated, such as the hexagonal representation of the network which is now fully blue (I connected an access point, a switch and the SkyKey), the Clients section is now showing the total number of devices that are connected to the SSID, the Throughput displays some live info about the data transfer, the Top Access Points, the Top Clients, the Top SSIDs, the Top Applications and the Top Device OS are also now displaying some data that they receive from the newly connected access point.
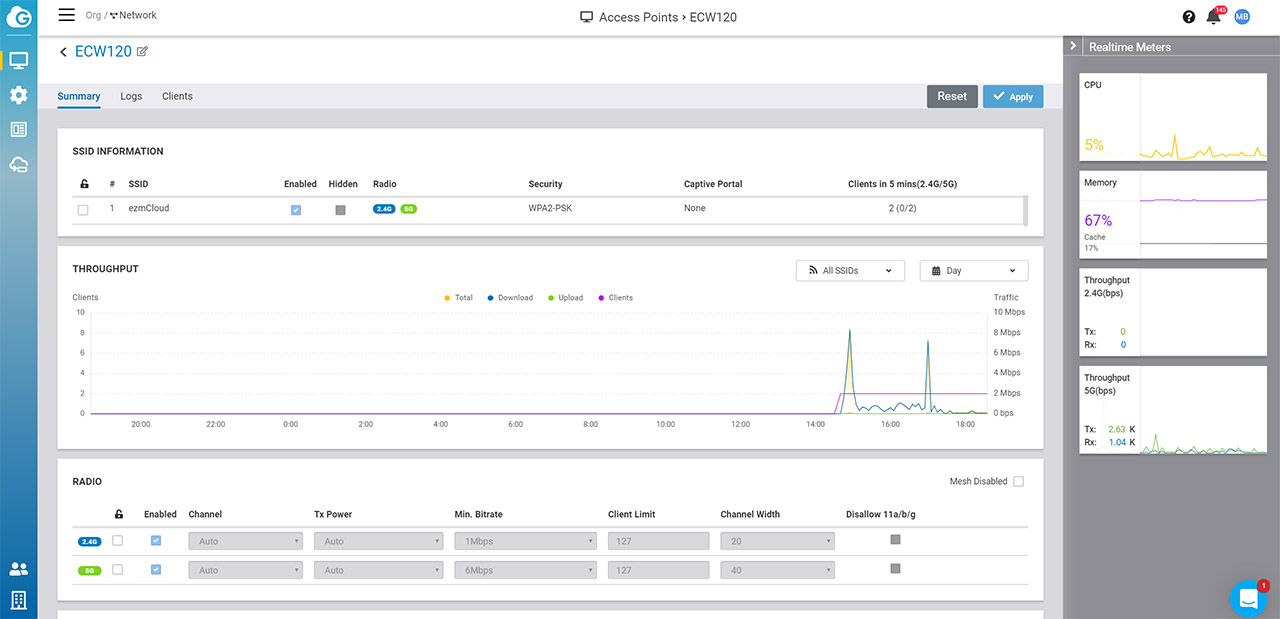
If you click on the APs section, you will be taken to a list of all connected access points and each will display some tags (such as the Channel, the WAN and LAN IP, the firmware version and more), but, to configure the settings of the ECW120, you will need to move the mouse on top of the the device and, from under the Mesh Mode tag, click on Details. Here, you will get some info about the access point (as well as some LED control and a photo of the device), while on the right, there are four RealTime Meters (the CPU, the Memory as well as the Throughput on both bands) and, underneath the stats, there are three main sections: the Summary, the Logs and the Clients.
Under Summary, you get to see the SSID Information, the live Throughput graph, change the Radio settings (such as enabling/disabling any of the two available radios) or the IP settings; under Logs, you can see detailed log info and, under Clients, you can see the devices that are currently connected to the access point (and you can change the displayed tags).
Returning to the Dashboard, you can also click on the Clients section which will display a list with all the clients (each with its set of tags, including the AP that they’re connected to), the live Throughput and the Applications, but, to see more AP-related sections, you need to go to Manage > Access Points where, besides the List, there is also the Map and Floor Plans to help you quickly go to the preferred AP.
EnGenius ECW120
Pros
- Can be used with the subscription-free EnGenius Cloud management platform
- Consistent wireless performance
- Runs at a decent temperature
- Supports the mesh technology
- MU-MIMO + BeamForming
Cons
- Only one Ethernet port
- There is no power cable in the package
- The local management software is a bit limited (expected on a Cloud-managed AP, but worth a heads-up since the unknown variable will always remain the support longevity for this type of devices)

Mark is a graduate in Computer Science, having gathered valuable experience over the years working in IT as a programmer. Mark is also the main tech writer for MBReviews.com, covering not only his passion, the networking devices, but also other cool electronic gadgets that you may find useful for your every day life.

