
After seeing that ASUS has made available its new WiFi 7 routers series, I got very excited and got the BE3600, which I suppose is an entry-level device, although the price definitely stated otherwise. That was with the expectation that it does support the 6GHz radio. But, the box says something else and so does the hardware, so be aware that approximately 250$ will not give you the 6GHz radio and you may be better off getting a WiFi 7 access point.
Anyway, after the initial betrayal, I decided to open up the case of the router and, as usual, I checked the areas underneath the silicone feet. And indeed, there are four screws there, but ASUS just had to add a Warranty Seal didn’t they?
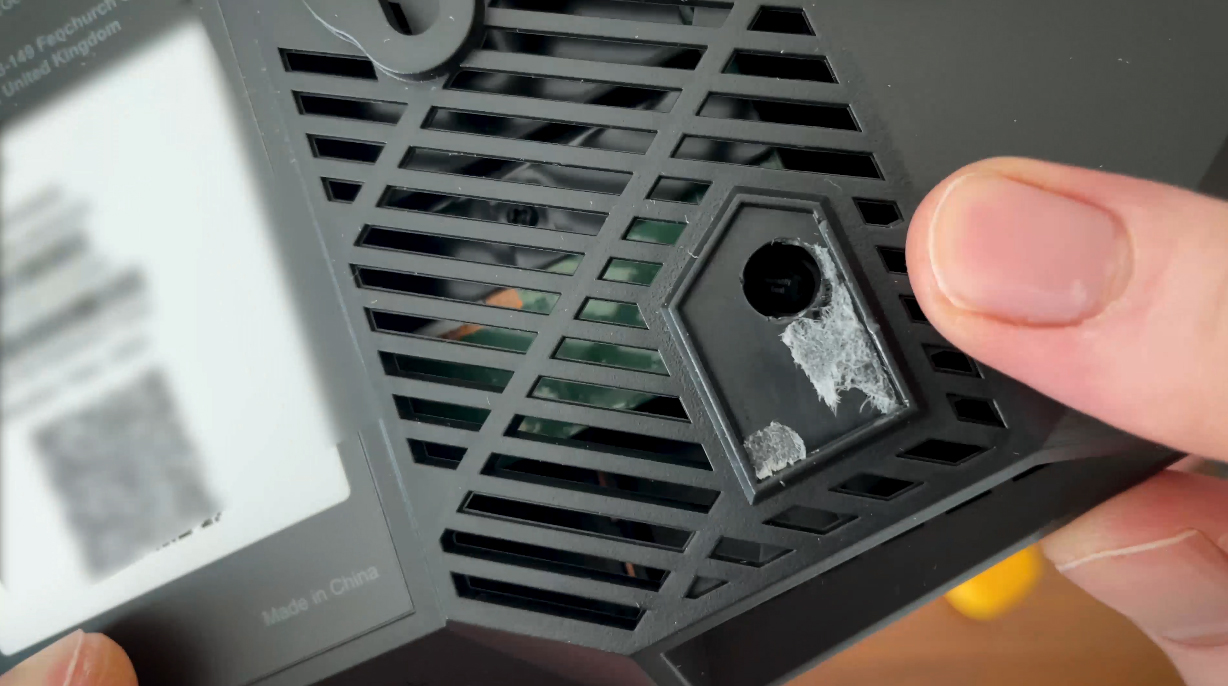
Of course, if it’s not plastic nicks and scuffs, there’s always the option to blame a small piece of glued piece of plastic. And it basically breaks at touch, so you are not allowed to put your little paws there. Otherwise, you risk losing the warranty. In the US, this seal should not be even there since it appears to not be enforceable, but in the EU, ASUS doesn’t seem to actually care.
After getting the screws out, I checked if there is a fifth one underneath the large label and there wasn’t, so I took a prying tool and tried to detach the upper side of the router. It was weirdly rigid and that’s usually a sign that I may have missed a screw. Let’s check under the label again, this time in its entirety. But no, there is no other screw, so I just had to push harder. This does mean some additional plastic marks, so bye bye warranty, but at least I finally managed to remove the top side.
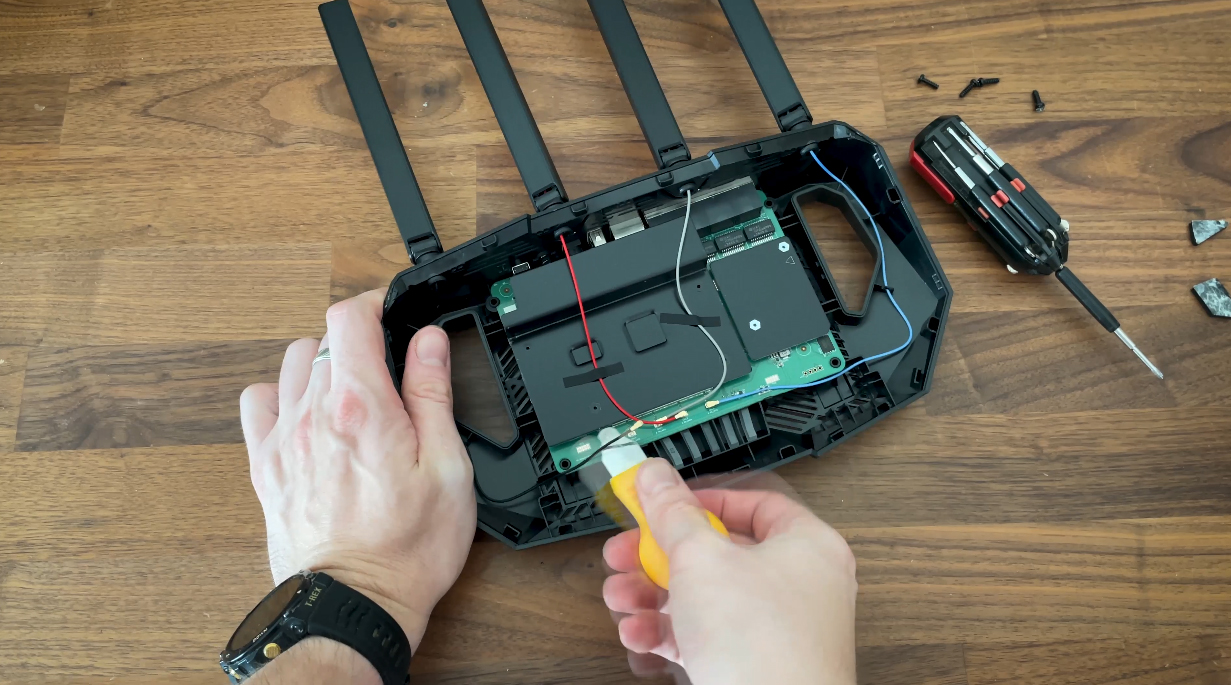
We can see the small PCB in the middle, but what’s with those handles? It’s just wasted space for some weird design decision. This router could have been even more compact. Well, let’s move forward and detach the four antennas. Don’t worry, there is no glue and none are soldered, so it’s fairly easy to take them out. Then, the PCB can be detached as well and we can see that on both sides there are some heat spreaders. These need to be removed, so I took out the screws from the bottom side, releasing the two large heat spreaders.
There is an aluminum cover on the bottom side, but there’s nothing of interest for us underneath it. There’s also a soldered chip which I assumed was for storage, but I found the chipset on the other side, so no idea what’s underneath it. I also took the last remaining screws and the front side revealed all its aluminum covers. Let’s remove them. Be careful because ASUS put them too tightly and one did get deformed. Again, bye bye warranty. OK, now let’s get a good look at the main chipsets.
| ASUS TUF BE3600 | Asus TUF-AX4200 | Xiaomi BE7000 | |
| CPU | quad-core 2.0GHz Broadcom BCM6764LFKFEBG | quad-core 2.0GHz Mediatek MT7986AV | quad-core 1.5GHz Qualcomm IPQ9554 |
| RAM | Nanya NT5AD512M16C4-HR 320167W1EF (DDR4 SDRAM) | 512MB Nanya NT5CB256M16ER-FL | 1GB Nanya (2x NT5CC256M16ER-EK) |
| Storage | 256MB NAND Winbond (25N02KVZEIR 2422 64072F70051) | 256MB Winbond 25N02KVZEIR | 128MB GigaDevice 5F1GQ5REY1G |
| Switch | Realtek RTL83675 PHY | MXL TC1PZ4122 | Qualcomm QCA8084 |
| 5GHz Radio | Broadcom BCM6764LFKFEBG a/n/ac/ax 2×2:2 | Mediatek MT7976DAN an/ac/ax 3×3:3 | Qualcomm QCN6224 a/n/ac/ax/be 4×4:4 |
| 2.4GHz Radio | Broadcom BCM6764LFKFEBG b/g/n/ax 2×2:2 | Mediatek MT7986AV b/g/n/ax 2×2:2 | Qualcomm QCN5024 b/g/n/ax 4×4:4 |
That’s about all for this teardown article. I was far from impressed by this router, but I will test it regardless, so make sure to check back if you’re interested to see the results I get.
Mark is a graduate in Computer Science, having gathered valuable experience over the years working in IT as a programmer. Mark is also the main tech writer for MBReviews.com, covering not only his passion, the networking devices, but also other cool electronic gadgets that you may find useful for your every day life.