Setup and Features
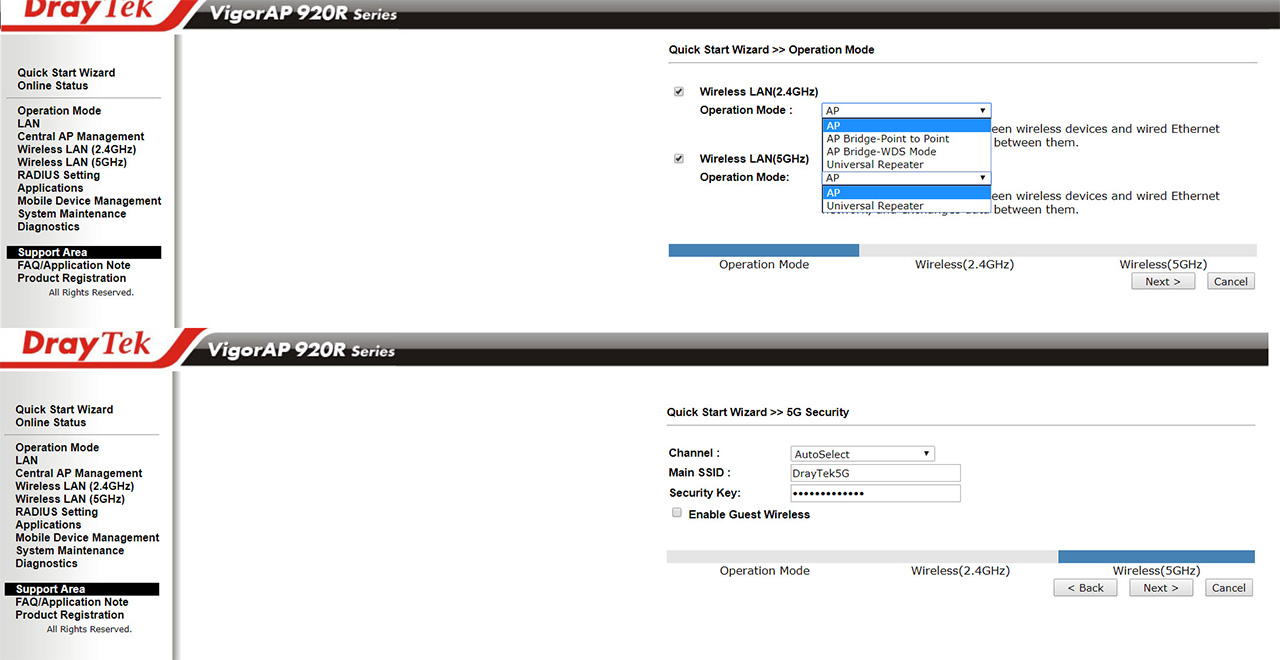
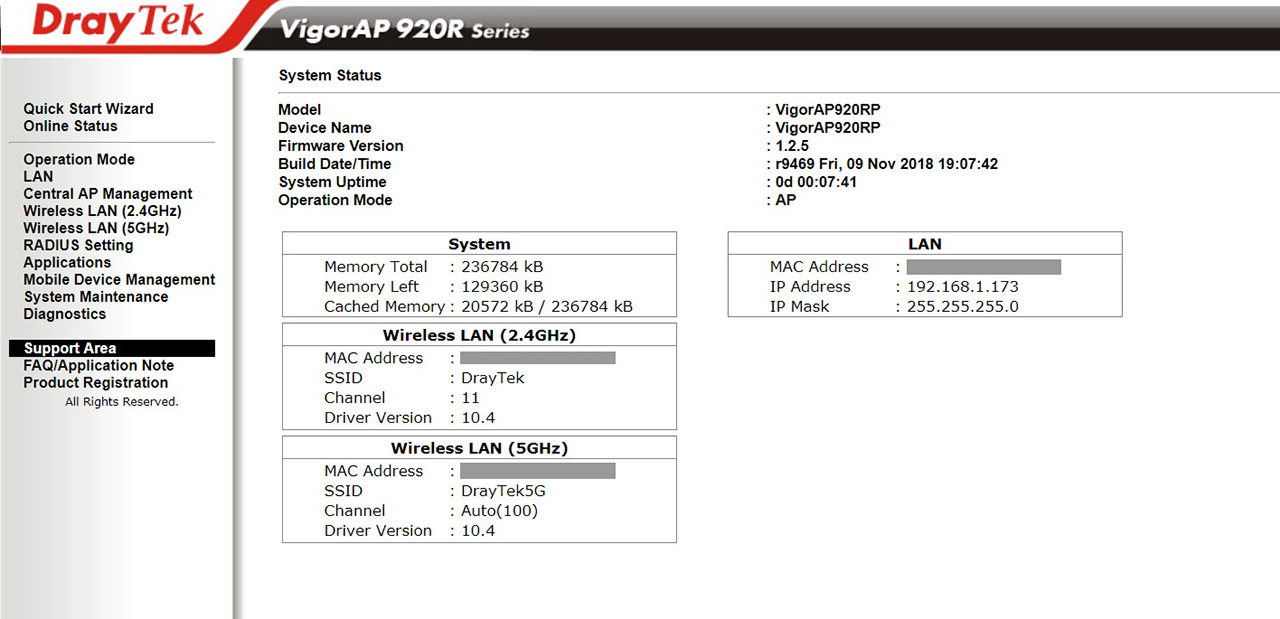
By default, you can access the DrayTek VigorAP 920RP immediately after you power it on by connecting to either of the two available default SSIDs (the password is written on a label from the side of the device) and, once you enter the UI, I suggest to immediately change the default username and password (you’ll be requested to enter them before accessing the interface) by going to System Management and to Administration Password. The default UI is not really impressive (the controller looks a lot better – will talk about it in a minute), but it does have all the main option laid out on the left menu. The first option to access is the Quick Start Wizard, which helps you to quickly configure the main settings of you AP and then, there’s the Online Status which, as the name suggests, displays brief status info about the system.
Next, there’s the Operation Mode (where you can choose between AP, AP Bridge-Point to Point / Multi-Point, AP Bridge-WDS or Universal Repeater on the 2.4Hz network or between AP and Universal Repeater on 5GHz LAN), the LAN setup (IP Network and DHCP Server Configuration + Management VLAN, as well as basic Port Control (Disable/Enable)) and the General AP MAnagement (includes enabling Auto Provisioning, viewing the Log, create Black List for devices that will be disassociated or view the Status of the Settings). Underneath it, there’s the Wireless LAN (2.4GHz) configuration, where you can change basic settings (you can create up to 4 SSIDs which can be Isolated or Tagged with a VLAN ID), change the security for each SSIDs, filter by MAC addresses (create policies), enable WPS, use AP Discovery to scan for new access points, enable WMM/APSD, set bandwidth limits (upload/download limits), enable Airtime Fairness (which ensures that newer devices aren’t slowed down by those that use older WiFi standards), enable Station Control (allows you to set a specific period of time when the client can connect to the AP), enable Fast Roaming (802.1x), configure the Client Roaming Parameters, view the Station List or enable and configure the Band Steering.
The Wireless LAN 5GHz settings are similar, but the menu lacks the Band Steering option. Other sections include the RADIUS Setting, the Applications (here, you can enable the ability to keep Apple iOS devices connected by sending packets every few seconds or configure the Sensor section), the Mobile Device Management, the Diagnostics and the System Maintenance (configure the connection to the ACS controller, create Back-ups, enable SNMP/SNMPv3 Agent, Reboot the System or Upgrade the Firmware – I had to update the firmware manually (I download it from the official website)).
Note: There’s also a buzzer built inside the case to let you know where the device is located, in case you forgot where you deployed it (or if it’s fallen off the pole).
Besides the default interface, DrayTek offers a centralised management software called VigorACS 2 which cannot be downloaded directly from the official website, but needs to be required via an email form (it’s a quick process where you have to insert your credentials and the Serial Number of the access point). Once you receive and download the software, you need to follow this guide: https://www.draytek.com/en/faq/faq-vigoracs-si/vigoracs-2/how-to-install-vigoracs-2-on-windows/ in order to properly install it: after installing OpenJDK and MariaDB (two prerequisite requirements – make sure to remember the database root password), you need to run setup.exe from the ACS directory and select between Local or Remote (for testing purposes, I chose the former).
After everything is installed, in order to access the VigorACS 2 interface, you need to open a new browser and, if you chose to configure the AP locally, then go to localhost:port number and insert the username and password (by default, it’s root and admin123). Next, you’ll have to create a new MyVigor account and, once you gain access to the user interface, select a new Nickname for your device. The VigorACS 2 can be used in Trial mode for a month and you can purchase annual licenses from the local retailer.
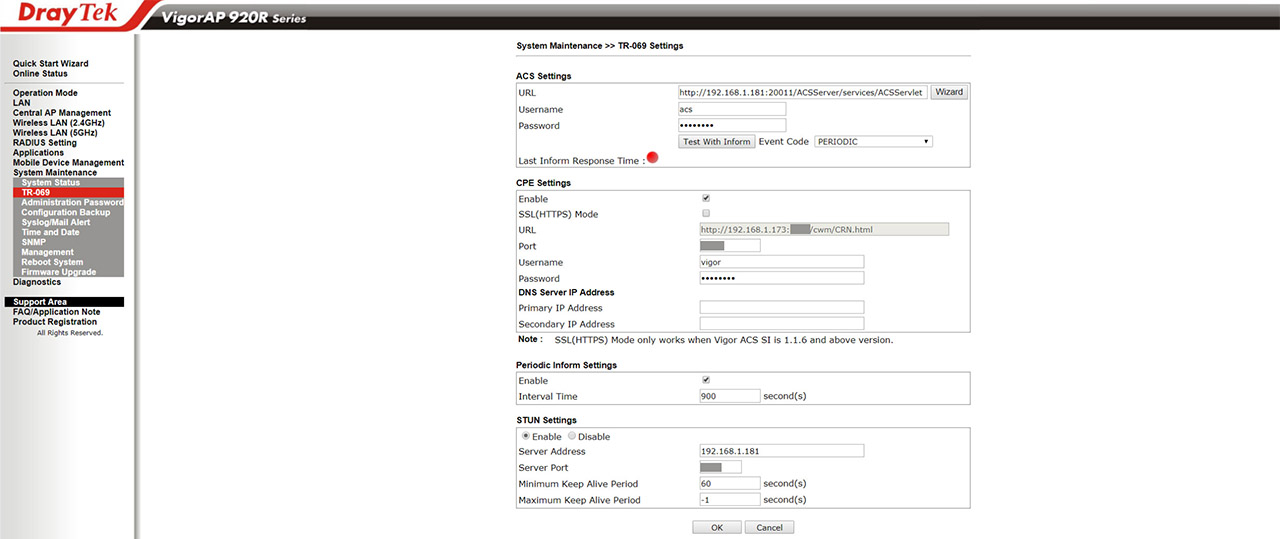
In order to adopt the AP to the VigorACS 2, you need to go to TR-069 (in System Management) and insert the ACS URL, as well as the network user name and password (can be found under the Network Management > Root Network) and, at the CPE Settings, make sure to Enable it and check out if the Port, Username and Password are correct. If everything is properly set up, then, when you click on Test With Inform, the small red circle should turn green and, at the VigorACS 2 interface, you should see the access point. The controller will display the Network Overview, the location on the MAP, the Active Clients and the Traffic on the Dashboard; you can also view detailed Statistics over specific periods of time, visit the Monitoring section to set Alarms, view the connected Clients, the LTE Data Usage or scan for Rogue APs.
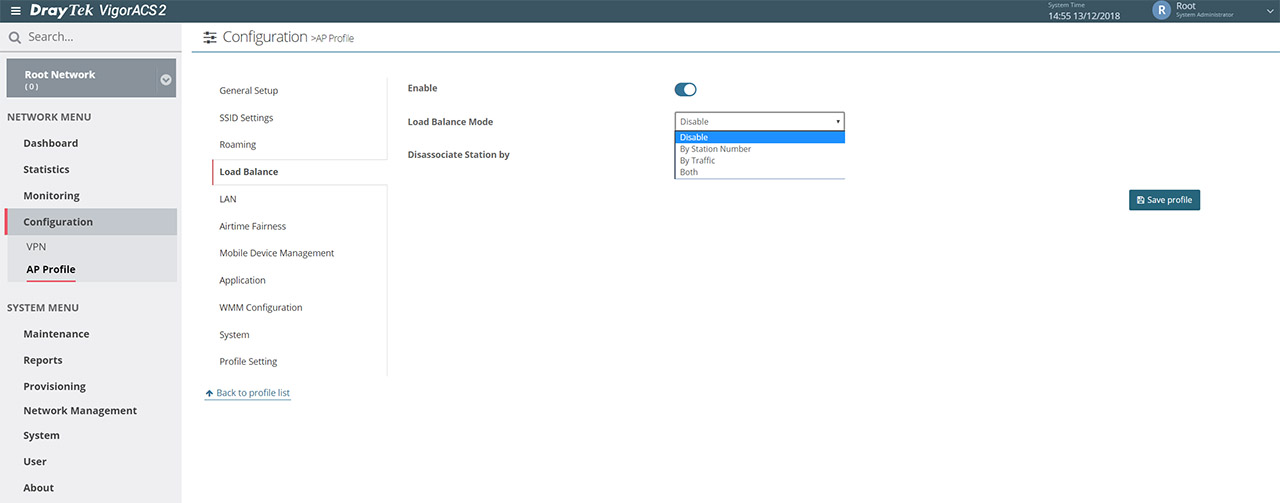
Under Configuration, you can create a VPN (PPTP, IPsec, L2TP, SSL or Custom) or set an AP Profile. Under the System Menu section, you can monitor and configure the Maintenance tools (useful for creating Backups, restoring data, upgrade the Firmware, rebooting the Device, reset the system Password and more), view the Reports, configure the Provisioning area (includes Network & devices, CPE Set and Keep Parameters), modify the Network Management, configure the System (general Parameters, Language, External Monitoring Server, Block Host, Upload Serial Number, insert the Google Maps JavaScript API key and more) and the User area, where you can manage the individual users or the group, enable the External Authentication Server, enable the Mail, SMS and SNMP Server or configure the Function Management and the Wholesale Wizard.
Conclusion
For a long time, the outdoor access point has been considered a niche product, but, since a stable WiFi connection is now a necessity indoors (more than a luxury), people need to use their wireless devices around their homes as well and that’s where devices such as the DrayTek VigorAP 920RP come in handy, offering a stable WiFi signal on both the 2.4 and the 5GHz network (although the throughput is not the highest, the signal does reach really far), an easy to use user interface (as well as the option to use a centralised paid software) and the device is designed to survive outdoor conditions and it does its job wonderfully.
DrayTek VigorAP 920RP

Mark is a graduate in Computer Science, having gathered valuable experience over the years working in IT as a programmer. Mark is also the main tech writer for MBReviews.com, covering not only his passion, the networking devices, but also other cool electronic gadgets that you may find useful for your every day life.


