The Nest Learning Thermostat has been a long time favourite since it managed to offer what the user expected from a smart thermostat (the best balance between a number of useful features and an intelligently designed device – something that the more complicated traditional thermostat lacked), but after some time, the shortcomings of the Nest Learning Thermostat are starting to show and since the Ecobee thermostat series was never too far behind, with the fourth generation, it may have finally managed to take the lead. One thing that I have noticed with both the Nest Learning Thermostat Gen 3 and the Ecobee4 is that the manufacturers seem to play it safe and there isn’t that much progress made from one generation to the other.
So, the Ecobee4 is almost identical with the Ecobee3, the only significant addition being the complete integration of the Amazon Alexa smart assistant (and, naturally, it takes advantage of the voice control commands). That being said, the Ecobee4 remains a surprisingly well designed and well thought device and, besides the full set of smart features, along with the compatibility with a large variety of smart hubs, the Ecobee4 comes with a remote sensor (and you can also purchase additional ones), so it can read the temperature from multiple rooms and this can give it a significant edge over the competition (especially the Nest which is limited by its location).
UPDATE 03.10.2019: The Ecobee4 has been updated to the firmware version 4.2.0.395 (comes with support for Pandora and Sirius XM playback).
Design
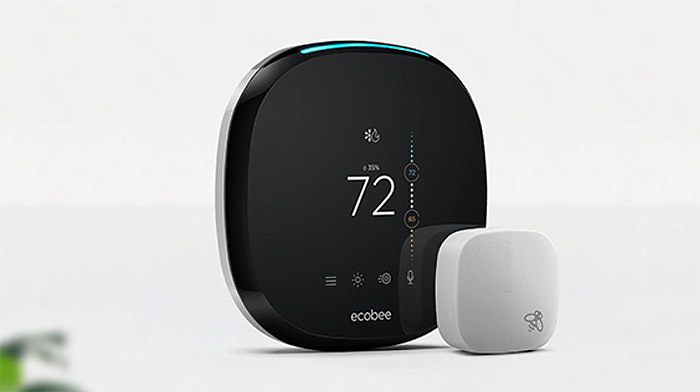
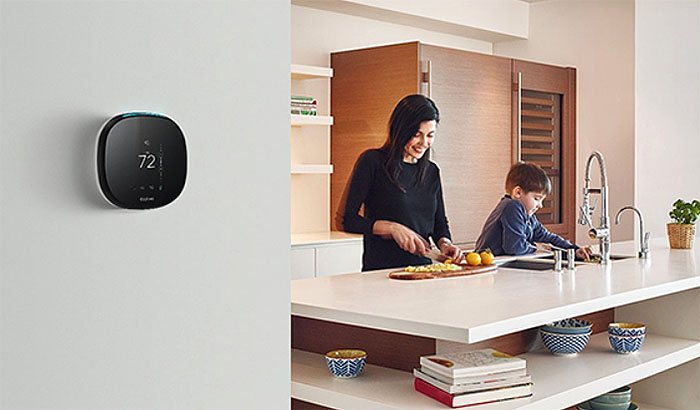
The Ecobee4 shares the same design lines as the previous Ecobee3, which means that the smart thermostat keeps the unobtrusive look and the minimalist approach. The case of the Ecobee4 is made of plastic, so it doesn’t really have the flair and the premium feel of the Nest Learning, but it still has taken advantage of some high quality materials and it won’t look half bad mounted on the wall.
The thermostat has also grown a bit, now measuring 4.29 x 4.29 x 1.0 inches, but, while I like the black glossy front (which has a very bad habit of retaining fingerprints), the display itself is still smartphone-sized (positioned in the middle), so there are huge bezels which do have a negative impact on the overall look of the device (here, the Nest Learning Thermostat Gen 3 has the upper hand, since it takes advantage of almost the entire screen estate with its display).
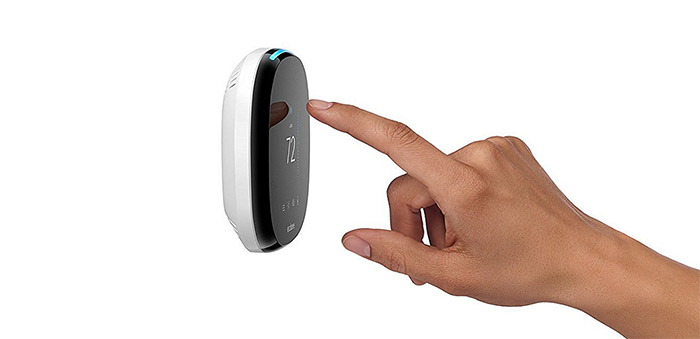
The 3.5-inch colour touchscreen display is definitely less intuitive than the rotating dial of the Nest Learning (and a lot less satisfying), but it does its job valiantly, allowing the user to select a specific icon or a list via a light tap, as well as giving the option to drag the finger across the screen to control a slider or to scroll through a list of items (to make the navigation through various screens as easy as possible, the Ecobee4 has implemented a system of three icons, similarly to how the phone used to function: tap Cancel to return to the previous screen and disregarding any changes, tap Done to save the changes and go to the next screen and Home, which cancels and action or changes and returns the user to the home screen).
The quality of the display is decent and the 320 x 480 pixel display should suffice for the occasional configuration (it’s also reasonably sharp), but, in truth, the display doesn’t really need to be of very high quality since the best smart thermostat is that which doesn’t need continuous corrections and adjustments.
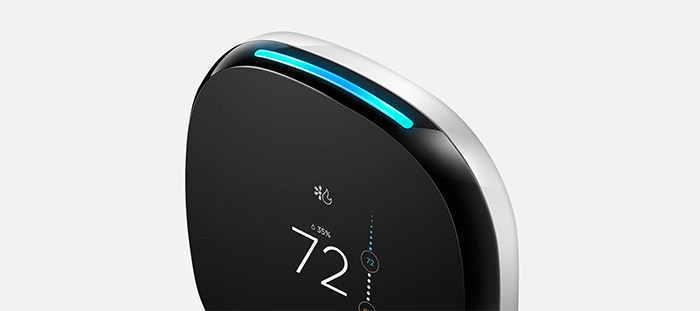
Around the front area, there’s a glossy black band which gets interrupted on the top side by a narrow LED light that lights up a blue colour when Alexa is enabled and when it listens for your voice commands, but it will turn red if the microphone is turned off (this is a great feature to let your know that a service is activated, especially for privacy reasons and, if the LED is not enough, especially if the thermostat is positioned somewhere out of sight, you can also enable the ‘Wake on Sound’ function to also get audible indications when Alexa is activated).
Since the Ecobee4 has integrated Alexa, it had to also add a speaker and a microphone (which can be found on the rear side of the device), so the user can take advantage of some new features, but this is heavily reliant on where you position the smart thermostat inside the house, since it will ‘interfere’ with other Alexa hubs inside the house (it does not have the Echo Spatial Perception ESP feature) or it may be a bit awkward to scream at the device from 20+ feet away if you put it in the hallway (since the firmware version 4.2.0.171, Ecobee4 comes with Echo Spatial Perception, so, even if there are multiple Alexa devices installed inside your home, only the nearest to you will answer). Also, you don’t want to use it to listen music since the speaker is not really among the best (not even among the decent ones).
On the rear side of the device, besides the microphone and the speaker, there are some vent holes which should facilitate a proper heat management. While the Nest Learning Thermostat could be powered directly from an AC source and, in case there was a power outage, it would use the built-in battery (which would recharge automatically), the Ecobee4 is just hardwired and it does not feature any internal battery (which is a shame since many times I appreciated this feature on the Nest Learning Thermostat).
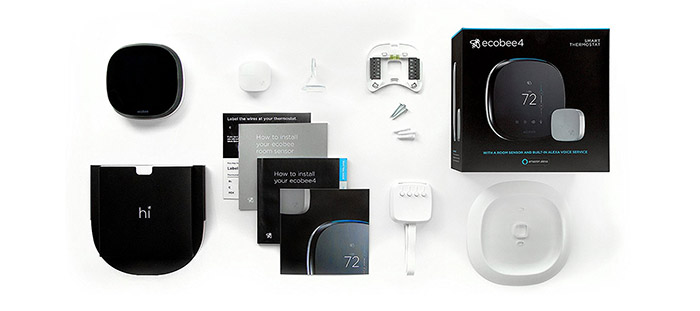
Note: Inside the package, there’s one Ecobee4 thermostat, a mounting plate, one room sensor (with detachable stand), wire labels, some screws and drywall plugs, a Voice card, the Install Guide, as well as a trim plate and a Power Extender Kit (PEK).
Installation and Functionality
The installation process is not really that difficult, but it requires a bit of know-how and, if you’re brave enough, you should finish it in under 30 minutes (although, if you don’t know what you’re doing, it’s best to call a professional). The first thing that you need to do is to turn off the AC, heating and ventilation systems (as well as the power) and then remove the old thermostat in order to expose the wires (if your old thermostat used high voltage or has the following labels: L1L2 or 110 VAC / 120 VAC / 240 VAC, then the Ecobee4 is not compatible with your setup).
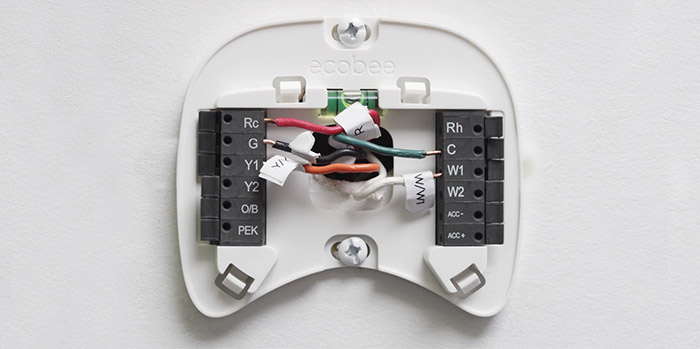
Now, depending if your old terminal has a C wire connected to your thermostat, you’ll use that for powering the device and you won’t need the Power Extender Kit (PEK). To do so, disconnect the wires, label each of them and remove the old mounting plate (if you had an older thermostat installed prior to this). Next, either use the trim plate (useful for covering any hole marks) or if you want to install directly the backplate, pull the wires through the middle hole and attach the plate to the wall. Afterwards, insert the wires into the suitable terminals (R or Rc goes into Rc and Rh goes into Rh), tug the wires gently and lastly, press the Ecobee4 unit into the backplate until it clicks into place.
If your old terminal does not have a C wire, then you will need to use the PEK (which is included into the package) – this requires a bit more steps, and you can find the full installation guide here: https://support.ecobee.com/hc/en-us/articles/115006936767-ecobee4-Installation-Manual.
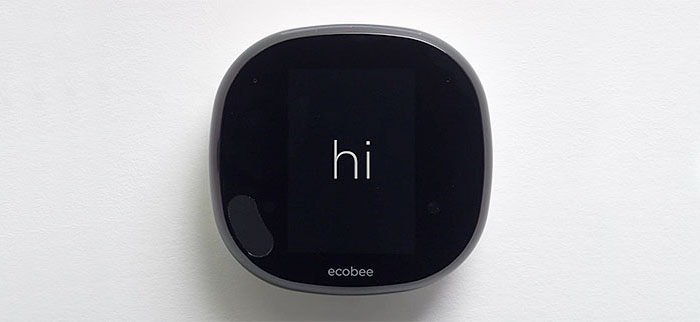
You’ll know the hardware installation has been successful when the display turns on and greets you with a cordially ‘Hi!’. The next step is to perform the software set up, which will ask you some questions about the way you have connected the wires (confirmations that everything is detected in a correct manner), as well as if you have installed a Humidifier, Dehumidifer or Ventilator, which heating system you have installed in your home and if you want your fan to be controlled by either the Ecobee4 thermostat or by the furnace.
You can also name the smart thermostat, connect to your WiFi network (here, you can use an iOS device as well), choose the HVAC system mode (Heat, Cool), select the desired ideal temperature during the winter and during the summer, enable the Smart Home/Away feature (which, similarly to the Nest Home/Away Assist, it senses when you are not at home and temporarily overrides your configuration, so it does not heat or cool down an empty home, therefore maximizing the savings) and select your location / TimeZone.
The Home screen will display the following information: first, there’s the System Mode (Heat / Cool / Auto / Off), the Humidity level, the Indoor Temperature (on the right, there’s a slider which allows for a manual adjustment of the temperature) and towards the bottom, there’s the Menu tab (here, you can configure the general System parameters, the Sensors, create Schedules, adjust the Comfort Settings, create Reminders and Alerts or set-up Vacation options), the Weather tab (tap to see the local weather, as well as the forecast for the entire week), the Quick Changes (this option allows you to quickly switch from the Home mode to Away and vice versa) and the Voice Control icon (tap this option to either turn down or up the volume or to enable or disable the microphone).
Note: Beside the touchscreen display, the Ecobee4 can also be monitored and configured using the Ecobee app (compatible with both iOS and Android OS) – the interface of the app is simple and intuitive, closely resembling the software from the smart thermostat itself.
The Ecobee4 is equipped with four sensors: a Temperature sensor for detecting the temperature in the vicinity of the device, a Humidity sensor for detecting the humidity in the room, as well as an Occupancy sensor and a Proximity sensor for detecting if anyone is in the area. Furthermore, Ecobee4 went a step forward and, similarly to the last gen Ecobee thermostat, it has also added a remote proximity and temperature sensor which can be positioned in a specific room, allowing the thermostat to make a more accurate reading of what the ideal temperature should be inside the house, therefore, reducing the risk of either overheating the rooms (which tends to happen with other thermostats especially during the night) or keeping them too cool – for even better readings, you can purchase additional sensors.
Adding the remote sensor is very easy and all you have to do is to stand near the smart thermostat when removing the tab from the back of the sensor – this way, it will automatically appear on the screen of the Ecobee4, allowing you to select a name for it. The remote sensor can either be mounted on the wall or you can just let it stay on a flat surface using the provided stand.
Inside the case, the Ecobee4 is equipped with a NXP MCIMX283DVM4B Embedded MicroProcessor (ARM9 Core Type clocked at 454MHz), a NXP MKL15Z128VLK4 Micro-controller, a 902 MHz transmitter antenna and a 2.4GHz Atheros transmitter antenna (the thermostat uses the WiFi IEEE 802.11 b/g/n standard).
The smart thermostat is built to have a very broad compatibility with lots of smart home hubs and other smart home devices: first of all, the Ecobee4 supports most of the functions of the Amazon Echo (through Alexa), it also is compatible with Apple HomeKit, which (using Siri), allows the users to remotely monitor and control their home comfort; the thermostat will also work with a lot others home hubs in order to integrate with other IoT devices to create a smart home environment, where everything interacts with each other (Samsung SmartThings, Wink, Haiku Fans, IFTTT, LogiTech Harmony, Vera, Control 4 and more). To take advantage of al the smart features of the Ecobee4, you need to always have an Internet connection, but, in case the device will go offline, you can still manually control the HVAC system and the sensors will still pick up the temperature and adjust the thermostat accordingly.
Note: If your Ecobee4 is still stuck on an older firmware, then you should email the support and they’ll immediately push the update towards your device.
Conclusion:
The Ecobee4 is without a doubt one of the best smart thermostats on the market and a serious contender to the Nest Learning Thermostat Gen3, but the fact that there aren’t that many differences between the Ecobee4 and the Ecobee3 (except for the Alexa integration) shows how the manufacturers are shying away from making significant changes from an already successful formula. I definitely appreciate the extra functions and the Alexa integration (as well as the broad compatibility with other smart home hubs), but, just as with the almost-unchanged-over-multiple-generations Nest Learning Thermostat, it may make some people ask for more with every new device. But, for now, the Ecobee4 will satisfy the need of a large majority of people and it does offer almost everything that the average user may expect from a smart thermostat (even more than the Nest in some areas).

Mark is a graduate in Computer Science, having gathered valuable experience over the years working in IT as a programmer. Mark is also the main tech writer for MBReviews.com, covering not only his passion, the networking devices, but also other cool electronic gadgets that you may find useful for your every day life.

