The EnGenius ECS1112FP is part of the Cloud-managed Ethernet switches and similarly to the entry-level ECS1008P that I tested about a year ago, the ECS1112FP does not have multi-Gigabit ports, but this model does come with a couple of SFP ports for a better Uplink connection.
| EnGenius ECS1112FP | |
|---|---|
| EnGeniusTech.com | Check Product |
It’s clear that the manufacturer wants to move past the Gigabit-only Ethernet switches, but, as expected, the demand for multi-Gigabit devices is still fairly low (bound to increase and become the new norm over the years), so the EnGenius ECS1112FP positions itself in a fairly favorable position for SMBs and even for some home users (SFP in a home network can make sense, depending on the type of application).
Besides the SFP ports, the ECS1112FP offers a good PoE budget (130W) and it supports the 802.3at/af standards, so you can connect both wireless access points and security cameras.
As expected, there is also the integration within the EnGenius Cloud platform, allowing you to configure and monitor not only multiple Ethernet switches at the same time, but other compatible devices as well (such as indoor or outdoor APs). But even though it’s advertised as a Cloud switch, you can also rely on the local web GUI (which is quite comprehensive) or use ezMaster to maintain your network in working conditions (you can also use the SkyKey). That being said, let’s have a look at the EnGenius ECS1112FP and see whether it’s going to be suitable for your network or if you should consider a multi-Gigabit Ethernet switch.
Design and Build Quality
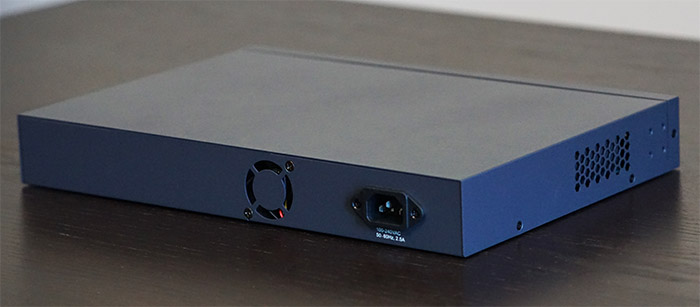
Just like the EnGenius ECS1008P, we’re dealing with a rectangular metallic case covered by a dark blue finish, but dimension-wise, the ECS1112FP is almost double the size of the entry-level model (it measures 13.0 x 9.0 1.73 inches and weighs 4.4lbs) and, as expected, it was designed to be mounted inside a rack. There are four mounting holes on the right and four on the left side, as well as some brackets and screws inside the package to make this process easy. But, if you decide to keep the switch on a desk, there are four silicone feet that you can add to the bottom of the device, so it doesn’t slide around. Besides needing more space for ventilation purposes, the ECS1112FP is a bit larger to accommodate the internal PSU (as you can see from the tear-down section) and I also noticed that EnGenius has relied on a small fan to keep the temperature in check.
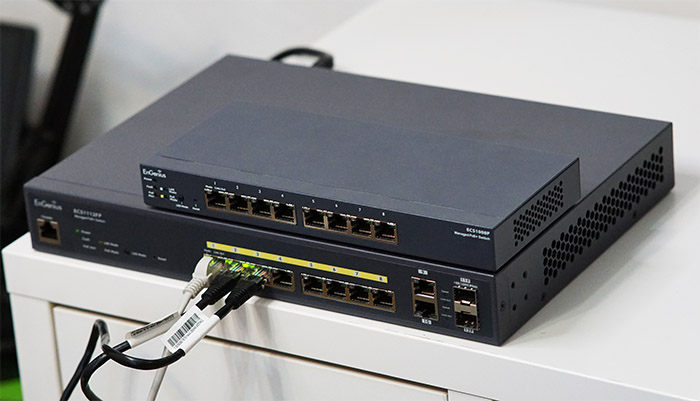
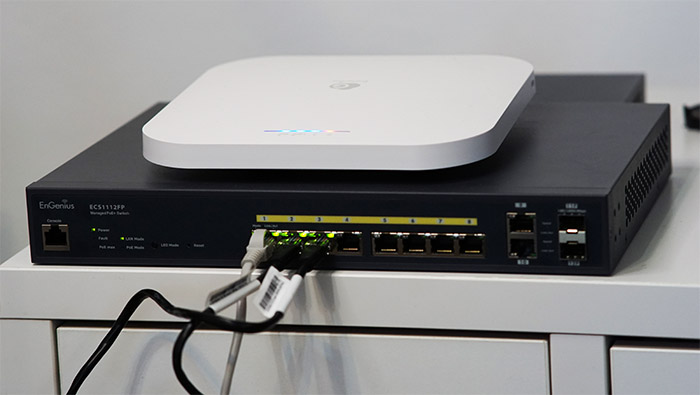
The ventilation fan seems to always work at the same rpm and the noise level is very much noticeable, so much that I would advise against sleeping in the same room with the Ethernet switch (again, a rack is more than suitable). The rear side has the DC-In Power port and the small fan that is connected with two screws, so it can easily be replaced (12mm) and that leaves the front section for the LEDs and the ports. And indeed, on the left side, underneath the logo, there’s a Console port (there is also a Console cable inside the package if you want to connect it to a computer that has support for it) followed by a few LEDs.
First, there’s the Power LED (if the device is powered on, the LED will be solid green), then there’s the Fault LED (if the switch encounters an error, then the LED will turn red, otherwise, it will stay turned off), and the PoE Max LED (when the max PoE budget – 130W – is achieved, the LED will turn red, otherwise it will stay turned off). The next two LEDs are the LAN Mode (if you don’t connect any PoE devices, it will stay solid green) and the PoE Mode (turns solid green when you connect clients that use PoE). Further to the right, there’s the LED Mode button which switches between the two aforementioned modes (in case you want your PoE devices to only connect for data transmission) and a small recessed Reset button (to return the switch to its default settings).
The first set of Ethernet ports are the eight PoE-compatible Gigabit ports, each with its own set of two LEDs (Mode and Link/Activity), followed by two non-PoE, but still Gigabit Ethernet ports and a couple of SFP ports (100/1000Mbps). If you need more ports and have another switch that has SFP ports, it’s not a bad idea to get some inexpensive optical transceivers (such as hose from FS) and some optical cables to inter-connect them and not use up any of the other Ethernet ports (so they remain available for your PoE devices).
EnGenius ECS1112FP – Internal Hardware
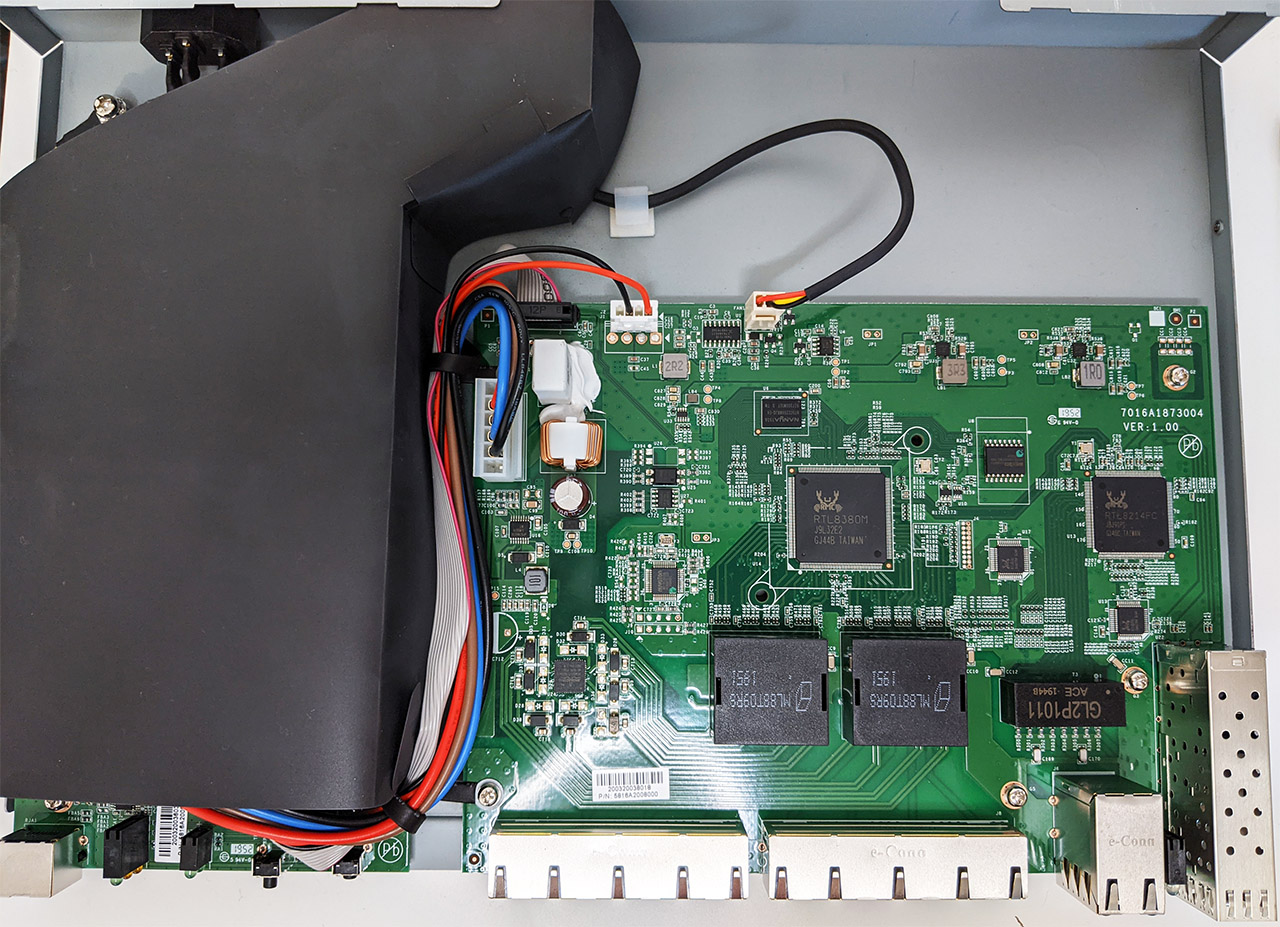
While other manufacturers have made it explicitly clear that they don’t want you to open up the cases of their devices (with warranty seals), EnGenius has made the tear-down process relatively painless, but be aware that it can still void the warranty. If that’s fine with you, remove the three screws on the left and the three on the right side of the switch and be aware that there are two other screws on the bottom of the ECS1112FP. Afterwards, you can slide the metallic front section and then you can gently take out the top metallic cover; this way, it will expose the two main parts, the PSU that’s covered by a plastic wrap and the PCB with all the circuits that we now need to identify.
The first component was the Broadcom BCM59121B0KMLG highly integrated IEEE 802.3bt-complaint PSE controller, followed by the 256MB of RAM from Nanya (NT5CC256M8JQ-EK) and 32MB of NOR flash memory from MXIC (X194411 MX25L25635FMI-10G). There’s also the RTL8214FC JBJ91P1 which is an integrated 10/100/1000Mbps quad Gigabit Ethernet transceiver, the RTL8380M J9L3E2 multi-layer managed 10*10/100/1000M-Port switch controller, a GL2P1011 ACE 1944B IC, a couple of ML88T09RS 1951 ICs and two RealTek RTL8231 JAA2784 IC chips.
| EnGenius ECS1112FP | |
| CPU | Broadcom BCM59121B0KMLG PSE controller |
| RAM | 256MB Nanya NT5CC256M8JQ-EK |
| Storage | 32MB MXIC X194411 MX25L25635FMI-10G |
| Switch | RTL8380M J9L3E2 |
Note: The EnGenius ECS1112FP features a switching capacity of 24Gbps, 9K Jumbo Frames, 8K MAC addresses and 20 IPv6 address.
Setup and Features
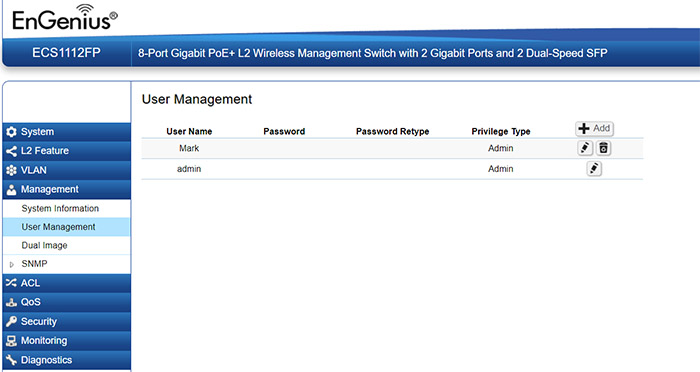
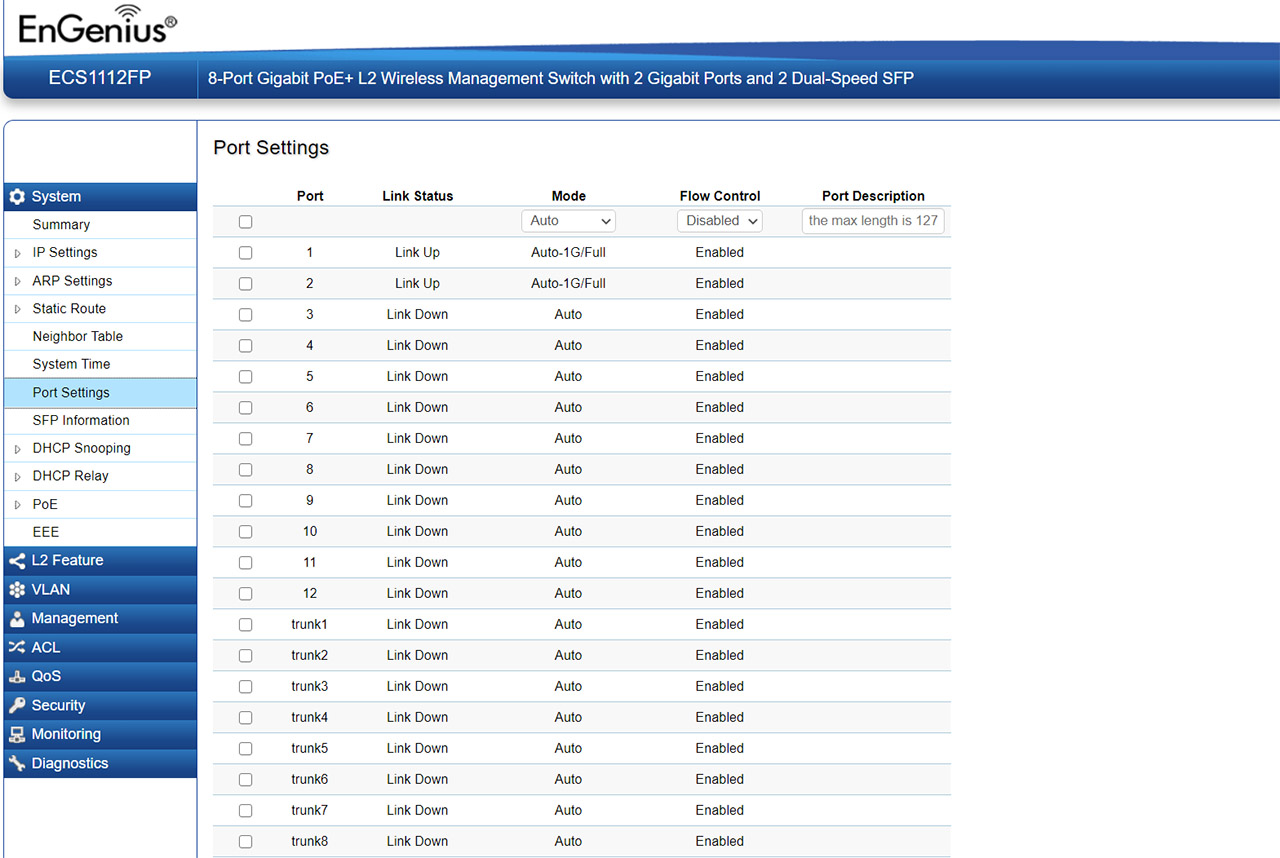
In order to configure the EnGenius ECS1112FP, you can either use the Console cable and connect to a terminal session or just plug in an Ethernet cable from the switch to a computer and enter the IP address of the ECS1112FP in the URL of any browser. I assume most people will go for the latter, so after hooking up all the necessary cables, I entered the IP address that the switch received from the router (just check the Clients section on the router UI) and then I typed the default username and password (admin and password). Doing so, gave me access to the local web-based GUI and it’s interesting just how feature rich it is (some other manufacturers give far less attention to the local management of their Cloud networking devices).
But, before anything else, you need to immediately change the default password – go to Management > User Management and type a new password (I would have liked to also change the user name).
Local management
The user interface is very similar to what we saw with the ECS1008P which means that there’s a vertical menu on the left with the System being the first option, displaying some general stats. Still under System, you can set a static IP address to the switch, create VLANs (IPv4 and IPv6), set the DNS Servers, configure ARP, use NDP to check for neighboring routers (or hosts), set the Flow Control for each port, configure the DHCP Snooping and Relay, set the PoE Priority for each port and set the EEE (Energy-Efficient Ethernet) Status (and more, of course). The L2 Features couldn’t be missing, so we have Link Aggregation available (basic Trunking and LACP), port Mirroring, STP settings, LoopBack Detection, LLDP, IGMP and MLD Snooping, Multicast Filtering and Jumbo Frame.
The VLAN section includes Voice VLAN and under Management, you can configure the Dual Image and set up SNMP. You also get the option to configure the ACL and QoS. Under QoS, you get to set the Trust Mode and Priority for each Queue, set the CoS Value for each Port, configure the Bandwidth Control, the Storm Control and more.
Under Security, you can set Guest VLAN, port-based authentication, the RADIUS Server, Port Isolation and more, while under Monitoring, you can have a proper view of the way your Ethernet switch behaves. The Diagnostics section allows you to run Cable Diagnostics on each port to detect any physical flaws, run Ping tests (as well as IPv6 Ping) and Trace Route.
EnGenius Cloud Management Platform
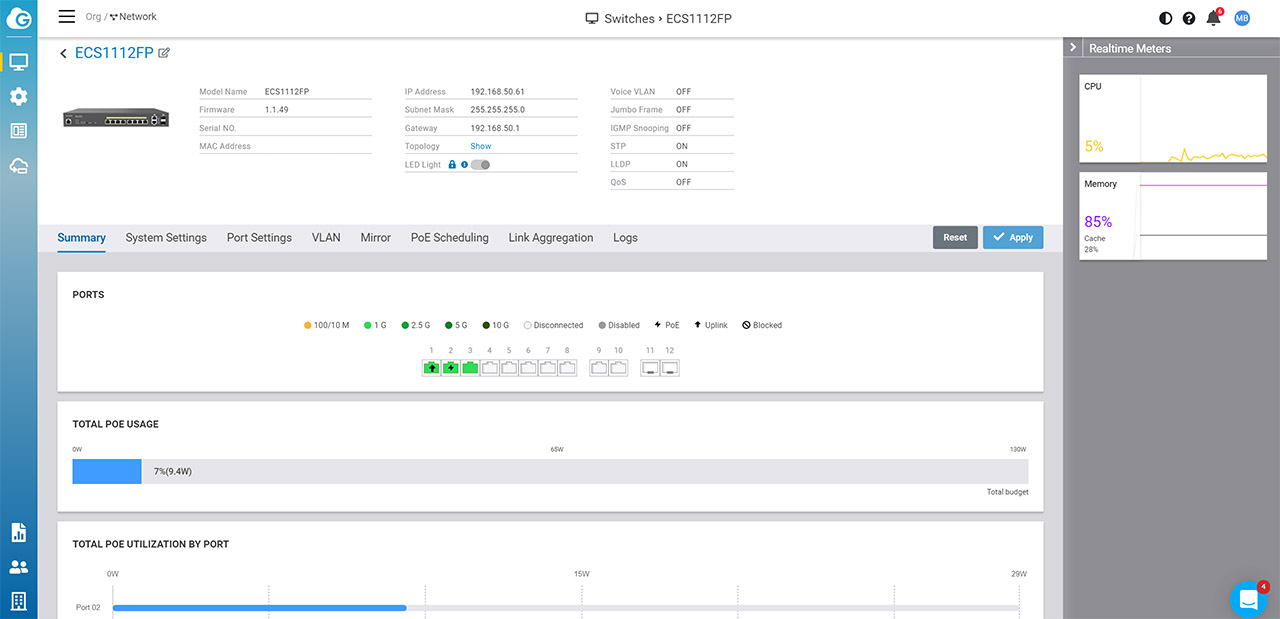
To access the EnGenius Cloud platform, head out to cloud.engenius.ai and either sign in (if you already have an account) or register a new account (you also need to create an Organization and a Network). It’s incredibly easy to add a new EnGenius device, so, to adopt the ECS1112FP to the Cloud, you need to go to Organization > Inventory & License and then click on the Register Device from the top right corner.
This will summon a small window where you can add a Serial Number (if you use the mobile app, it can be done by scanning the QR code from the bottom-placed label); after that’s done, select the newly added Switch and click on Assign to Network to add the device to any preferred Network – you do have the option to add more than one. The Monitor > Dashboard section should now get populated by more info, including the newly added switch and to check out the individual settings, click on the Switches icon and, from the list, select the ECS1112FP and click on Details.
Doing so, will open a dedicated window where you can see some status details about the Ethernet switch (including a couple of Real-time Meters, the Total PoE Usage), but, going to System Settings, we get to configure the way the device functions. There’s STP, LLDP, Voice VLAN, QoS, IGMP Snooping, Jumbo Frames and the possibility to enable the Local GUI. Then there’s the Port Settings and you can configure each independent port: the Mode, the PoE Priority or Limit, VLAN, set port Isolation, set a Rate Limit, Flow Control and QoS. You can also add a VLAN, set Port Mirroring, schedule PoE availability, Link Aggregation and check the Logs.
These are the individual settings, but considering that we’re on a Cloud platform, you do have the option to create a global set of settings that will then be applied to some or all of your connected Ethernet switches. To access this section, go to Configure > Switch Settings, as well as VLAN Settings. I noticed that there is also a Block List available (under Access Control) and you can adjust the notifications that you receive from the Alert Settings.
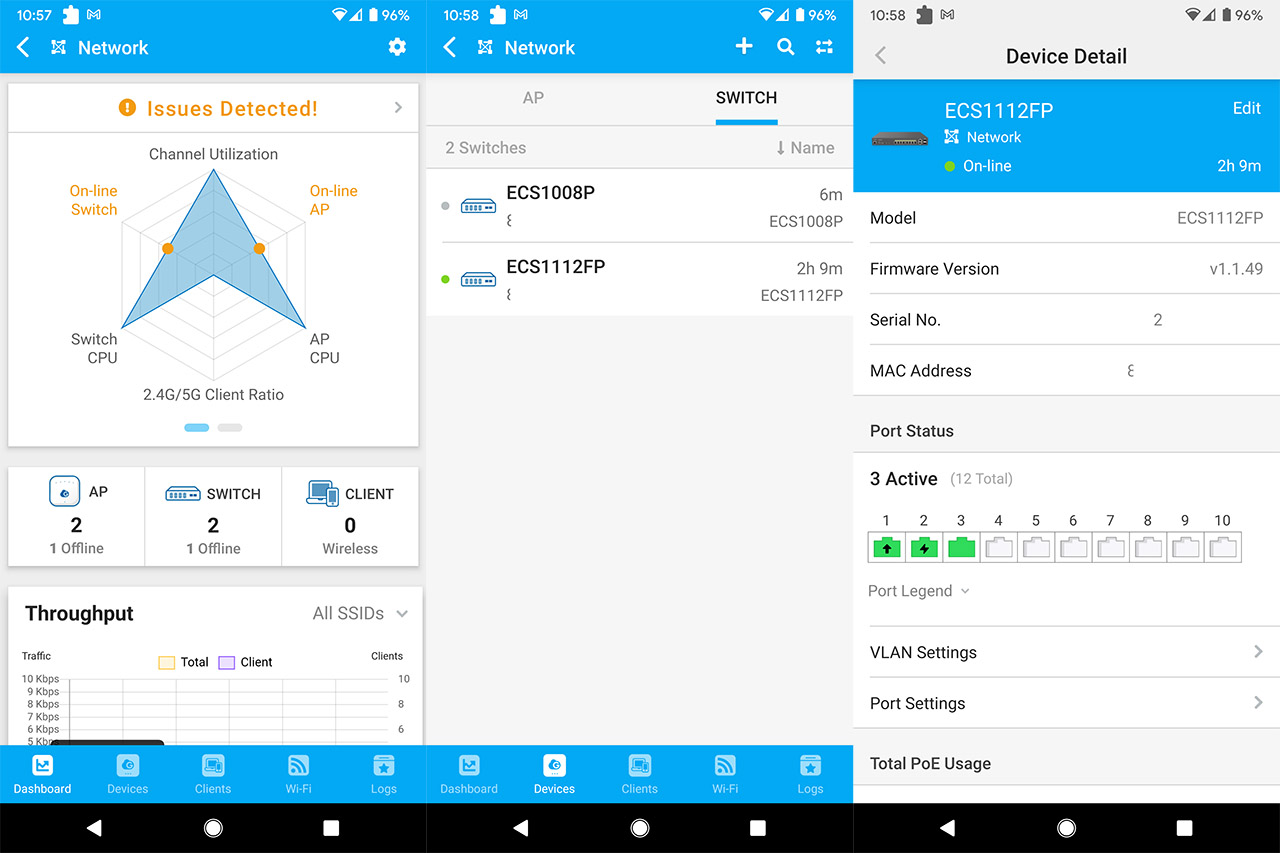
Note: EnGenius has made available a mobile application which is very similar to the browser-based UI, offering essentially the same settings, but in a more conveniently accessible format (and that’s a great thing considering that other brands prefer to strip most of the features from the app).
Conclusion
The EnGenius ECS1112FP may not have multi-Gigabit ports, but it’s still very much relevant for the current needs of a lot of SMBs (and, why not, even for some home users enthusiasts). You get a robust metallic device, two SFP ports, a healthy PoE budget (130W) and the possibility to configure the switch via the Console port. But, as with other Cloud managed devices, one of the biggest strengths of the ECS1112FP is its ability to inter-connect with multiple other EnGenius products, such as APs and other switches (looking forward to seeing a gateway) and the software is very easy to use, with all the expected options – the mobile app is just as comprehensive as the web-based UI. If owning a Cloud-managed switch makes you anxious for the future, know that the local management software is feature-rich, so there are fewer risks than with some of EnGenius’ competitors.

Mark is a graduate in Computer Science, having gathered valuable experience over the years working in IT as a programmer. Mark is also the main tech writer for MBReviews.com, covering not only his passion, the networking devices, but also other cool electronic gadgets that you may find useful for your every day life.

