The interface will have two options: the Device Status which shows some info about the device and the network that’s currently connected to and then there’s the Local Setting. Here, you can change the IPv4 or IPv6 Settings, enable STP, upgrade the firmware, enable proxy authorization and more. If you think that the Cloud management platform may not be what you’re looking for and require more than the basic interface, there is the EWS377AP which offers a more comprehensive list of options outside the Cloud platform.
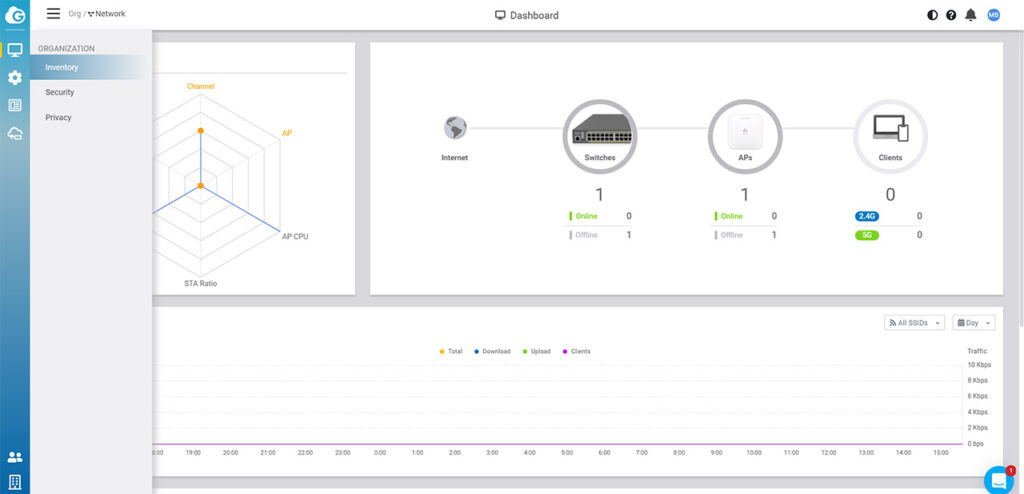
That being said, the ECW230 needs to be adopted to the EnGenius Cloud management and to do so, log into cloud.engenius.ai, click on Inventory which will display a list of any adopted devices and from the corner on the right, click on Register Device. You can use the mobile application and scan the QR code from the bottom of the wireless access point or, as I did, simply insert the Serial Number and the AP should immediately appear in the list. But that’s not all since you need to assign it to the Network and then you can start adjusting the necessary parameters. First of all, it’s important to understand that the Cloud platform was built to manage multiple access points at the same time, so the same configuration can simply be applied to any newly added access point. I have already added the ECW120, so I simply applied the same radio settings to the ECW230, but you can create a general config for this network by going to Configure and mainly modifying the SSID and Radio Settings (you can also add multiple networks, each with its own configuration or simply group multiple APs).
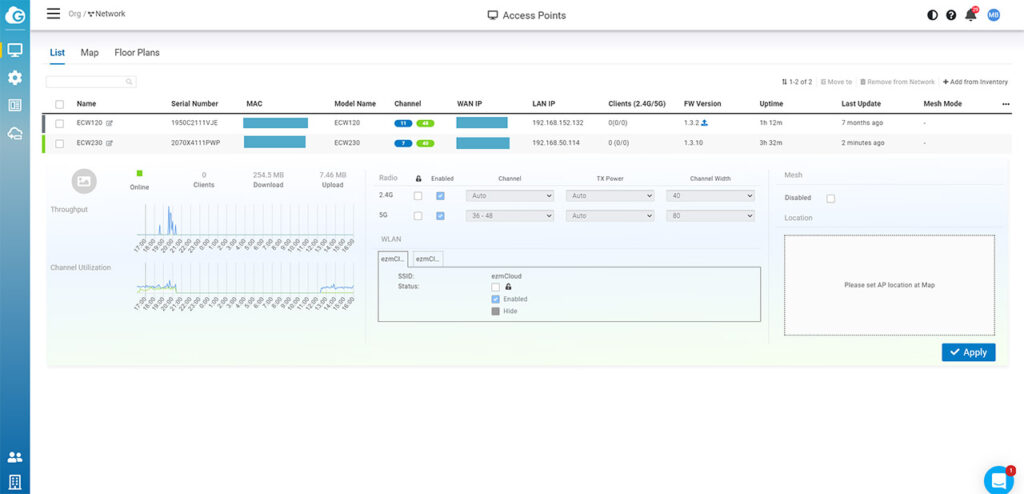
I say mainly because besides creating new SSIDs and creating Indoor/Outdoor radio profiles, you can also create bandwidth limits per client or per SSID, enable the Captive Portal which, along with the Splash Page are very useful if the access point is going to serve multiple users that need to authenticate into the network, such as a hotel, mall or any similar public space. The supported Authentication Types are Click-through, EnGenius Authentication, Custom RADIUS, by voucher or social media, while the Splash Page is very easy to create with the editor or you can simply upload an already custom made one from an URL. Also under SSID, you can create schedules for the Internet access, as well as a policy Block List. I noticed that there is now a VIP List which can be populated by devices that do not have a monitor, such as a printer, scanner or server and that will bypass both the Captive Portal and the L2 isolation exception. You can also see some dedicated settings for the ECW230 by going to Manage, Access Point and selecting the device from the list – clicking on it will immediately summon some statistics, as well as some quick action options.
But, to get the full view, you need to click on Details (will be on the right, when you put your mouse over the AP column). This way, you can see some RealTime Meters on the right side (CPU, memory, throughput) and in the middle, you can view the Summary section (various stats about the access point), the Logs and Clients. I do like the Client section since I can click on any individual device to see a timeline layout, showing when the client has connected to the network (or disconnected), as well as the connection duration, the protocol, the radio and the signal strength.
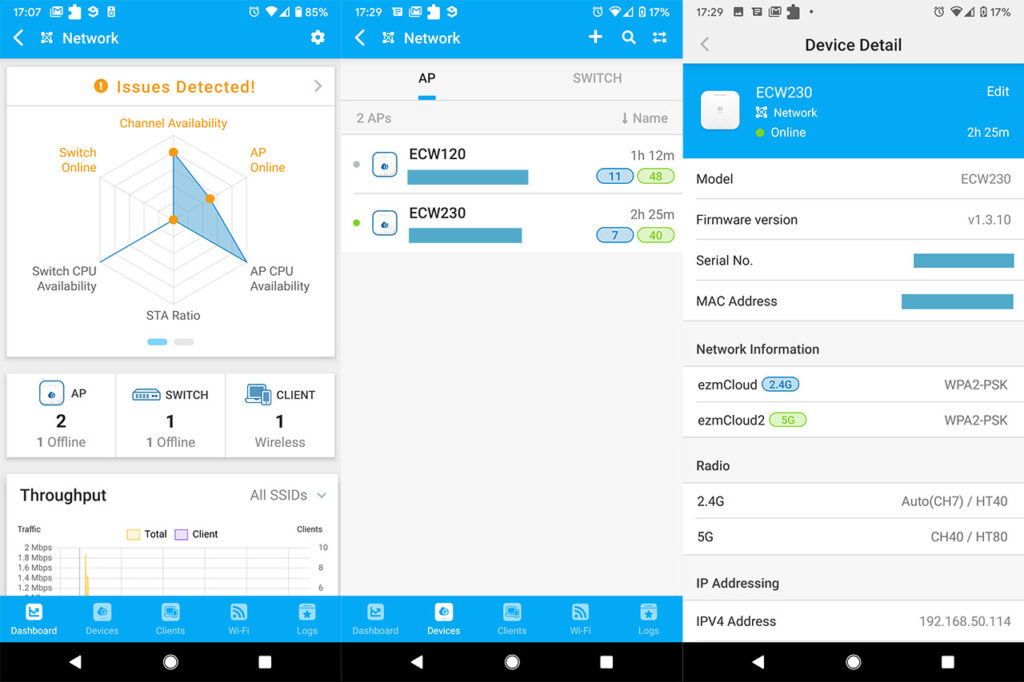
As I have previously mentioned the ECW230 can also be managed using the dedicated EnGenius Cloud app. The application will display a similar dashboard to the web-based interface and you get access to most settings from the full-Cloud managed platform, but I do see it as more of a means to quickly adjust various options. And it works great for this purpose, but for proper multi-sire management, you do need to have access to the web-based Cloud user interface.
Note: The Cloud managed platform that I have used is the free version which already offers plenty of options for smaller businesses, but there is also a paid version available which adds some additional interesting features.
Conclusion
The EnGenius Cloud managed platform has gotten better over the last year and it’s currently offering most of the expected features suitable for SMBs (yes, even the free version offers quite a lot), allowing the configuration and management of multiple devices on multiple sites; and it doesn’t feel like navigating a puzzle since the settings are well laid out in a fairly unique fashion (not everybody has copied the UniFi and that’s a good thing). As for the hardware itself, the WiFi 6 technology has opened the doors for faster data transfers, as well as for the creation of a more reliable network and the EnGenius ECW230 does offer the expected features (although I would have liked to see support for 160MHz channel bandwidth). Design-wise, the access point looks great on the ceiling (it’s very slim) and the wireless test showed that if the right conditions are met (compatible clients), the ECW230 can deliver a really good throughput (I was unable to go past the Gigabit point possibly due to my testing hardware limitation). It’s clear that the ECW230 is going to be overkill for the consumer-level market, but for the SMBs, it’s a good mid-level solution.
EnGenius ECW230
-Pros
- Very slim case
- The EnGenius Cloud Management platform (the free version already has lots of features suitable for SMBs) + mobile app
- WiFi 6
- Good, consistent wireless performance
- A 2.5Gb PoE port
Cons
- Gets quite hot while functioning
- No cables in the package and no PoE adapter
- Limited at 80MHz channel bandwidth

Mark is a graduate in Computer Science, having gathered valuable experience over the years working in IT as a programmer. Mark is also the main tech writer for MBReviews.com, covering not only his passion, the networking devices, but also other cool electronic gadgets that you may find useful for your every day life.


