It’s true that the built-in smartphone camera stabilizer has come a long way and there is far less shakiness when capturing a video but the gimbal’s role into the videography, be it professional or amateur, has pretty much remained unchanged. And that’s because it’s quite hard to get those smooth rotations and keep the camera steady enough to try new angles and various transitions in your videos.
Sure, if you’re on a tight budget, you can practice walking more steady, but the gimbal has become much more affordable over the years and entry-level devices such as the Hohem iSteady X should be able to deliver a far smoother footage than your flagship phone. Additionally, the gimbal is very compact, so it’s very easy to carry around and that’s actually one of the highlighted features since the iSteady X is among the lightest gimbals on the market.
The small joystick is also there for adjusting the angle of the phone and the mobile application helps you get the most from the gimbal. Yes, you can use the native camera app, but you’re going to lose a lot of fancy features, such as the face tracking ability or the dolly zoom effect. That being said, if you’re currently using a phone as your main shooter and want to capture better videos, it’s worth checking out the iSteady X gimbal and see if it can turn your smartphone into a far more useful video capturing tool.
Design and Build Quality
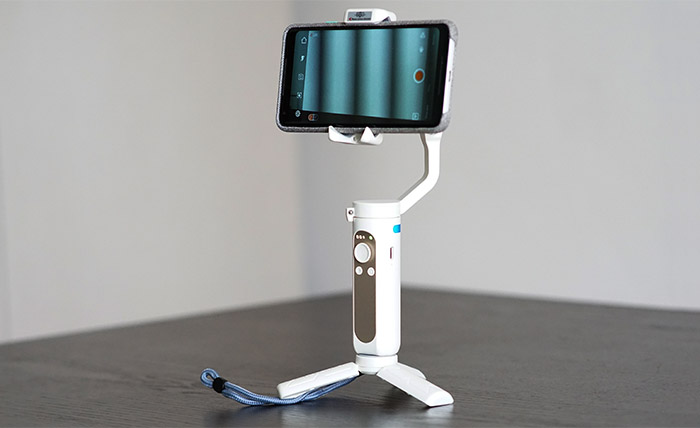
Hohem iSteady X follows the usual design blueprint that has been followed by almost all gimbal manufacturers (and for good reason since it has proven be the most suitable when shooting a video with your phone). So expect a cylindrical handle made of plastic with a small metallic piece for some of the button and at the top of the handle, there are several pieces operated by internal motors to balance the phone. I have a fairly large hand and, while the handle is certainly very comfortable to hold, I found it that attaching the tripod at the bottom gave me the feeling that both the gimbal and the phone are a lot more secure (especially when using a case which can make the phone significantly more heavy). It’s worth noting that the gimbal weighs 0.57lbs, so it’s quite light and it supports smartphones that weigh up to 0.61 lbs, which means that it can handle even larger devices (such as the iPhone 11 Pro or the Samsung S20 Ultra).
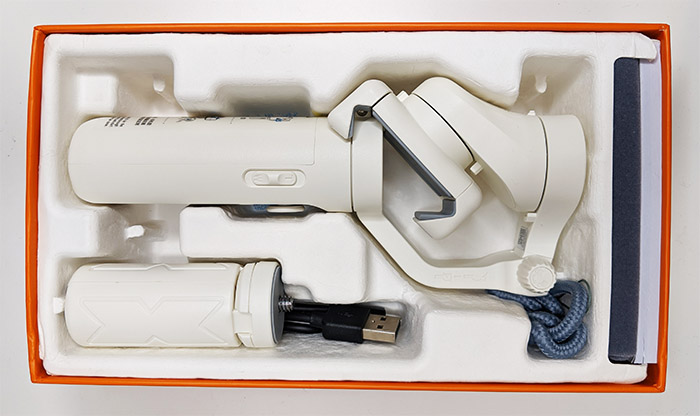
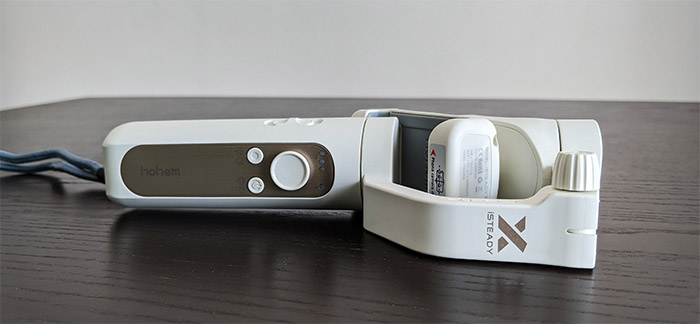
The entire device is covered by a white matte finish (there is a black variant available as well) and, after taking the gimbal from the package, I noticed that the arms are tightly locked, allowing zero movement. After unlocking the arms, I realized that only the handle and the clamp are made of plastic (also the tripod), while the rest of the gimbal seems to be made out of some metallic alloy (possibly zinc). Immediately at the top of the handle, there’s the first arm that’s operated by the pan motor and yes, there is a lock to keep it shut when traveling (you don’t want your equipment to be wobbling in your bag). Going higher, there is a locking knob that holds the pan arm connected to the tilt arm and, as expected, you do need to use the knob to unlock the two arms and move the tilt arm in an upper position (lock it again at this point). Before the clamp, there are two other motors, the tilt and the roll motors which again, need to be unlocked before being able to attach a smartphone.
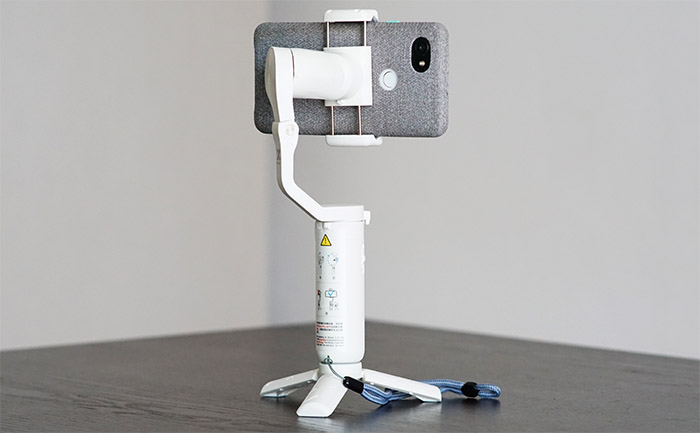
Hohem has added a few soft pads where the phone should get in contact with the clamp and yes, the mechanism is spring operated, with the opening being quite large, going from 2.28 to 3.54 inches, so I could easily add my Pxel 2 XL along with the protective cover (something that I couldn’t with the Funsnap Capture 2). On the clamp, there is a printed guide to let you know which side should the phone be positioned. The phone can be panned and tilted using the joystick from the handle which is very responsive and easy to operate, while everything else (the stabilizing process itself) is done automatically. Underneath the joystick, there are two buttons, the one on the right for turning on the gimbal (press and hold it for a couple of seconds, until you see the LEDs shining) and the other for photo/video capture. Of course, both buttons have additional functions, so, if you quick press the Power button once, it will switch between landscape/portrait mode (it will move the phone accordingly) and double clicking it will recenter the gimbal.
The Capture button will switch between photo and video mode on double-click and it will switch between front/back camera on three clicks. Above the joystick, there are three LEDs dedicated for the battery and one LED on the right for the Mode: it’s green when the gimbal is connected to the smartphone via Bluetooth, yellow when it’s not yet paired and red when it detects abnormal loads or when a firmware update has failed. All these buttons rest on the metallic piece, while on the left, there is a T/W switch which will allow you to zoom in and out, by default, but, from the app, you can change it to manual focus. I found the switch to be quite easy to reach with your thumb, but again, if you have a larger hand, it’s going to be far easier to operate the gimbal using the tripod. Speaking of which, the iSteady X does have a tripod inside the package that you can attach at the bottom of the gimbal and despite being made of plastic, it doesn’t feel flimsy at all (there are also gray pads where the surfaces get in contact).
On the right side, there is a USB-C port for charging the battery and a recessed Reset button. Something that I found a little bit annoying with the Funsnap Capture 2 was that one side of the phone was blocked and I couldn’t add an external microphone. Considering that both sides of the smartphone remain free when using the Hohem iSteady X means that you can definitely add an external mike, so you don’t have to rely on the (usually) subpar built-in microphone. All in all, at 9.0 x 3.14 x 1.57 inches (unfolded), the iSteady is definitely among the most compact gimbals on the market and, as I said before, the fact that the motors fully lock, it’s a major plus when traveling – there’s also a pouch in the box.
Setup and Functionality
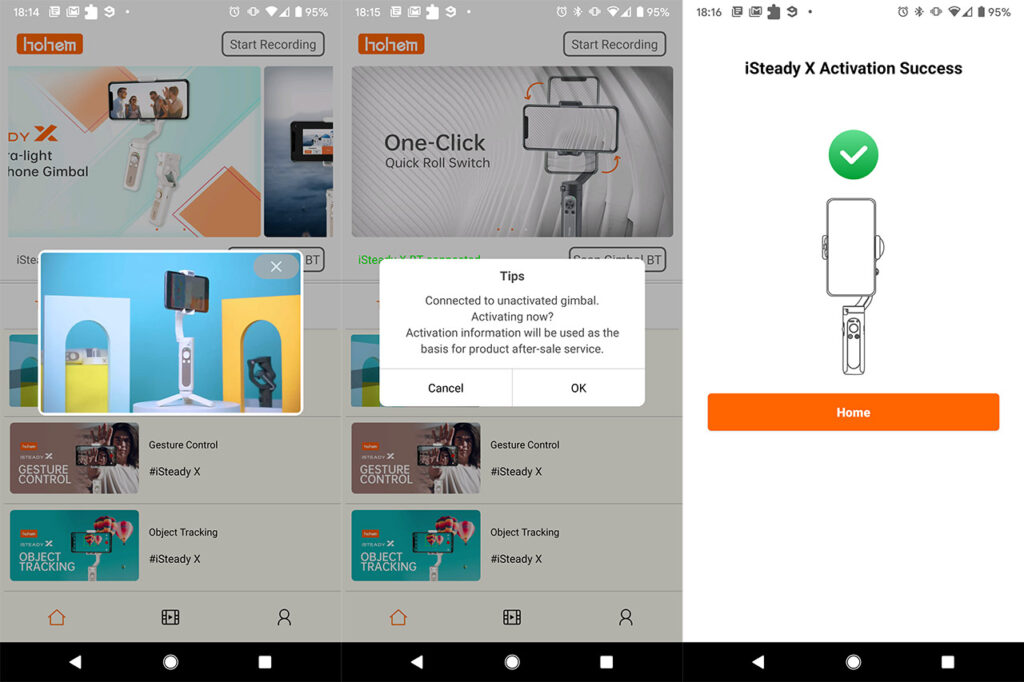
Inside the package, the Hohem iSteady X is folded, with the arms locked, so the first thing that you need to do after taking it out of the box is to unlock all the pieces and use the knob to straighten up the arms of the gimbal – I also suggest to attach the tripod to the bottom for a better grip. I know that at this point, you will be tempted to insert the phone into the clamp and power on the gimbal, but doing so will not start the stabilizing process. The reason for that is because Hohem requires for the gimbal to be first registered via the application and connected to the phone using Bluetooth. So, go to the Android (or Apple) store, download the Hohem Pro app, allow its necessary permissions and, after the welcoming video (?), the app should quickly detect the gimbal via Bluetooth. Pair it and start the activation process: enter your email and a password. After that, insert the phone into the clamp, press the Power button for a couple of seconds and the gimbal should now start stabilizing the phone.
In case the Bluetooth LED (the one on the right) goes red and you hear a strange motor noise, make sure that you have unlocked every section – the good news is that in case a part is locked, the gimbal will immediately turn itself off, ensuring that the motors don’t break. It’s worth mentioning that the iSteady X uses the Bluetooth version 4.0 and yes, it’s not the latest available, but considering that the smartphone will always be in the (very) close proximity of the gimbal, it doesn’t really matter. Also, you may notice that the angle of arms seems a bit strange, but it’s that way to make sure that no part of the gimbal will be visible in the footage. The app is a bit unconventional since it will show Tutorial videos (which are quite useful for aspiring video-makers), some highlighted videos, FAQs and if the iSteady gimbal is connected using Bluetooth. I checked for the camera app itself, but the only tabs where taking me to the main window (Home), to the recorded videos (or captured photos) or to the Account.
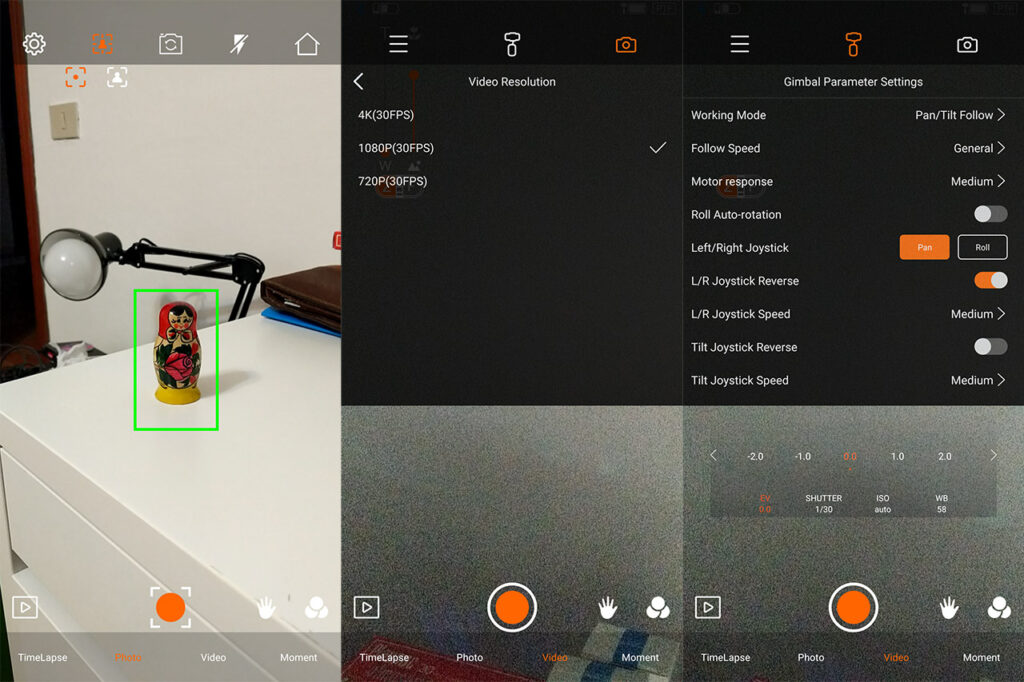
And then I realized that there is a small ‘Start recording’ section in the top right corner which opened the proprietary camera app. At first glance, the interface looks similar to the native camera of my Pixel 2 XL, but at a closer look, I realized that there are more options and some completely new functions. On the left, you can turn on/off the flash, switch between the two cameras (this can also be done using the physical button) or enable the Object/face tracking option. This can be a bit tricky to achieve perfectly, especially on a budget-friendly device and indeed, there are a few problems. After you enable the object tracking option, you need to select the object from the screen (tap and drag over the area) and then the gimbal will follow the object around. This function works very well when you move the phone slowly and in a controlled manner – quick changes and the camera will not be able to track the object. That’s also the case with the face detection, but I did notice that the motors can sometimes be a bit aggressive in their tracking, resulting in sudden movements that may not look that great in the video.
This happens when using the standard movement setting (you can change it from slow to fast); of course, using the fastest mode will follow the subject a bit better, but you also get a completely different video composition (suitable for action scenes). Further down, there are the Settings where you can adjust various other options, such as Working Mode (you can choose how the camera will follow the subject – a combo between the pan and tilt motors), the Follow Speed and the Motor Response which, by default, it set to Medium, but you can also switch it to Low or High – be aware that the last mode can lead to phone vibrations which will be noticeable in videos. Furthermore, you can enable the Roll Auto-rotation, select how the joystick will operate (pan or roll), reverse the L/R joystick movements, the L/R joystick speed and more. Additionally, while in the Settings section, you can click on the Camera icon to enter the Parameter Settings, where you can change the Video Resolution (supports up to 4K at 30fps), the Photo size (the ratio), set a Timer, show the Grid, select the Zoom Speed or enable the Professional mode which will display the EV, ISO, WB and the Shutter stats.
On the right side of the camera app, there are four main modes: Timelapse, Photo, Video and Moment. While the first three are self explanatory, the Moment is perhaps the most interesting addition, since it has various cinematic modes that you can use in your video composition. It includes the Inception mode (just like in the movie, the gimbal rotates the camera 180 or 270 degrees to achieve a similar effect), the Dolly Zoom effect (the zoom wasn’t very smooth – maybe it has something to do with my phone), the Fantastic Rotation (the gimbal rotates the camera following a music rhythm), the Smart Motion Timelapse (unlike the default Timelapse, the camera will also move for a more cinematic look) and the Panoramic Video. But that’s not all that the camera app has to offer since you can also enable the Filters (the three circles icon) or the Gesture Control which allows you to control the camera (when it will start recording or capture a photo) by using either the high-five or the peace sign – make sure that both your hand and your face are in the shot.
Note: Inside the device, there is a 2000 mAh rechargeable battery which should last up to 8 hours and indeed, after using it for about 2-3 hours, only one LED turned off (meaning that two thirds of the battery were left). Recharging it from 0 to 100% should take about 2 hours.
Conclusion
In its current state, the smartphone is more than enough for capturing holiday videos for FaceBook or Instagram, but if you’re trying to get more serious with vlogging or are perhaps thinking of starting a professional career in cinematography, then you will need more than just your phone’s camera. The gimbal doesn’t replace expensive professional equipment, but it can put you in the right direction and, after checking out the Hohem iSteady X, I was pleasantly surprised to see all those tutorials and automatic cinematic modes (under Moment) which can help create a cool effect with the click of a single button. From the hardware point of view, the gimbal is well designed, it has a good range of movements, the joystick is responsive and I could insert my smartphone along with the protective cover. So, overall, it ticks all the boxes and, considering that it’s quite affordable, it’s definitely one of the better options in its current price range.
Hohem iSteady X
-Pros
- The stabilization works really well
- Cool cinematic features
- The app has lots of video tutorials
- The motors can be fully locked, so it won't wobble when you're traveling
- Affordable
Cons
- You can't attach a small action camera, such as a GoPro
- When searching for an object (or face), the motors will move less smoothly

Mark is a graduate in Computer Science, having gathered valuable experience over the years working in IT as a programmer. Mark is also the main tech writer for MBReviews.com, covering not only his passion, the networking devices, but also other cool electronic gadgets that you may find useful for your every day life.

