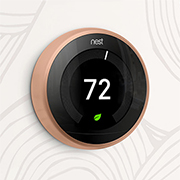
While it did not build the initial smart thermostat, Nest is among the first manufacturers to have managed to find the perfect balance between a functional design and a proper amount of features. Unlike other devices (such as the water bottles, hairbrushes, trash-cans or toasters) that got smart just as a proof of concept, the thermostat is one of those products that had to inevitably get ‘smarter’ since the traditional programmable thermostats weren’t really user-friendly, so, more often than not, the people were underusing their features because these were too complex and unintuitive.
| Nest Learning Thermostat Gen 3 | |
|---|---|
| Amazon.com | Check Offer |
That’s why the first Nest Learning thermostat was built to challenge the way the traditional thermostats were operating, by implementing lots of interesting technologies and sensors into a small, cool-looking device and it allowed the users to operate it either via the built-in display or by connecting the thermostat to a mobile app to gain access to the device from everywhere (using either your home WiFi network or going through an external secure Internet connection).
That gets us to the third generation of the Nest Learning Thermostat which, similarly to the previously released devices, it prides itself with the adaptability to the home owner’s behaviour patterns (it needs about a week to learn the routine), as well as a better display, an improved user interface and it has also added some new features to enhance the smart home experience.
Note: It’s worth noting that Nest has also released a fourth thermostat device a few months ago, called the Nest Learning Thermostat E, which is a smaller and not-so-well equipped version of the 3rd gen, but it does come at a better price point.
UPDATE 09.18.2018: Nest has recently released the Temperature Sensor which helps at better adjusting the right temperature for all the rooms in your home.
Design
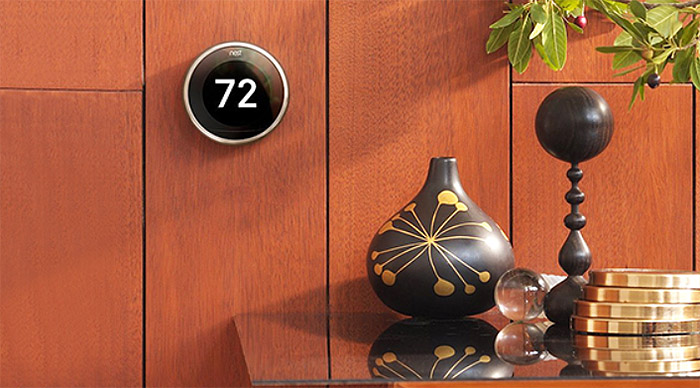
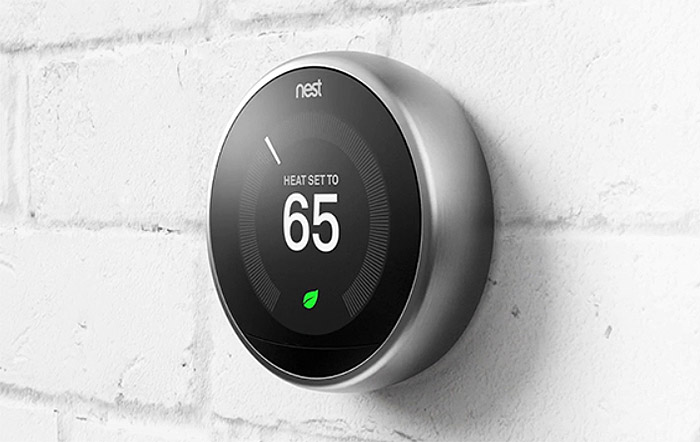
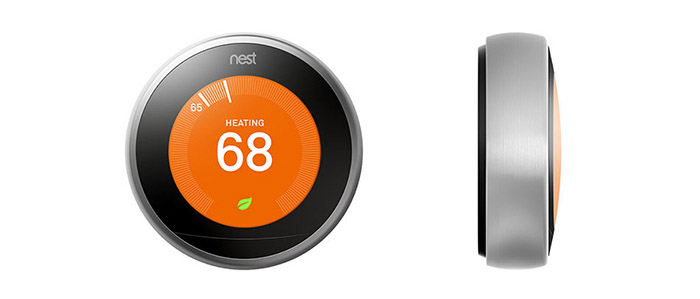
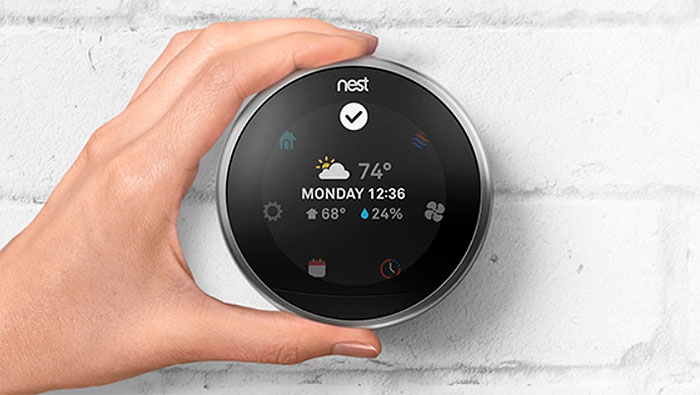
There aren’t many design changes from the first or the second generation, the third gen Nest featuring the same cylindrical case with a brushed metal exterior (it comes in four different colour variations: copper, stainless steel, black and white) with soft rounded corners and a large display on the front side (has a smaller bezel than the second generation, therefore more screen-estate).
If the look of the Nest will give you an Apple-ish vibe, your instincts are serving you well since the founders are former Apple employees (the company is now owned by Google), so the Nest thermostat is built in a simple and minimalist way, but it did not shy away from using high-quality materials, which means that it also has a premium feel.
The external metallic shell is actually a circular dial that feels very satisfying to spin around (it will make a clicking sound when you turn it – this sound is not created by the movement itself, but by a small speaker from inside the device) and it has the role of navigating through the user interface, while, in order to select a specific option, you need to press on the edge of the dial. It seems that Nest still has not gone for a touch-screen display, but it’s not necessarily a bad thing since the navigation system is incredibly easy to use, intuitive and very reactive. So, we’re dealing with a 2.1-inch LED display with a resolution of 480 x 480 pixels and 229 ppi pixel density (a 25 % improvement over the last generation display) which is surprisingly crisp and does a great job even if the sun shines directly on its surface.
Towards the top of the display, there’s a small LED light which will blink blue when the device is either updating the software, restarting (to restart the device, you need to push and hold the thermostat ring for about 10 seconds) or booting up after it has been connected to the base plate, and the LED will blink red when the battery is depleted and the power it receives is not yet enough to power on the device (once the battery is fully charged, the display will turn on automatically and it will resume its work).
That being said, the Nest Learning Thermostat Gen 3 comes equipped with an internal battery that can keep the device alive for at least an hour (in case of a power outage) and it recharges using either the cooling or the heating wires, but, since this may take a while and if you’re in a hurry to put the system back on, then you could use the USB port from the rear side of the thermostat.
In case the battery charge goes too low, then the thermostat will turn off the WiFi (so the app will see the device as offline) in order to still save some power to allow heating or cooling control, but if it goes below 3.6 V, then the device will turn off and it won’t allow you to change the temperature or any other settings using the built-in display or the Nest app. Furthermore, even if the thermostat turns off due to low battery, it will still remember the settings, so you won’t have to go through the setup process again.
If you decide to also purchase additional Temperature Sensors, know that these devices are small (one unit measures 1.9 x 0.8 inches and weighs 1.6 oz), they’re battery-powered (each device uses a CR2 3V lithium battery which can provide up to 2-year lifetime) and you can simply put them anywhere in the room and add them to the Nest app in order to communicate with the thermostat.
Note: Inside the box, there’s the main unit (that with the display), the mounting base, as well as mounting screws and labels, a Nest screwdriver, an optional trim kit, an Installation Guide, a Welcome Guide and an Installation card.
Installation and Functionality
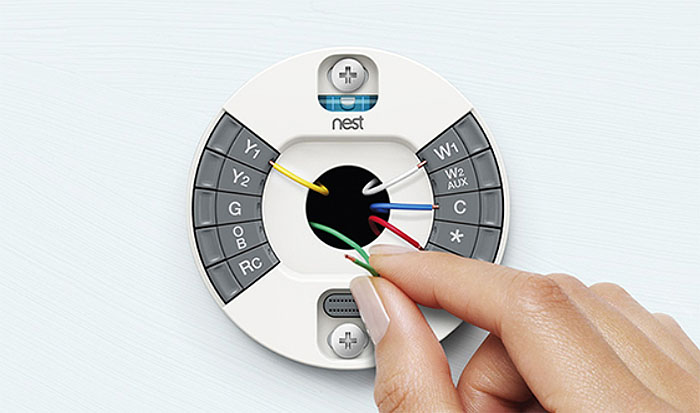
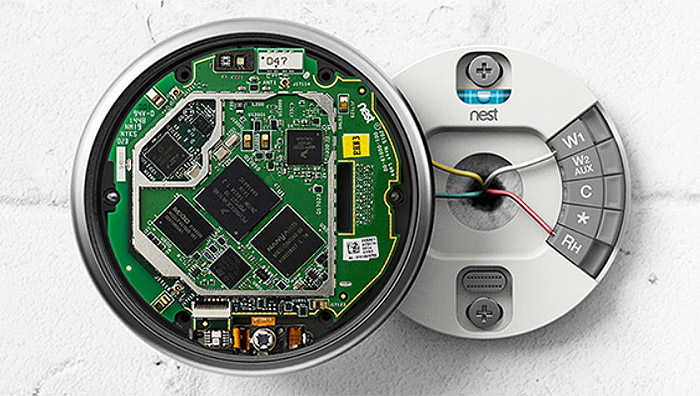
The hardware installation may seem intimidating at first, but Nest has provided everything you need to make the process as simple as possible (you can also opt for the Nest Pro installation): first, you need to turn off the power, then carefully remove the existing device (or, if it’s the first time you install a thermostat, just prepare the necessary wires), use the Compatibility Checker (a useful online guide) to see if the wires are compatible with the Nest thermostat (hint: high voltage or stranded wires are not compatible – also, be aware that the Nest thermostat is not compatible with all the heating and cooling systems), peel the labels from the installation guide to see (such as W, R or Y) and stick them to the matching wires (ideally, you should label the wires immediately after you have removed the old thermostat); on the next step, you can use the trim plate to cover any holes on the wall and, using the bubble level, attach the Nest base to the plate and connect the wires to their proper connectors (press the connector button and insert the wire as far as possible and then release the button); on the last step, take the main part of the Nest thermostat and push it onto the base until it clicks into place.
After you have installed the Nest Learning Thermostat, you can now navigate the interface and change the necessary options. So, on the small display, you’ll notice some icons, each with its own functions: the house icon will run the setup wizard which will let you choose the language, connect to the local WiFi network, wait until it updates (if it finds a new firmware available), select the location of your device (this way, it will automatically choose the correct date, time and weather forecast), setup the Heating and cooling system (will ask you whether you’re a Home Owner or a Pro user, it will detect the equipment (you can chose the cooling system, the heating one or the fan), select the fuel source for your heating, as well as the heating type) and lastly, set up the Temperature (heating or cooling – select the lowest and the highest temperatures for when you’re away from home) and lastly, you can test the system to see if everything is working properly.
Afterwards, you’ll be greeted by a digital dial which can be adjusted using the external metallic ring in order to choose the desired temperature – it is best to use the Nest Leaf to choose the proper temperature since, this way, you’ll save energy and cut a bit from the electricity bill (the Nest Leaf temperature adapts to your preferences).
The next icon will appear as you have finished the system configuration and it will display the weather, temperature, as well as the date and time, while the Home icon, this time will allow you to choose between the Home or Away modes manually. The Settings icon consists of several options, each allowing the user to customize the thermostat and these are some of the main ones: the Fan can either be scheduled or simply be turned on or off; the Lock can be configured to only stay within a certain temperature range or to be completely locked from external input; the Eco allows the user to manually adjust the Eco temperatures (although the thermostat does this automatically anyway); Home / Away Assist; Nest Sense (a combination of sensors that are needed for the device to learn about your habits and your home); the Placement; Reminders and more. The other icons show the status of the Thermostat (can be Heat, Cool, Heat & Cool and Off), the Fan (can be set to turn on Automatically, Every Day and Start Now), the Energy consumption and the Schedule.
Note: If you go to the Settings > Nest Account and select Get Entry Key, the thermostat will display an entry key which you can then use while installing the Nest app on your mobile device (iOS or Android).
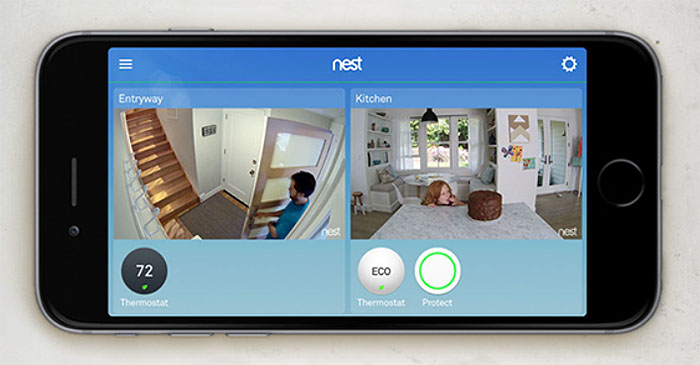
The Nest app delivers pretty much the same user experience as the display interface, allowing the creation of temperature schedules (by day and by hours), manually adjust the Eco temperature remotely, create fan schedules, create family accounts, so each family member can adjust or control the thermostat and, you can also pair the device with a Nest camera and with the Nest Protect smoke alarm to view a live feed of your rooms, along with the temperature and the status of the smoke alarm.
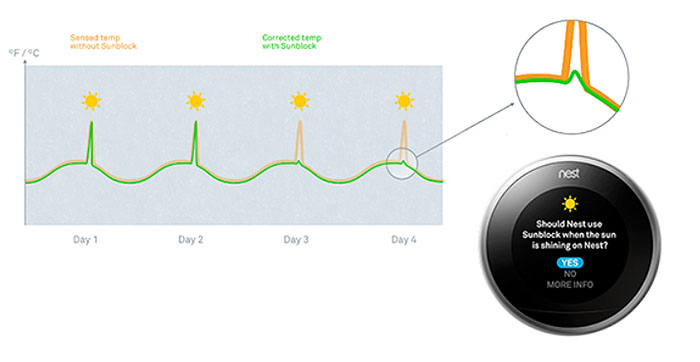
The Nest Learning Thermostat Generation 3 has two main features over the last gen called the FarSight and the Home/Away Assist, the former uses a Near-field activity sensor in order to detect your presence up to 20 feet away so it turns the display on, but it also gives you some display options to choose from (analogue or digital clock, current room temperature or the target temperature or the weather and forecast), while the latter uses both the phone location (on which the Nest app is installed) or the near and far-field activity sensors to detect when there is someone in or outside the house, so it can set the thermostat to the Eco mode in order to save energy. One other worth mentioning feature is the SunBlock which has the role of automatically adjusting to the correct temperature even if there is direct sunlight that shines on your thermostat (part of the Learning algorithm, so it will need a few days to learn the sun’s pattern).
Inside the case, the thermostat is equipped with a BlueTooth Low Energy radio, 512MB of RAM and it uses the 2.4GHz radio (802.11 b/g/n standard) and the 5GHz radio (802.11 a/n standard) for the WiFi communication and, for the wireless interconnection, it uses the 802.15.4 standard (the 2.4 GHz). This way, the Nest Learning Thermostat can interact with other Nest devices (such as the Nest Protect, which is a smart smoke detector or the Nest Cam Indoor or Outdoor) and it is supported by most smart home hubs, it will also work with Alexa voice commands and with the IFTTT protocol. Also, be aware that Nest Learning Thermostat requires a continuous Internet connection in order for the user to take advantage of all of its features.
While I do appreciate the high flexibility of the thermostat and the various sensors which facilitate a great temperature control implemented in the Nest Thermostat gen 3, there is a feature that would greatly improve this device: the ability to control the temperature of individual rooms. The problem with the Nest Learning Gen 3 is that, similarly to all other stand-alone thermostats it cannot accurately tell which is the general temperature in the entire house, so where it is placed will be of utmost importance. That’s why, a solution could be an integration with compatible thermostatic radiator valves which could be controlled by the Nest app and, this way, the temperature in every room would be at the proper levels.
To solve this problem, Nest has made some steps forward and, as I mentioned in the introduction, it has recently made available the Temperature Sensors which should improve the way the stand-alone thermostat reads the room temperature, but be aware that the this is the only type of measurement that the sensors can do and it lacks the ability to detect the air quality, the humidity level and there is no motion detection implemented, so it won’t be able to tell if a room is occupied or not (no help for the Home/Away Assist feature). Sure, the Temperature Sensors are a nice addition to the Nest Protect, but I feel that the manufacturer could have done more.
Conclusion
The third generation of the Nest Thermostat is not really a major improvement over the first two generations from the design point of view (although, I won’t lie, I do prefer the bigger display), but it does come with lots of improvements from the functionality point of view and it has also added some new features that sets it apart from the competition. The one problem that this thermostat and almost all other IoT device suffer is that they require a permanent Internet connection in order for the user to take advantage of all its smart features and that may raise some questions about privacy and security (there are some steps that one could take to ensure that their smart home is safe from hacker attacks). But, at the same time, if your network is properly secured and if you are unsatisfied with the unintuitive and complicated programmable thermostat, the Nest Learning Thermostat is a great solution.
Check for the latest price here:

Mark is a graduate in Computer Science, having gathered valuable experience over the years working in IT as a programmer. Mark is also the main tech writer for MBReviews.com, covering not only his passion, the networking devices, but also other cool electronic gadgets that you may find useful for your every day life.

