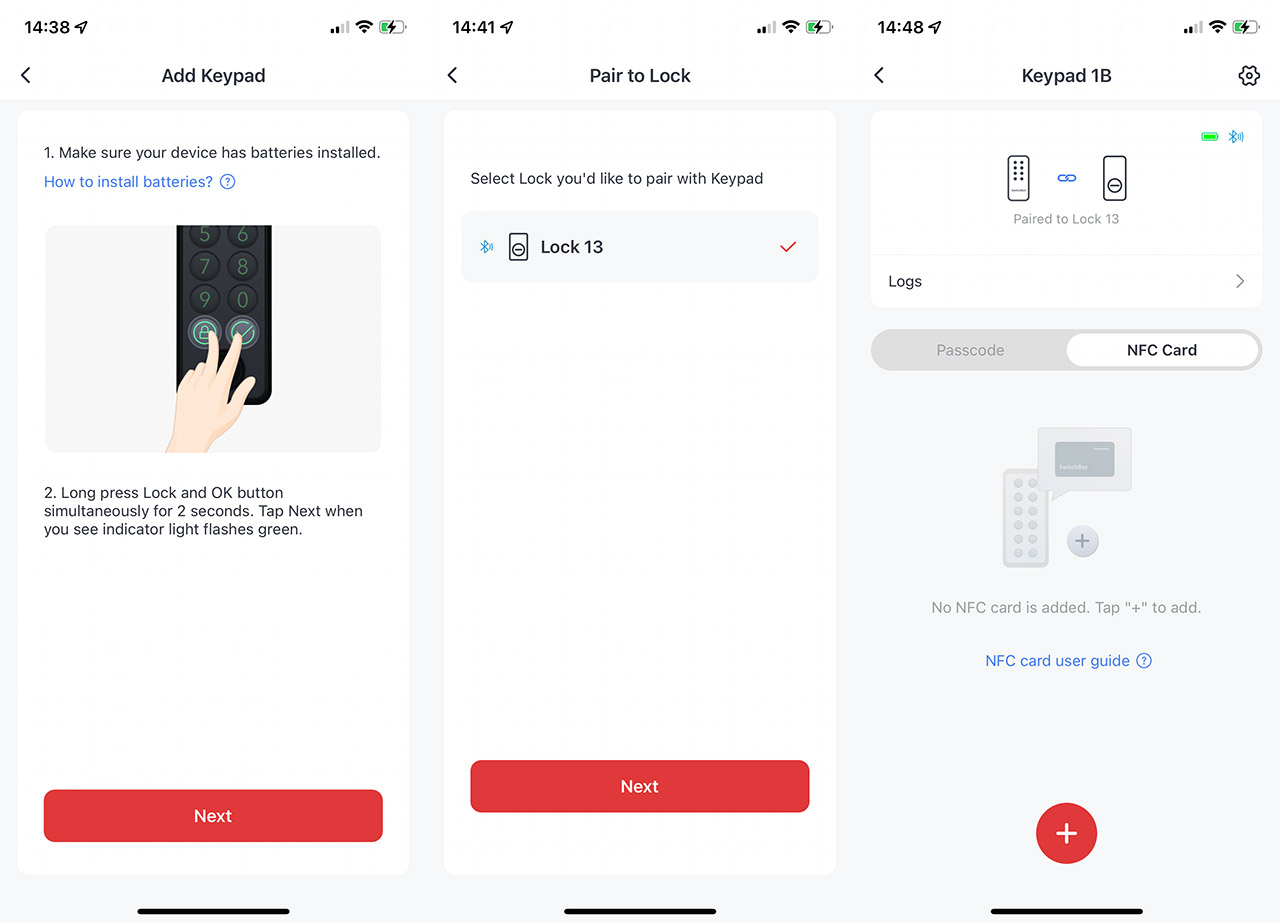
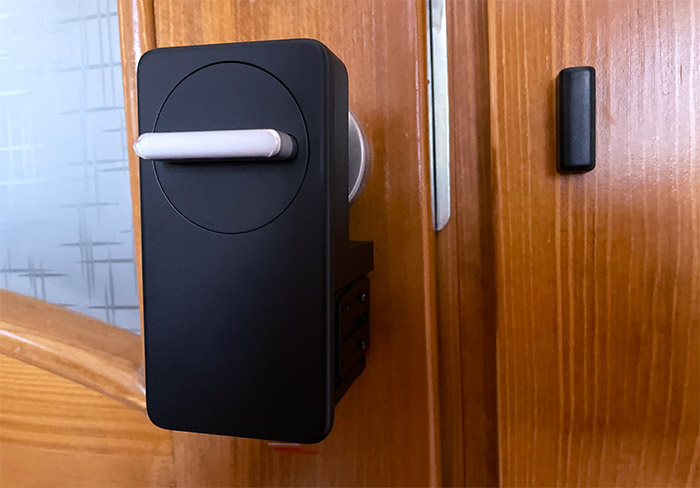
I have already mentioned that the device is weatherproof, but it also needs to be vandal proof since its location will most likely be outside. And, in a similar manner to the Imilab Video Doorbell, the SwitchBot Lock will not be easily detached from the bracket – you will need to use a pin to take it out. After inserting the batteries inside the keypad, the LED light up for a few moments and now the device should appear as available for pairing in the app.
Press and hold the OK and Lock buttons for 2 seconds until the LED indicator starts flashing green and then you can press next to add the device – it’s that simple. You may need to upgrade the firmware to both the lock and the keypad to move forward with the pairing, but you will be asked automatically if you want to link the two devices together.

Press next and insert the code that appears on the screen on the keypad. Press OK and the pairing process should be done. You should add a new passcode immediately (permanent or temporary) and you also have the possibility to add the NFC card. The process is simple – just touch the keypad with the card, select the time when it’s available (if it’s temporary) and then give it a name. These are pretty much all the steps for the installation.
The Mobile App
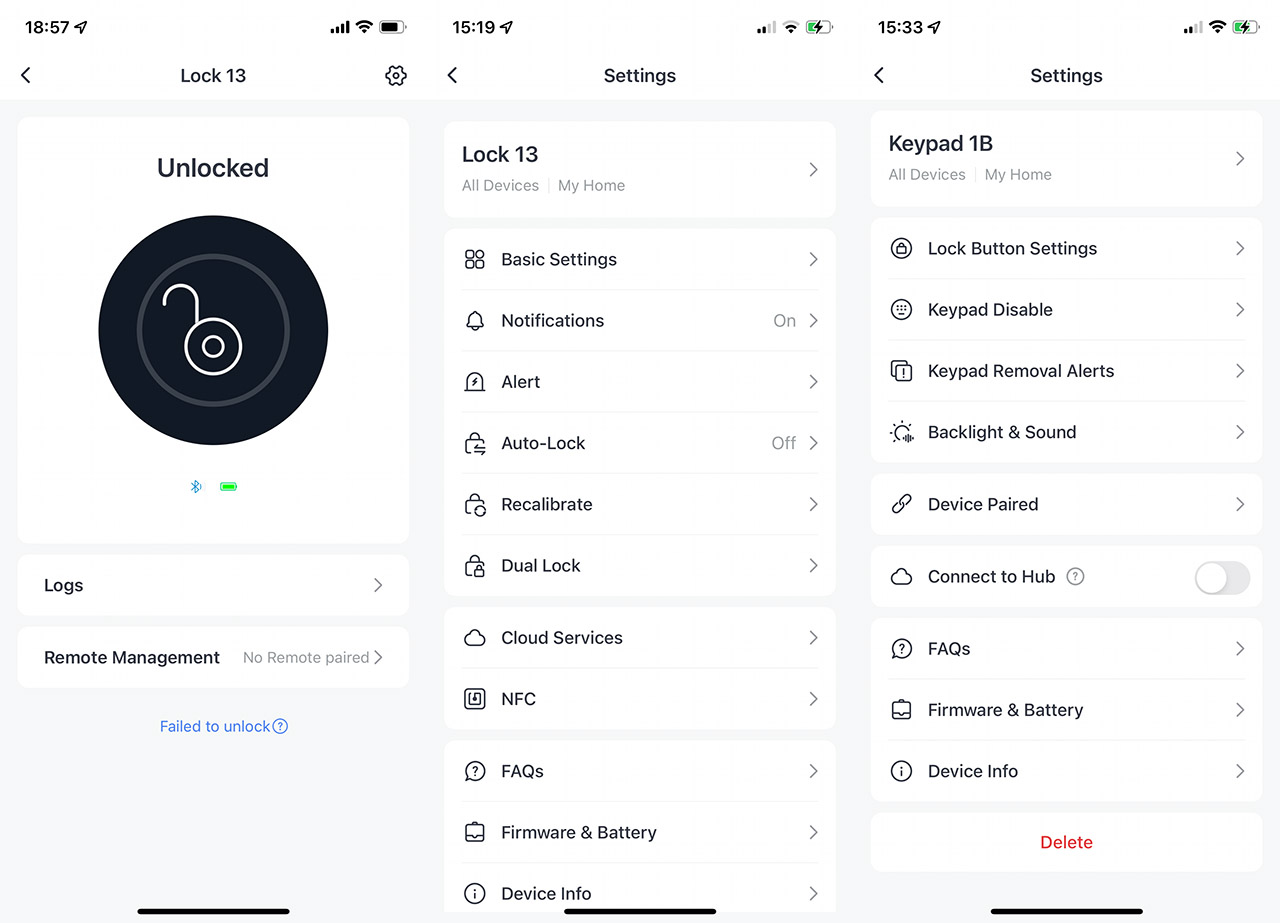
After adding the SwitchBot Lock to the app, you can now see the status of the lock, as well as control it remotely. The large icon in the middle will let you lock and unlock the door, while underneath, you can check the Keypad (if you have added one), the Logs (will show you when the door was locked or unlocked, whether there have been failed attempts and if anything changed in regards to the keypad). You can also add a remote to operate the unit. Tapping on the top right corner (cogwheel icon), will summon the Settings.
And here, you can disable the LEDs and/or the Sound, the Notifications (which are quite extensive), the Alerts (to let you know that you forgot to close or lock the door) or to enable the Auto-Lock function. What this means is that after a certain period of time has passed, the device will lock the door automatically.

There’s also the possibility to Recalibrate the lock and to enable the Dual Lock function. Moving to the Keypad, it does have a few Settings of its own which include the possibility to adjust the notifications (such as when someone removed the Keypad from its bracket). You can also disable the Backlight and the Sound (as well as enable the Auto Mode which uses the brightness sensor to adjust the LEDs light intensity), and it’s also possible to Connect it to the Hub.
The SwitchBot Lock Performance
We saw that it’s fairly easy to install the SwitchBot Lock and, while I wouldn’t consider it plug and play, it’s a far less invasive operation than with most other smart locks out there. But the question is, does it actually work? If installed properly, the motor is powerful enough to move the deadbolt in the suitable position.
I say installed properly because if the deadbolt is a bit particular, the thumbturn adapter may not adhere perfectly to the deadbolt locking mechanism, which can lead to failed unlocks or locks. It has happened to me a couple of times which prompted a light readjustment. So, measure ten times and attach the SwitchBot Lock once, especially is you’re using the two-sided tape.
As for the latency, I know that some people mentioned a slight delay of about 4 seconds, so I was curious whether it happens to my unit as well. I even made a video of it and, as you can see the process is pretty much instantaneous when using the app. So, I turned off the WiFi to check if the Cloud would be slower. It wasn’t. I do suspect that the reason for why there is no perceptible latency is due to the Hub Mini that I installed. And, if the user would rely only on its phone and local network to operate the device, it’s possible that this way, some latency may creep in. What about the keypad and the NFC card? I made a video of that as well and, as you can see, it’s as fast as it can be.
Since I mentioned the Hub Mini, SwitchBot does make it possible to use Alexa and Google Home to operate the smart lock, but I would suggest against it. Obviously, due to privacy and security reasons. If you have to mention the code to your smart assistant to unlock the door, you may as well just do it from the app or using the keypad. Also, be aware that the app will not work without continuous access to the Internet.

And it’s actually a bit funny because I turned off the LTE and the WiFi, but the app could still communicate with the smart devices for a few moments and then bam, I was out. I was actually thrown out of the app – automatic sign out. Do you need Internet to lock or unlock the door? In my humble opinion on, but this seems to be the road towards having the dreamy smart home. And I am not a fan, but I digress.
The Conclusion
I know that a lot of people entertained the idea of a smart lock, but couldn’t make the switch due to renting the space. So, the SwitchBot Lock, despite being a bit strangely designed and not really resembling the traditional lock, it should have a far larger public than the other smart locks out there. And, after testing it, the device does work as intended. The installation is not invasive (you can simply glue it to the door), I experienced no latency using the app and you do get additional ways to lock/unlock the door.
One is by relying on the keypad (there is a variant with a fingerprint reader) and the other using the NFC card. The price is also very competitive, so, if you’re in the market for a smart lock that won’t replace the existing one, the SwitchBot Lock is pretty much the only reliable option you have right now.
SwitchBot Lock
-Pros
- It's the least invasive way to retrofit your lock
- The app is simple to use
- Pretty much no delay until the device locks or unlocks the door
- Multiple ways to operate the unit - app, keypad, NFC card
- Can be used with Alexa and Google Home
Cons
- The app requires constant Internet access
- The design may not be on all people's taste

Mark is a graduate in Computer Science, having gathered valuable experience over the years working in IT as a programmer. Mark is also the main tech writer for MBReviews.com, covering not only his passion, the networking devices, but also other cool electronic gadgets that you may find useful for your every day life.

