Under the System section > Task Scheduler, you can create new actions for the drives, such as running S.M.A.R.T tests once every month to check for bad sectors. It’s worth looking under Applications since it will show the Privileges, allow you to create an Access Control Profile, sync shared folders and Enable Telnet and/or SSH (you can also set the port). Due to its vulnerable nature, the NAS should not be open to the Internet without having some protection put in place and this usually means to disable both Telnet and SSH, but using a VPN or a firewall (while keeping Telnet disabled) should suffice. The VPN server that comes as a downloadable package supports PPTP, OpenVPN and L2TP/IPSec.
Note: I said that not many people encrypt the data that they send to the popular Cloud servers and to do it using the Synology DS218+, you will need to return to Control Panel > Shared Folder and create a new Folder: when prompted, enable the Encrypt this shared folder option and set an encryption key (you can also encrypt the existing shared folders by clicking Edit > Encryption and following the same steps).
Maintenance
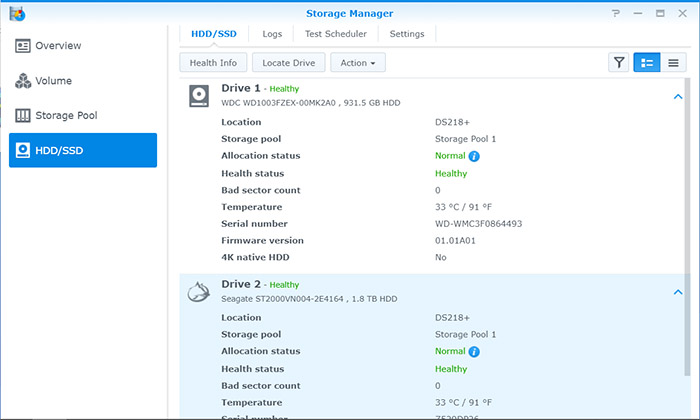
To view the status of your drives, you need to access the Storage Manager and under Overview, you’ll be able to see the Volume status, the RAID Type (by default, it’s going to be the Hybrid RAID SHR) and the Drive info. Under Volume, you can see more info about the current available drives and, if you click on Action, you get to start the File System Defragmentation or Configure the Volume: set the ‘record file access time frequency’ and run SSD TRIM (available only if you use SSDs). Under Storage Pool, you get to see the status of the system and clicking on Action will allow you to create a new Storage Pool or change the settings of the current one (as well as Repair it or to Change the RAID Type). It’s good practice to also set Data Scrubbing every few months and this can be done from the Data Scrubbing option and, under Configurations, you can Resync the RAID Speed Limits.
Note: It’s interesting to know that my first contact with Synology through their three routers (the RT1900ac and the RT2600ac + MR2200ac that can form a mesh WiFi system) and the interface is almost identical on both the NAS and the wireless routers.
Synology DS218 Plus – Performance and Tests
The Synology DS218+ features a raw capacity of 32TB (2 x 16TB) and the maximum single volume size is 108TB (identical to the TerraMaster F2-210) and, while I couldn’t max out the storage capacity, I did use a 1TB WD Caviar Black HDD (7200 RPM 64 MB cache) and a 2TB Seagate IronWolf (7200 RPM 256 MB cache), the latter being specifically built to be used with a NAS. The two drives were set in SHR, Synology’s Hybrid RAID which, in most conditions (2+ HDDs), will be slower than RAID 1 (while much better for flexibility if you plan to add other drives), but in our case, using only a couple of HDDs, there shouldn’t be any performance difference between the two RAID types.
Furthermore, it’s true that the CPU is dual-core and Intel has done a decent job with this series, but the processor in this NAS model is a bit on the entry-level side, so it may struggle with running virtual machines and I know that the NAS supports hardware-accelerated h264 encoding, but even so, it’s is also not going to offer the fastest transcoding performance (you can still run tasks in the background at the same time, so no worries). If you add more RAM, you will see some significant improvement, especially if you plan to run multiple applications – in its default state (2GB RAM), the DSM did stutter a few times.
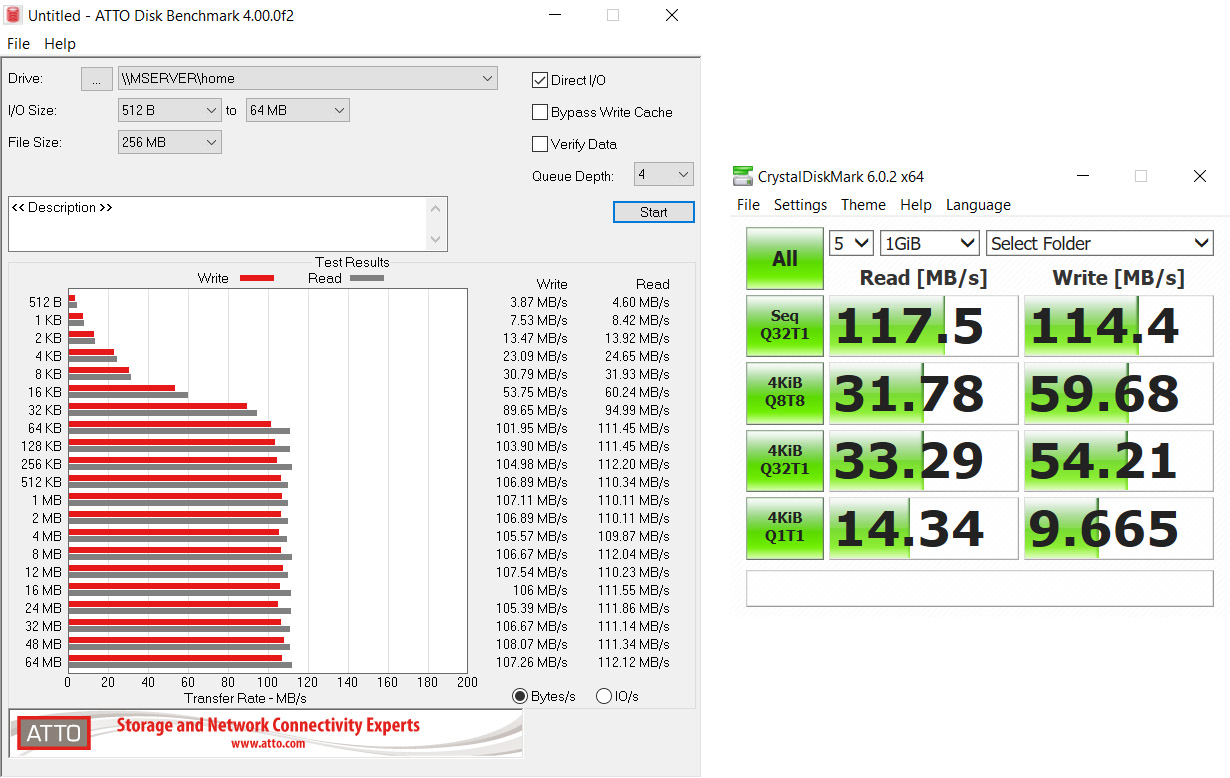
To test the storage performance of the NAS, I ran a couple of synthetic benchmarks on the Shared Folder and the results were good: CrystalDiskMark 6 shows 117 MBps for reading and 114.4 MBps for writing (sequential 128KB). Next, there’s the ATTO benchmark which shows an average of 106 MBps for the write test from 128KB to 64MB data packets and the read test for the same range was at an average of 111 MBps.
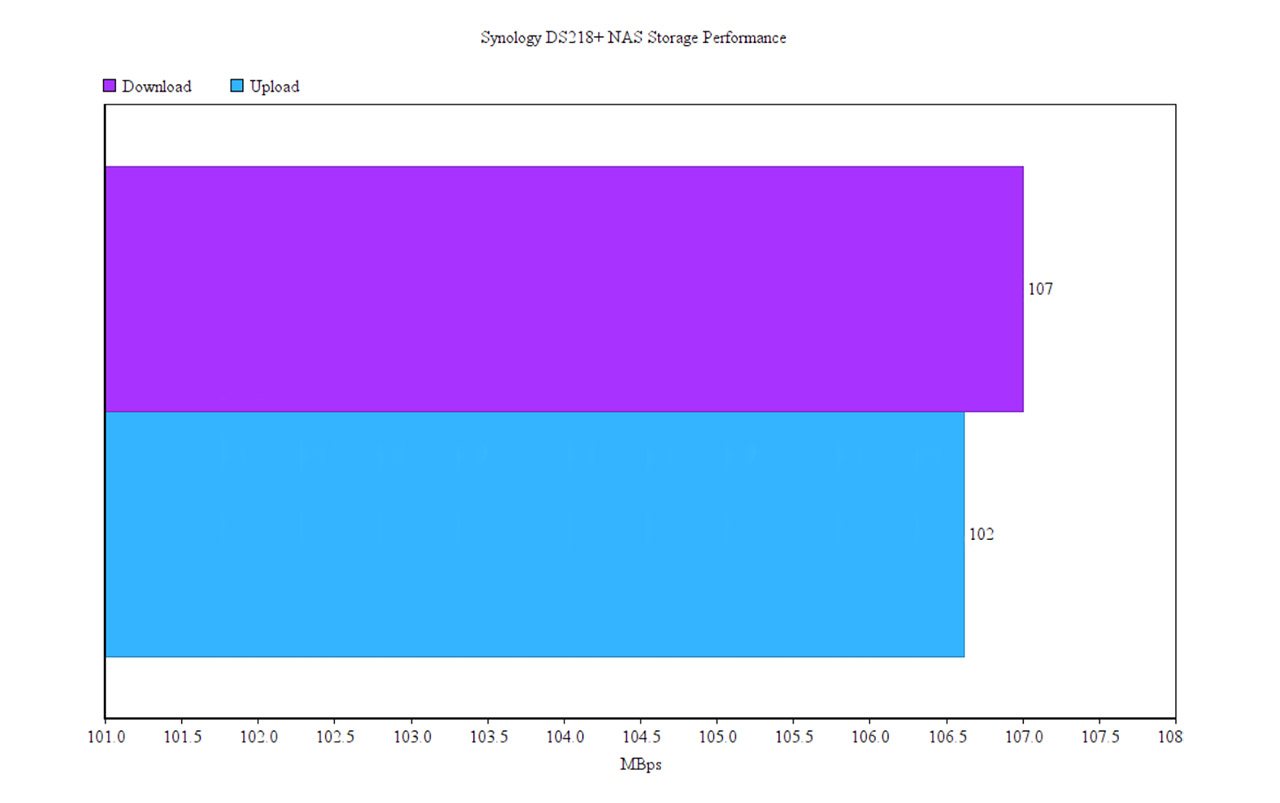
Next, I took a 40GB folder containing 20 x 2GB files and sent it towards the DS218+ and then back to the computer. This way, I saw an average writing speed of 102 MBps and an average reading speed of 107 MBps.
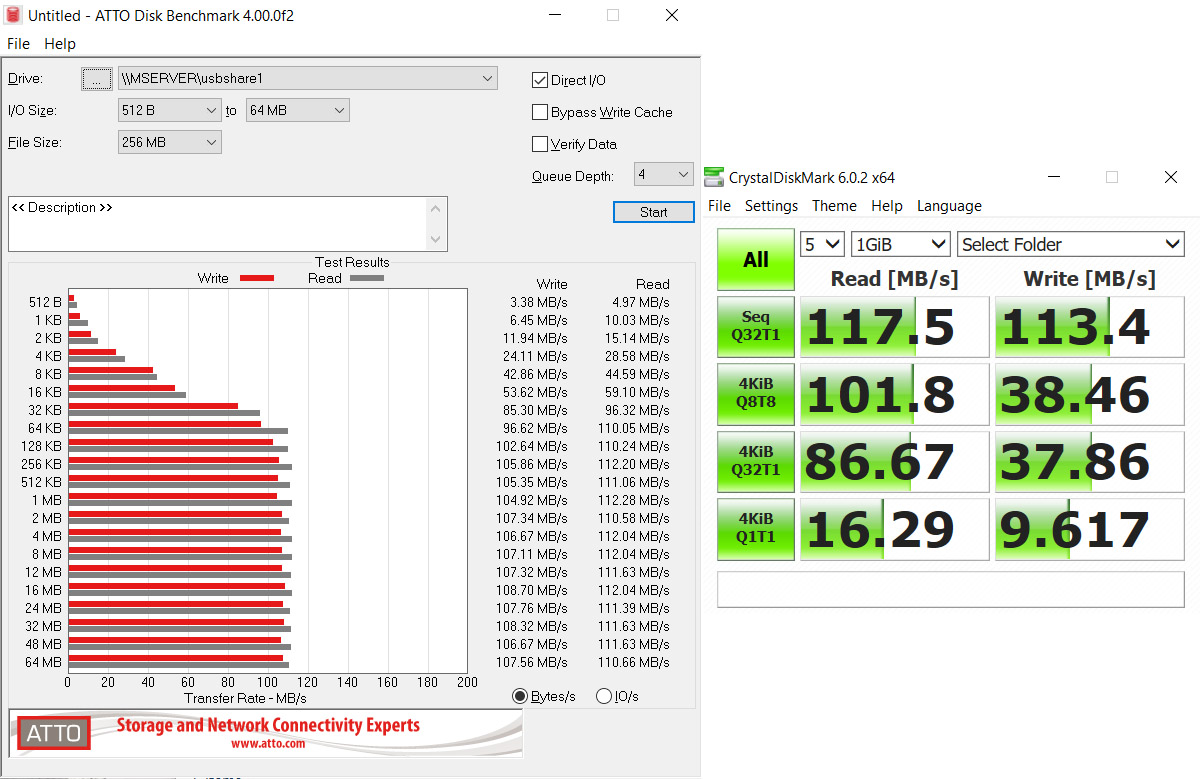
Lastly, the NAS is equipped with three USB 3.0 ports, so, to test their transfer rate performance, I took a Samsung T5 external SSD (250 GB) and ran the same two benchmarks as before. CystalDiskMark 6 displayed 117.5MBps (read) and 113.4MBps (write) for the 128 KB sequential test and ATTO showed an average of 107MBps (write) and an average of 111.5MBps (read) from 128KB to 64MB (a very similar score to the HDDs).
Note: Synology says that the DS218+ features a power consumption of 17.23W while active and, using a special measuring tool, I saw an average of 16.7W, so it’s within the advertised range.
Conclusion
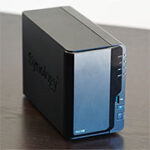
The Synology DS218+ is an excellent NAS for creating a home server, supporting all the expected features (backup, streaming and security), without the need to pay for any extra application (DSM offers a large variety of useful apps); the device is also very compact (that front panel is a bit strange, but it will do its job) and I do like that you can upgrade the RAM; at the same time, the CPU, while capable for almost all use cases, it won’t allow you to run every application that you may have in mind – for example, the Windows 10 Virtual Machine is going to be above this NAS’s capabilities, which is to be expected. When compared to the DS220J, I do think that the DS218+ is the superior device, but Synology has already released the DS220+, so, if you’re in the market for a 2-bay reliable NAS, the DS218+ is an excellent choice, but it may also be wise to wait a bit and see whether the DS220+ may be the better solution (from the price to performance point of view).

Mark is a graduate in Computer Science, having gathered valuable experience over the years working in IT as a programmer. Mark is also the main tech writer for MBReviews.com, covering not only his passion, the networking devices, but also other cool electronic gadgets that you may find useful for your every day life.


