MU-MIMO changes the way clients are being served, so, instead of using the round-robin technique (where every device would have to compete for the bandwidth and one could be served at a time), multiple users can be served at the same time. It’s not really a necessary feature at this moment since there are barely any devices that take advantage of this technology in a pretty limited way (1×1 or 2×2), but, some may argue that this is actually something that will become more widespread with time and may become more popular in a few years (which may put the AmpliFi HD at a disadvantage).
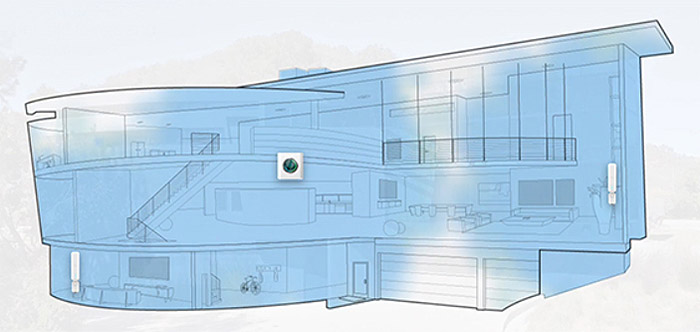
In order to test the wireless performance of the system, first, I connected the main router unit to the modem and took a 3×3 client (a laptop) to measure the speed at different locations inside the house (the fact that I can separate the two bands will make it easier to test the performance). So, using the 5GHz radio band (802.11ac standard), I was able to measure an average of 444 Mbps at no more than 5 feet, while, at 15 feet, the speed decreased to an average of 360 Mbps and lastly, at 30 feet, I was able to measure up to 253.7 Mbps. This is on par with the other popular WiFi systems (the Google WiFi featured an average of 464 Mbps, while the Linksys Velop went up to 482 Mbps), so, let’s see how does it behaves when adding the first node (mesh point) to the system.
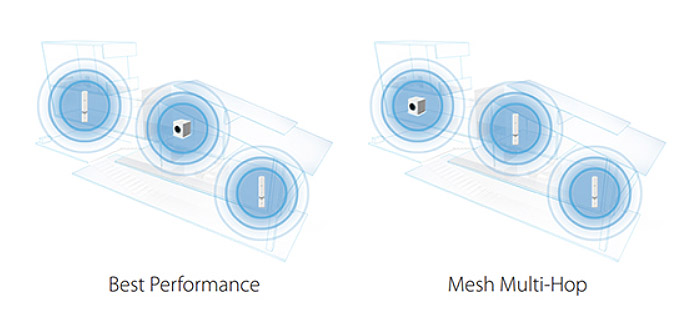
After connecting the first mesh point to the main router (at a distance of about 30 feet), I took the 3×3 client and measured an average of 230 Mbps at 5 feet from the extender and after increasing the distance to 15 feet, I managed to measure an average of 185 Mbps. After further increasing the distance between the client and the node to 30 feet, I measured a peak speed of 124.5 (with an average of 122 Mbps).
Lastly, I added the second mesh point to the network (at about 35-40 feet from the main unit, but with a wall between them) and I got an average of 185 Mbps at 5 feet from the node, while at 15 feet, the speed decreased to 159 Mbps. After further increasing the distance between the node and the client to 30 feet, the speed decreased to an average of 122 Mbps. To keep things interesting, I made the client to go through both nodes before reaching the base unit (keeping it on the 5GHz band – the second node being at around 100 feet from the base router and after two walls) and, as expected, this is not the best route to take because the throughput will take a heavy hit: near the node (5 feet), I measured 32.8 Mbps, while at around 30 feet away, I measured about 14.7 Mbps.
To conclude the wireless speed tests, I connected a client with a 2.4GHz-only wireless card to the main router and verified the speed performance at different locations: at 5 feet away from the router, I measured an average of 106 Mbps, while at 15 feet, the speed decreased to 97.1 Mbps; at 30 feet, I measured 84 Mbps.
Note: While the wired speed of any Gigabit router is usually close to 1Gbps, I noticed a lot of people were complaining about getting between 450 to 500 Mbps in Router/DHCP Mode and indeed, there is a bug that limits the bandwidth to a half using this mode and so far, to get close to Gigabit speed, you need to use the router in Bridge Mode (so, no Port-Forwarding, no DHCP). Ubiquiti seems to be aware of this bug and I hope that it will be fixed as soon as possible with new firmware updates.
Setup and Interface
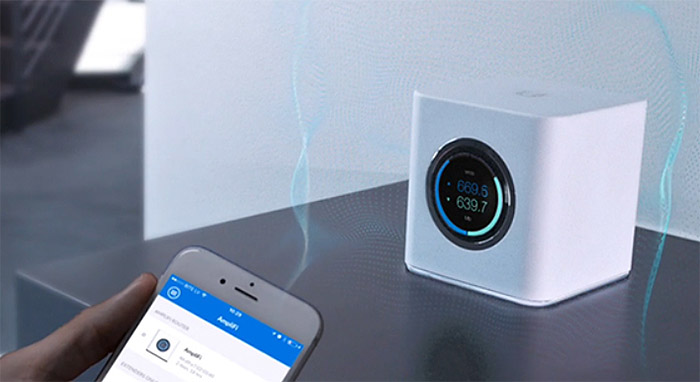
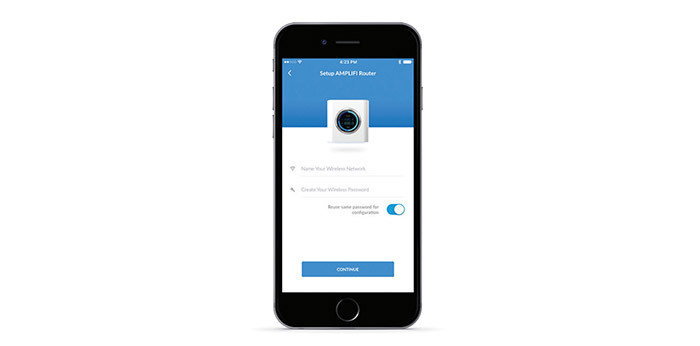
Ubiquiti provides two ways of configuring the WiFi system: using an app or via a web browser. The easier way is obviously, using the app, which can be downloaded from either the App Store or Google Play. So, after launching the AmpliFi app, you will be asked to choose between Setting up the AmpliFi Mesh System or the AmpliFi Standalone Mesh Point (in this case, I chose the former) and, next, you need to follow the hardware installation instructions (connecting the modem and powering on the device).
Afterwards, you need to tap the AmpliFi Router HD and select an SSID and password for your network (you will hear a sound which indicates that the configuration is complete). The app also allows you to set up a standalone MeshPoint and add it to the existing network: after selecting the device which will be installed, select the Ubiquiti WiFi system network and enter the password (the device will emit an audible sound which indicates that the MeshPoint is connected).
After the initial configuration is complete, the app will give you access to the system dashboard in the Overview window, which shows the status of the network (if everything is fine or if there are new updates available), displays a graphical representation of the AmpliFi Router and MeshPoints (tap on any device to access its settings – for example, if you click on a MeshPoint, you get to see the Signal Quality, the used band and its name and you also get to enable or disable the LED, the sounds, pause the mesh point entirely and locate or reboot the device), the number of Clients connected and the Upload and Download speed.
If you tap on the base router, you get access to the General settings (Time, Sound Effects, Locate, Reboot the device or Change the Password), Wireless settings (you can change the SSID, password and security type, as well as create a Guest network, enable Band and Router Steering and Separate WiFi SSID), Internet settings (includes the Network Type, enabling UPnP, Clone MAC Address, VLAN ID and Router Mode), change the LCD or LED brightness, enable Night Mode (you can also schedule it), configure the DHCP Server and the Port Forwarding.
Next, you can access the Performance section (which displays the Throughput (upload and download – swipe left to display the throughput pie chart) and allows you to perform an ISP Test), the Guest section (which shows the status of the Guest Network, allows you to enable or disable it and share the Guest network SSID), the Family section (it allows the creation of profiles which group family members based on specific time schedules and displays all the clients currently connected to the system – slide your finger to the left to open the QoS options: prioritize the WiFi client choosing between Gaming, Streaming and Normal) or the Diagnose section (checks the status of the WAN link, the IP Address, the Gateway Address, the DNS Address, the Internet Connection and the Mesh Points Online).
Note: The Family section (Parental Controls) feels a bit dry in features and I expected some in-depth filtering (by URL or content).
Conclusion
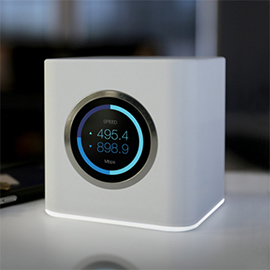
It’s clear that Ubiquiti wanted to be strange and intriguing when it designed the AmpliFi HD and it definitely has managed to accomplish that (the circular display is definitely an eye-catcher), but, while it had the potential to become the best looking WiFi system, the overall look of the MeshPoints is a bit underwhelming. Besides that, the wireless performance is really good and stable (similar to what we saw in the competition) and the mobile app delivers a more in-depth configuration than what I got used to with the other WiFi systems (some features aren’t yet fully developed, but it seems that more is added with every firmware update). Still, there are some issues that need to be addressed (the halved Gigabit speed in Router Mode) and, while I’ve praised Ubiquiti before for its price to features ratio, this time, it doesn’t seem to be the case, since the AmpliFi HD is pretty much on par with the other mesh system from this point of view.

Mark is a graduate in Computer Science, having gathered valuable experience over the years working in IT as a programmer. Mark is also the main tech writer for MBReviews.com, covering not only his passion, the networking devices, but also other cool electronic gadgets that you may find useful for your every day life.

