In any case, I then moved to the WiFi 5 client devices and the first one was a laptop equipped with an Intel 8265 adapter. This way, at 5 feet, I measured an average of 610Mbps up and 299Mbps downstream, while at 45 feet, it was 149Mbps up and 25.6Mbps down.
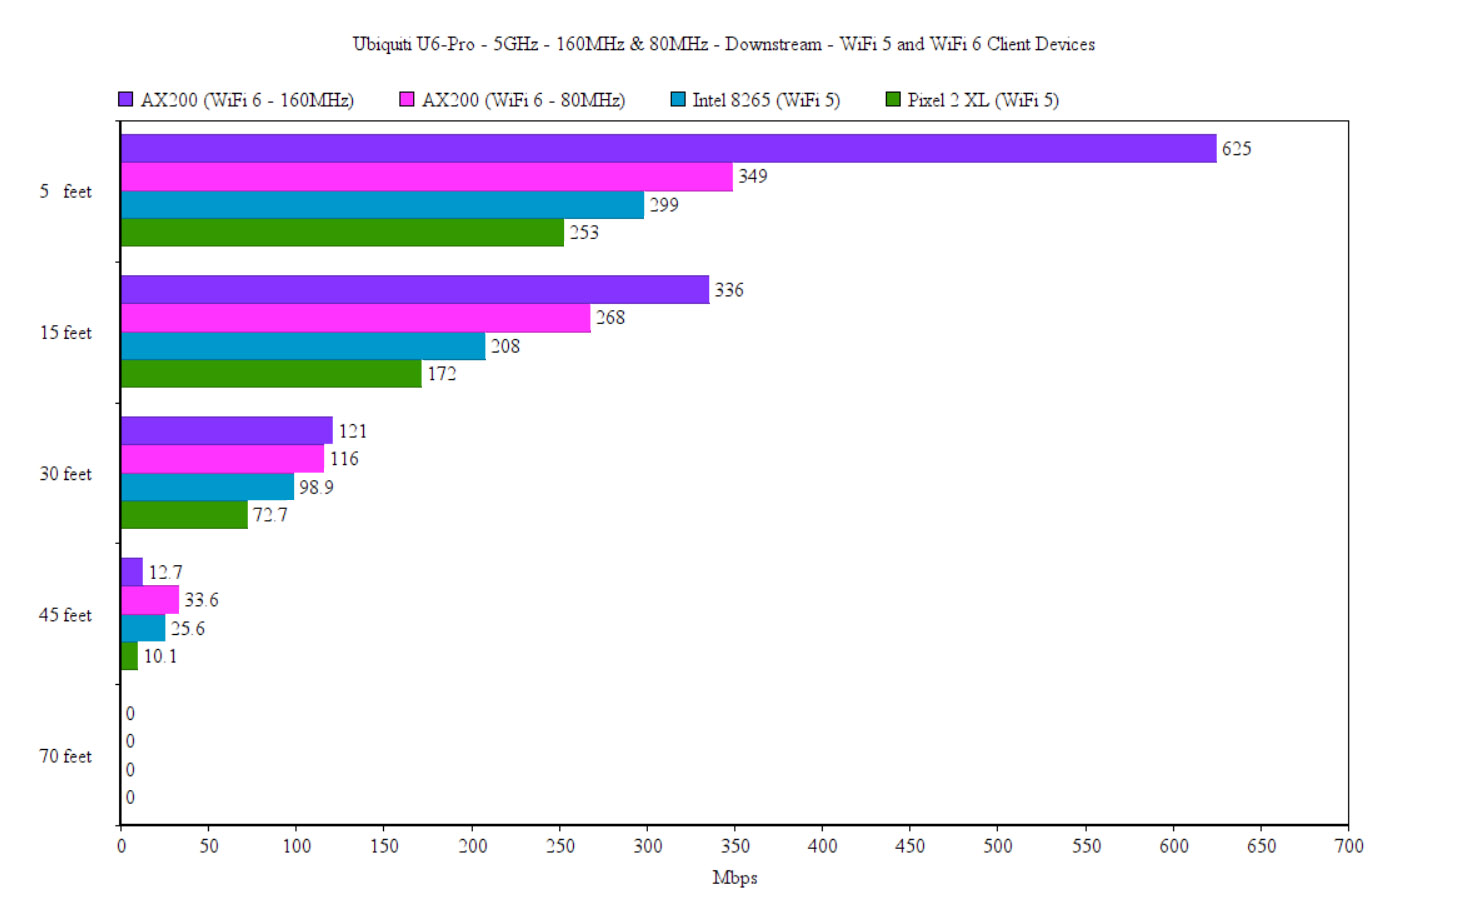
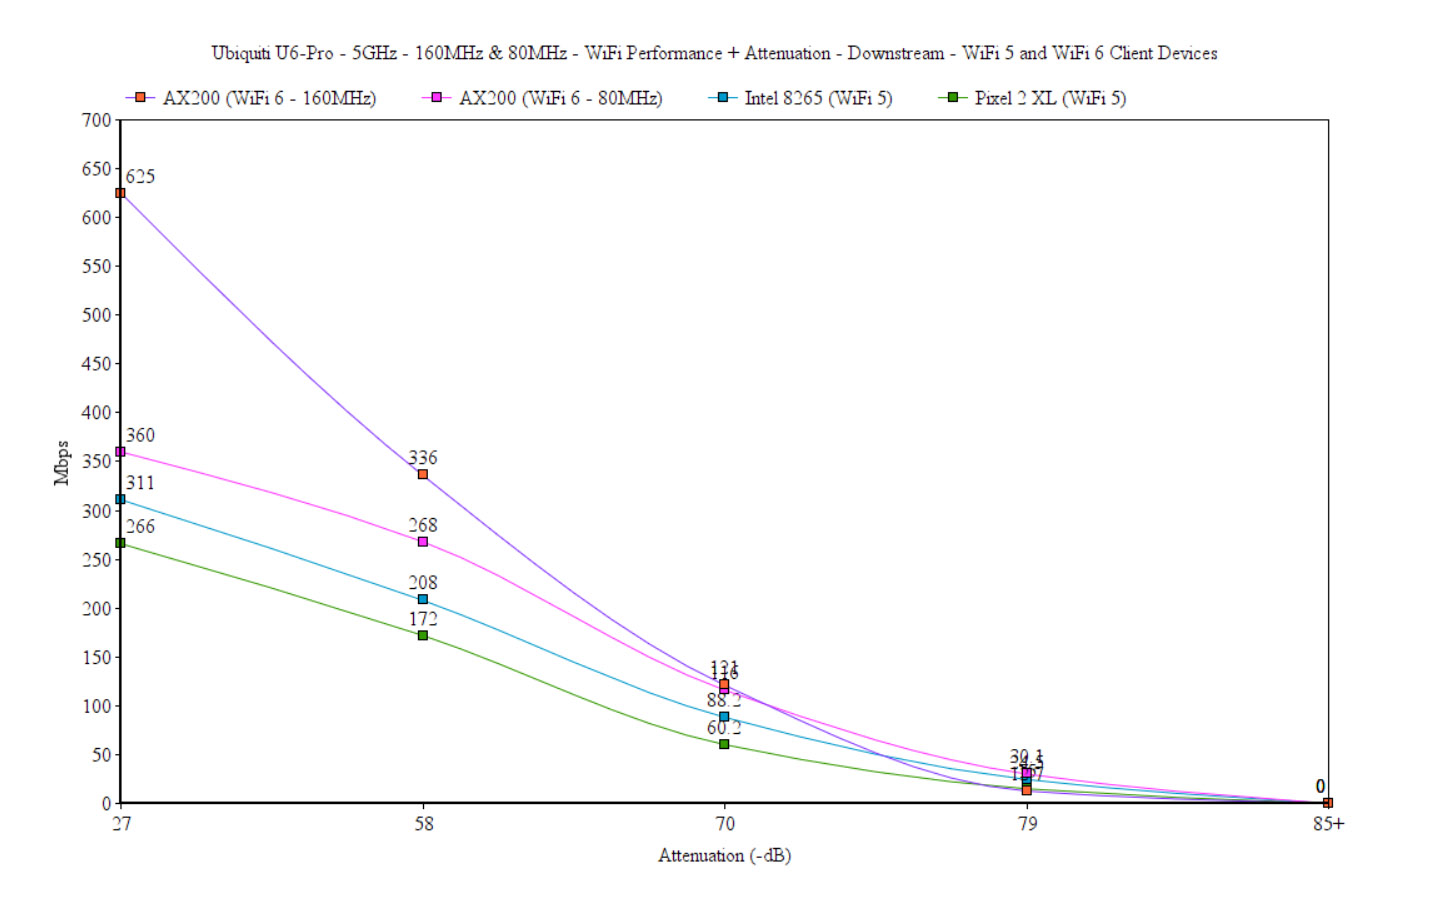
The story repeats itself at 70 feet, where the connection completely drops. The Pixel 2 XL was more anemic, as usual, offering an average of 411Mbps up and 253Mbps downstream at 5 feet, while, at 45 feet, it was 48.9Mbps up and 10.1Mbps downstream. No chance of going any farther than that.
Wireless test (2.4GHz)
The WiFi performance on the 2.4GHz is definitely better on the U6-Pro than on the U6-LR when using the WiFi 6 client device. Indeed, at 5 feet, I measured an average of 253Mbps upstream and 228Mbps downstream, and yes, I could go farther than 45 feet and up to 70 feet, where the throughput was still usable considering that I saw an average of 50.1Mbps up and 20.7Mbps downstream.
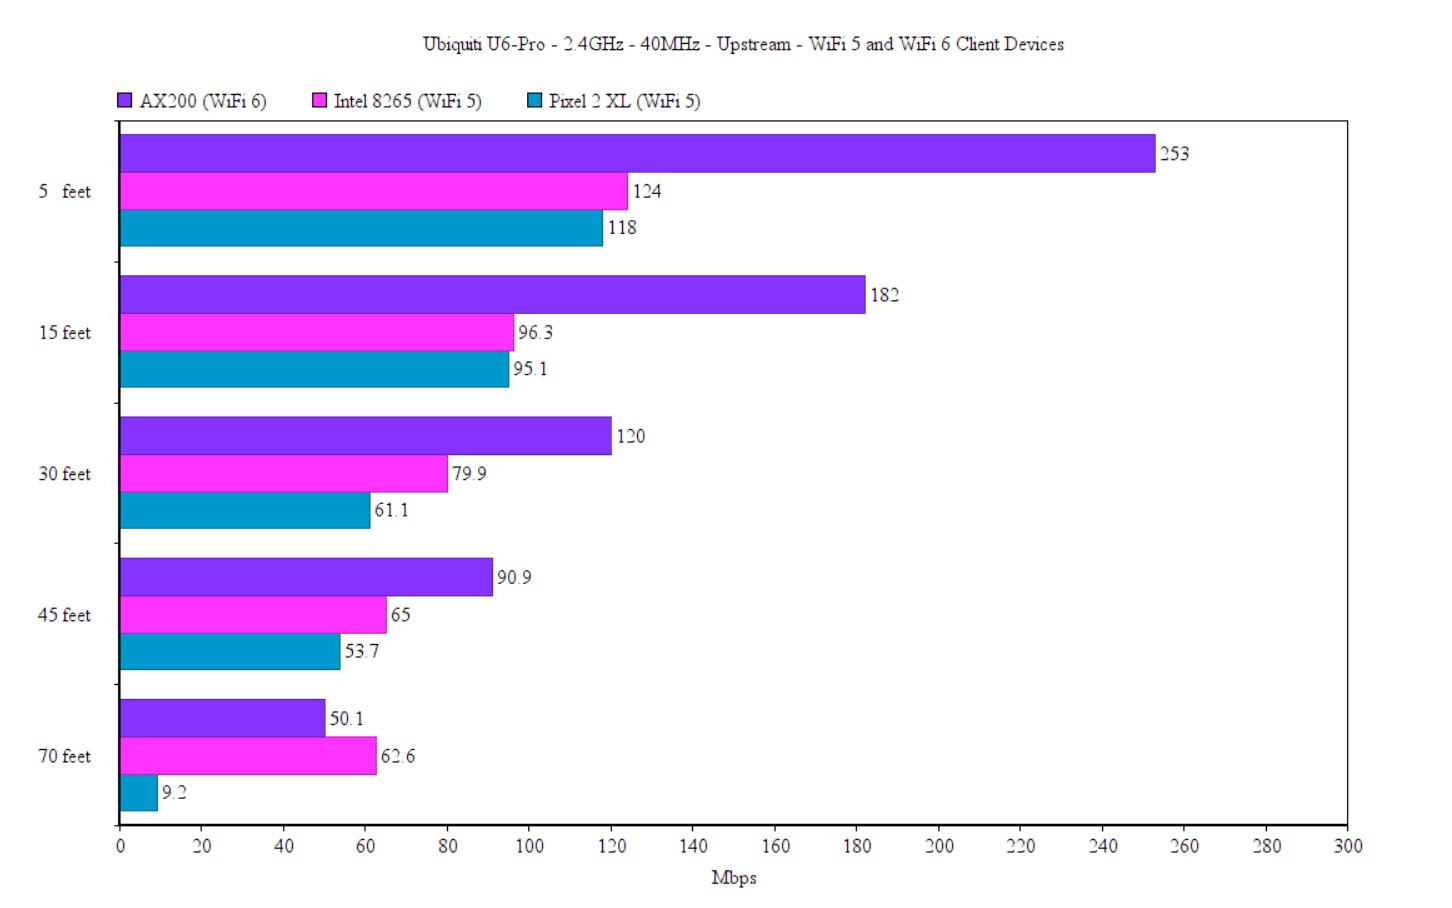
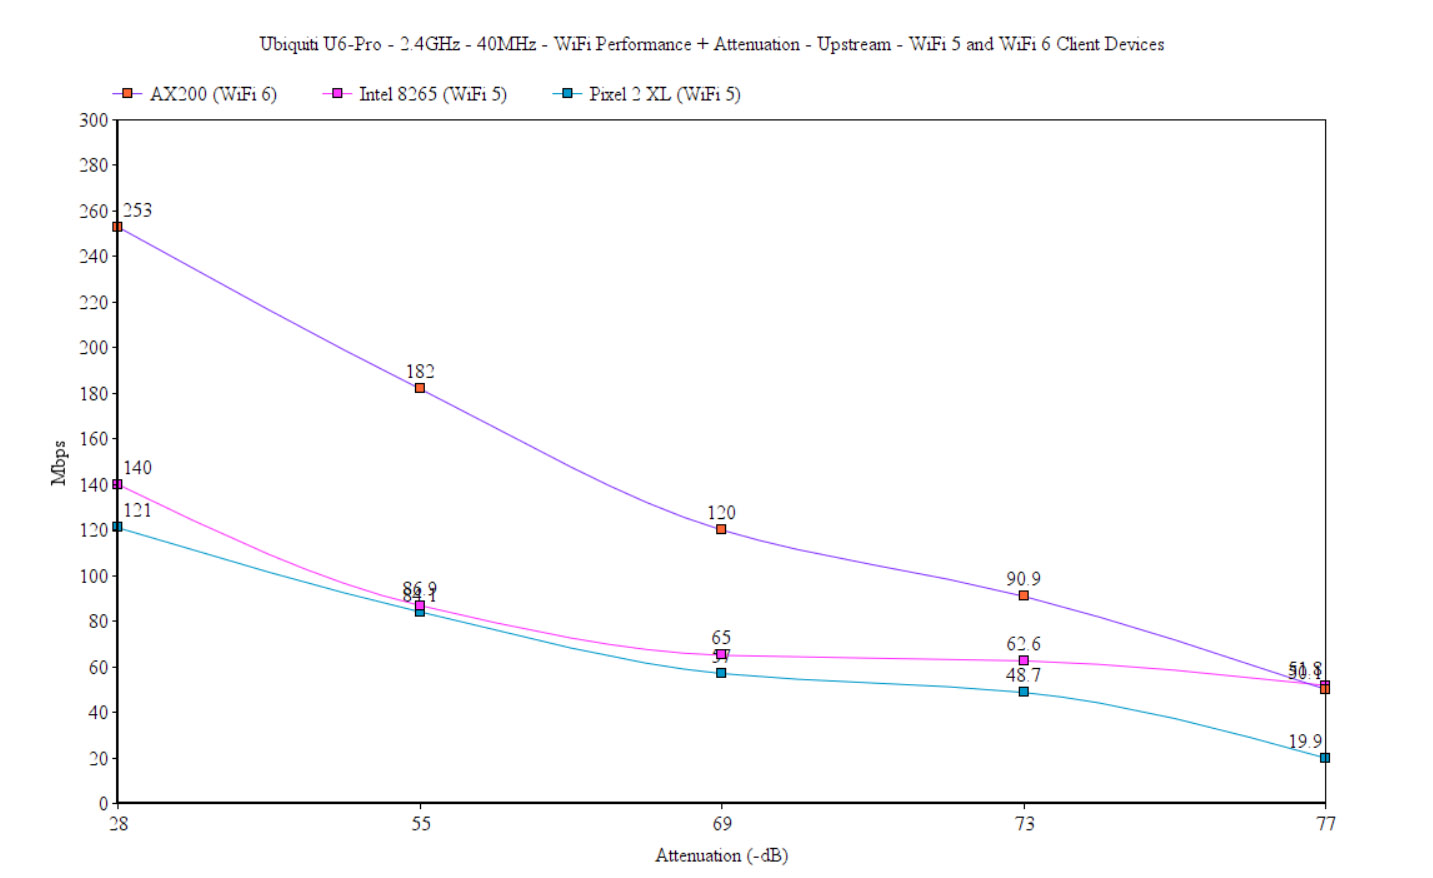
Switching to the Intel 8265 client device showed that you need to use WiFi 6 client devices with WiFi 6 routers if you want to see a proper performance. That’s because at 5 feet, I saw an average of 124Mbps upstream and 101Mbps downstream, but the signal went through up to 70 feet, where I measured an average of 62.6Mbps upstream and 52.3Mbps downstream. So, it was still very much usable for most applications.
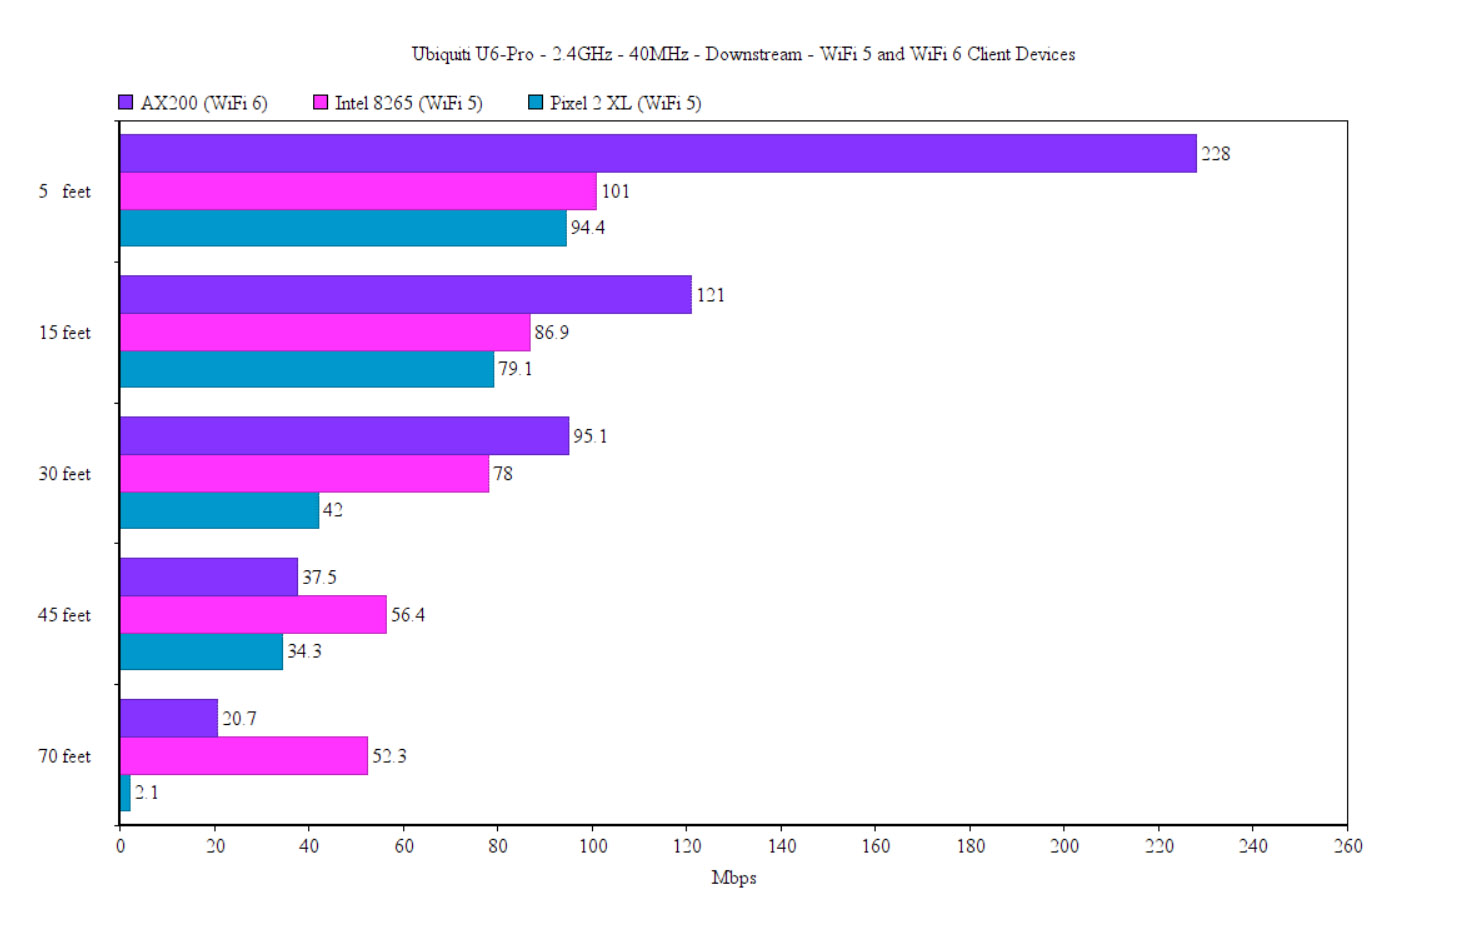
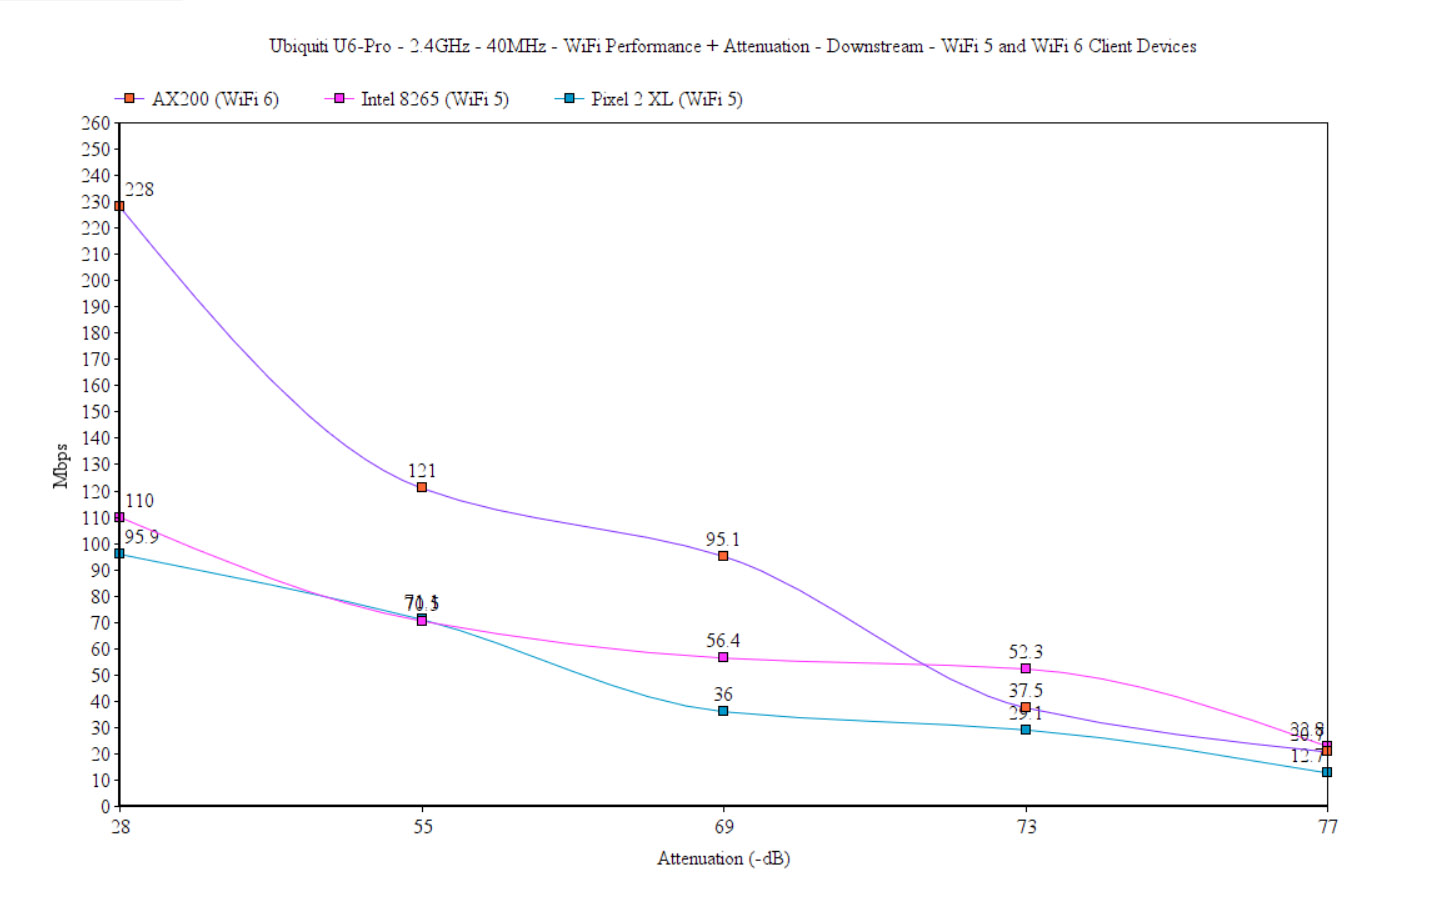
The Pixel 2 XL tried its best to keep up, so, at 5 feet, I measured an average of 118Mbps upstream and 94.4Mbps downstream. It even connected at 70 feet, but the throughput was far from decent, showing an average of 9.2Mbps upstream and 2.1Mbps downstream.
Setup and Software
Standalone Mode
Ubiquiti didn’t want to give you a web-based standalone GUI and instead, you need to download a mobile app (iOS or Android) to gain access to the settings. The installation process is the same as on the U6-LR, so you need to give some permissions for the app to run and then you can go ahead and add the Ubiquiti U6-Pro even if you don’t have an account. Then, I had to scan a QR code from the bottom of the access point and, using the Bluetooth radio, it should appear in the app.
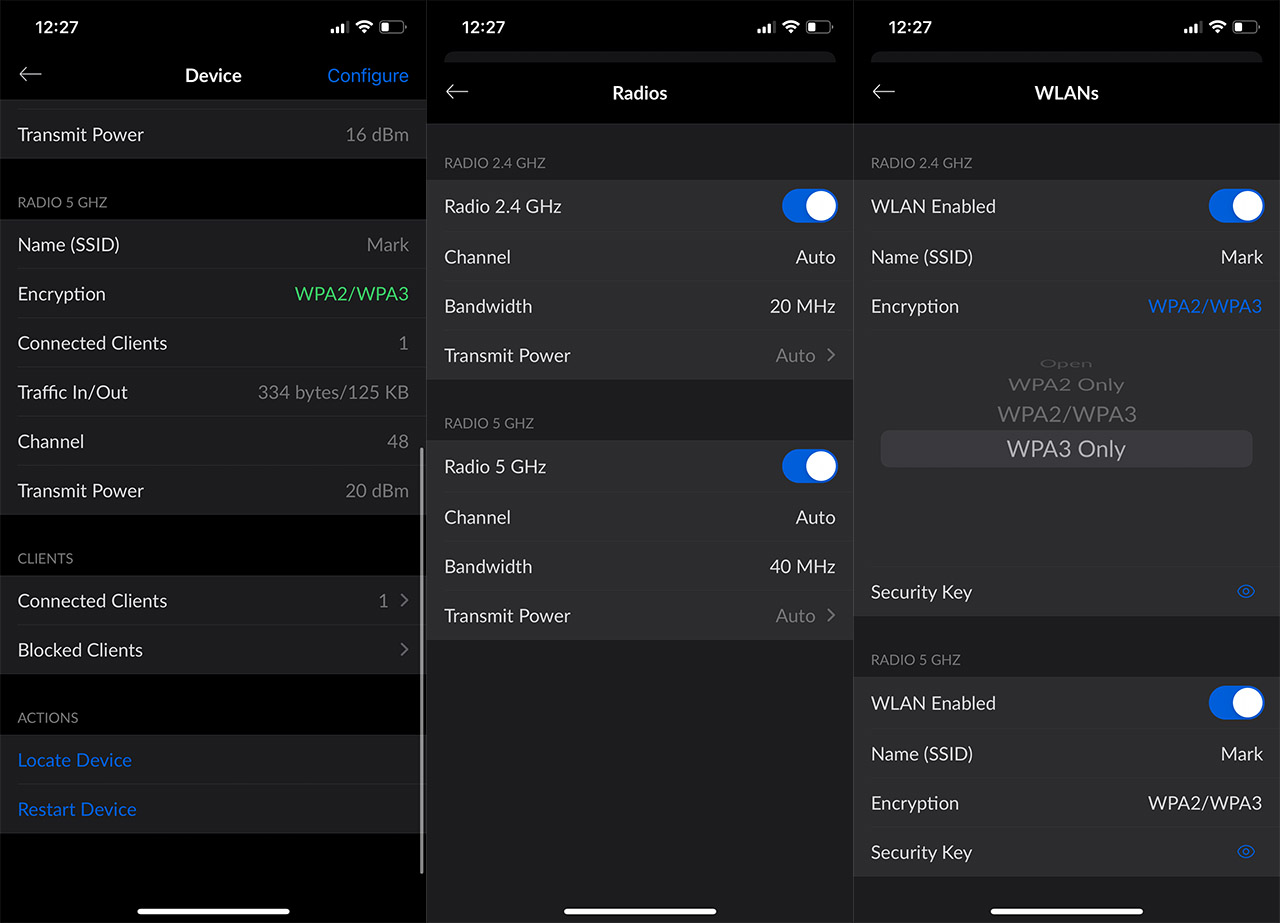
Then, after giving the network a name and password, I was able to access the GUI (with all the warning about limited functionality – we know, Ubiquiti, we know). Be aware that you won’t be able to add the access point if the mobile device you’re operating uses a VPN. The app will show all sorts of info about the U6-Pro, including the supported encryption which includes WPA3 (the U6-LR did not at the time of testing) and the Transmit Power – you can also run the ‘Locate the Device’ function.
Then, there’s the Configure section where you get some basic settings for the Radios (channel, channel bandwidth and transmit power, as well as the encryption key) and you can check the Device Credentials.
The UniFi Controller
There are multiple ways to run the controller, it can be on the Cloud or on a local machine, but be aware that for proper monitoring and management, it needs to run 24/7, so keep that in mind before venturing forward with Ubiquiti hardware. The good news is that the controller offers most of its features for free and let’s not forget that we’re dealing with the UniFi which essentially shaped the way a proper SMB controller should look like (and trust me, the engineers from the competition did take notes).
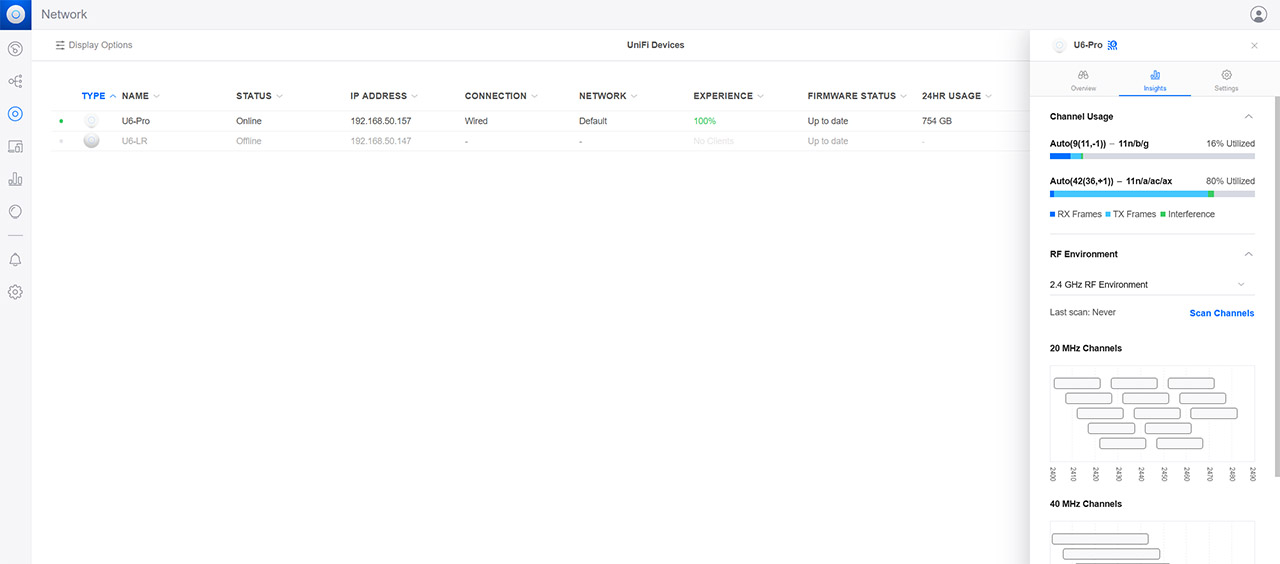
Now, as for the Ubiquiti U6-Pro, it’s very easy to adopt – it’s immediately detected by the controller and then you’ll see it in the list of available Access Points. I did like how there is nothing vague about what happens behind the curtains and the status of the AP would update pretty much in real time. Then, clicking on the device will summon the side window where it’s possible to see the Overview section which shows lots of stats, including a very comprehensive client connection log and the signal strength to all the connected client devices.
And, lastly, you can configure the Ubiquiti U6-Pro by accessing the Settings. This is where you can adjust the basic WiFi settings, but you can also adjust the Band Steering or set the VLAN. To go a bit more in-depth, you need to go to the global Settings and choose WiFi. That’s where you can set the SSIDs, optimize the radios (not really a fan of automatic settings, but Ubiquiti does a decent job in this regard).
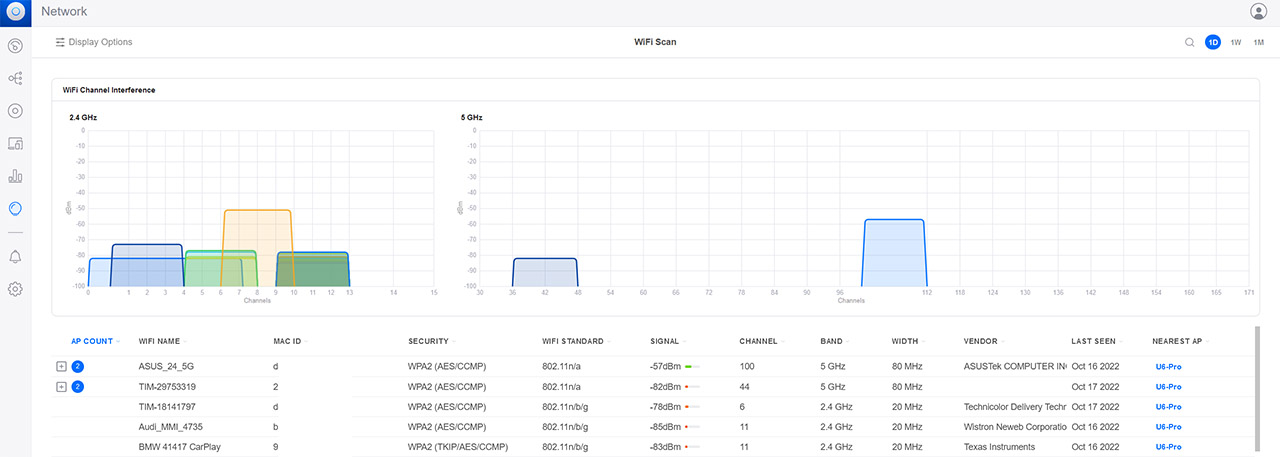
Then, you can add APs to the blocklist, enable Wireless Meshing (Uplink), schedule network optimizations and more. What I really like about the UniFi controller is the Insights section since it shows exactly what’s going on around your AP. It includes the WiFi Channel Interference, the signal strength of other APs in the vicinity, the Band and the Width, and more. It does bare a very close resemblance to the new EnGenius Diag Tools since there’s the scanning option, but that’s where the similarities end.
The Conclusion
As the title says, is the Ubiquiti U6-Pro better than the U6-LR? In some ways, yes, in others not so much. Design-wise, the U6-Pro is more compact, and I do like the half-metal case more, although I wasn’t very fond of the RGB shenanigans. In terms of performance, the Ubiquiti U6-Pro is phenomenal on the 160MHz channel width at close range, but it does fall in line with the other APs after moving a bit farther and using various types of client devices. It’s clear that the range doesn’t go as far as on the U6-LR, but when compared with other access points from the competition, it could have been a bit better.

Mark is a graduate in Computer Science, having gathered valuable experience over the years working in IT as a programmer. Mark is also the main tech writer for MBReviews.com, covering not only his passion, the networking devices, but also other cool electronic gadgets that you may find useful for your every day life.

