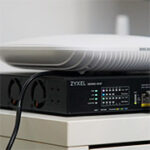
The Zyxel XS1930-12HP is a part of the new multi-Gigabit smart managed Ethernet switch series and it was mainly designed to accommodate the growing need to power multi-Gig wireless access points which have adhered to the new WiFi standard. It’s true that the multi-Gigabit Ethernet switches have been around for a while as a means to handle powerful servers and to move large data packets a lot faster, but with the emergence of the WiFi 6 networking devices, the SMBs have been given the possibility to also get access to higher wireless speeds (and other awesome features).
| Zyxel XS1930-12HP | |
|---|---|
| Zyxel.com | Check Product |
The problem is that some WiFi 6 wireless access points (such as the Zyxel WAX650S) are a lot more power hungry than the WiFi 5 APs, so, to get the maximum performance (since you paid for it), it is required to have an Ethernet switch with PoE++ ports available.
It’s true that the XS1930-12HP is not the most inexpensive networking device, but you do get ten multi-Gigabit LAN ports supporting 100Mbps, 1GbE, 2.5GbE, 5GbE and 10GbE connections (most inexpensive multi-Gig Ethernet switches do not), a power budget of 375W and, since this is a L2 managed switch, you get access to the NebulaFlex controller.
That is, if you want to use the device in stand-alone more, otherwise, you can adopt it to the license-free Nebula Cloud management platform. This is not the first Zyxel Ethernet switch that I have tested and all have proven to be quite reliable networking equipment, but the Zyxel XS1930-12HP is the first multi-Gigabit switch that I had the possibility to test, so let’s have a closer look at this powerful machine and see if you need one to improve your network’s performance.
Design and Build Quality
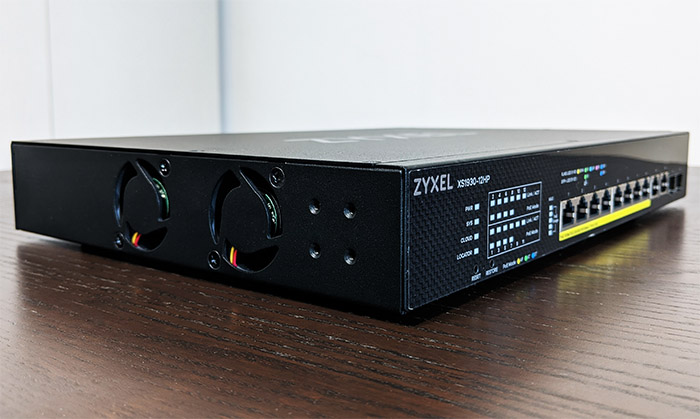
Considering that only the SMBs and most likely the mid enterprise market will be able to actually utilize the full potential of the Zyxel XS1930-12HP, the manufacturer has built the multi-Gigabit Ethernet switch to be rack-mounted which means that it’s a simple large metallic box covered by a black matte finish. I was impressed by how compact the Zyxel GS1920-8HP was, despite being quite powerful, but it did run a bit hotter and since the Zyxel XS1930-12HP did not try to make a design statement (especially since the powerful internal hardware will need some space to keep the temperature low), it’s designed to perfectly fit a rack unit. Indeed, the Ethernet switch measures 12.99 x 9.06 x 1.73 inches, which is the same as the other model from the series, the XS1930-10, but it does weigh a bit more – 6.17lbs. On the left and the right side of the device, towards the front, you will be able to find four holes to which you can attach the mounting brackets (from the package) and slide the switch into a rack. But, you also get the option to keep the XS1930-12HP on a flat surface by relying on the four silicone feet that you can attach to the bottom of the device (there are four dedicated areas).
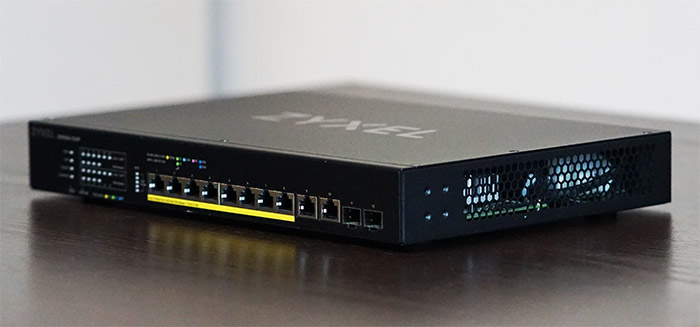
The Ethernet switch supports PoE++ and since the max budget is 375W, the internal temperature can rise quite a bit and to make sure that it’s kept within the acceptable parameters, Zyxel has added a couple of fans on the left side for pushing out the hot air, while on the right side, the case has a pattern of cut-out holes (the air intake system). The fans are 40 mm (FD124020EB-N) and regardless whether you connect one PoE++ access point or none, I was able to measure about 38dB (the default noise level) which is acceptable even if you don’t mount the Ethernet switch in a rack. Zyxel prides itself with a smart fan system that adjusts the rpm of the fans according to the detected temperature and I have to say that the system works as intended considering that the more APs it powers, the more heat will be generated so, the fans will get significantly more loud at that point (in this case, you should also consider putting the device in a separate room, ideally, mounted in a rack). The manufacturer has made the front of the Ethernet switch glossy black (with a low-key pattern) and that’s where you’ll find the LEDs and the Ethernet ports.
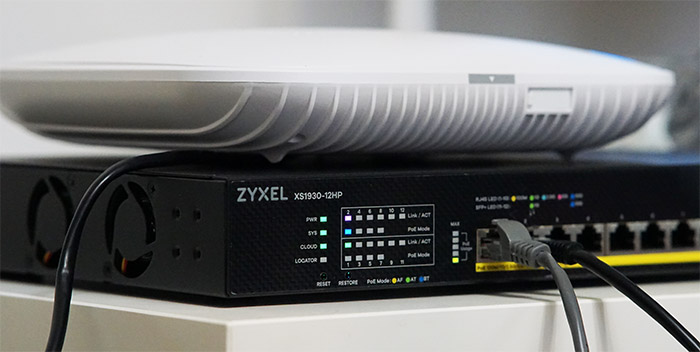
On the left, there’s the PWR LED (if it’s amber, then the switch is returning to its factory settings and solid green indicates that the device is powered on), the SYS LED (red means that the switch has encountered an error), the CLOUD LED (flashing amber means that the device is working in stand-alone mode and solid amber means that the switch is paired to the Nebula Cloud, but has failed to connect to the NCC; solid green means that the device is connected to the NCC and flashing green means that the Ethernet switch is not yet registered to the NCC) and the Locator LED (flashes to show you the location of the switch in a rack). A bit to the right, there is another block of LEDs which will show if there is Link/ACTivity on each port, as well as the type of connection by relying on a specific set of colors: if the LED is blue, then the connection is made at 10Gbps, otherwise, if the LED is purple, then the connection is made at 5Gbps; at 2.5Gbps, the LED will be light blue and at 1Gbps, the LED is going to be green (in case you connect a device that supports only 100Mbps, then the LED will become yellow). The first eight LAN ports also support PoE (up to 60W power budget per port) and, depending on the PoE standard that’s supported by the client device, the LED can become blue (802.3bt), green (802.3at) or yellow (802.3af).
Underneath this block of LEDs, you can find a couple of recessed buttons, one for RESETting the Ethernet switch (it reboots the device without turning the power off) and the other for restoring the Zyxel XS1930-12HP (press it for three to six seconds to restore a last saved default config file or press it for more than seven seconds to return the device to its factory default settings). The next set of LEDs will show when the MAX PoE budget is reached and then you get the first eight Ethernet LAN ports that support up to 10Gbps and PoE++, followed by a couple of 10Gbps non-PoE LAN ports. Lastly, there are two 10Gbps SFP+ slots (either use SFP+ transceivers or SFP+ DIrect Attach Copper). If you turn the multi-Gigabit Ethernet switch around, you will be greeted by a Kensington lock slot, a grounding screw and an AC Input connector (since it has the PSU inside, you only need to use the single cable provided in the box).
Internal Hardware
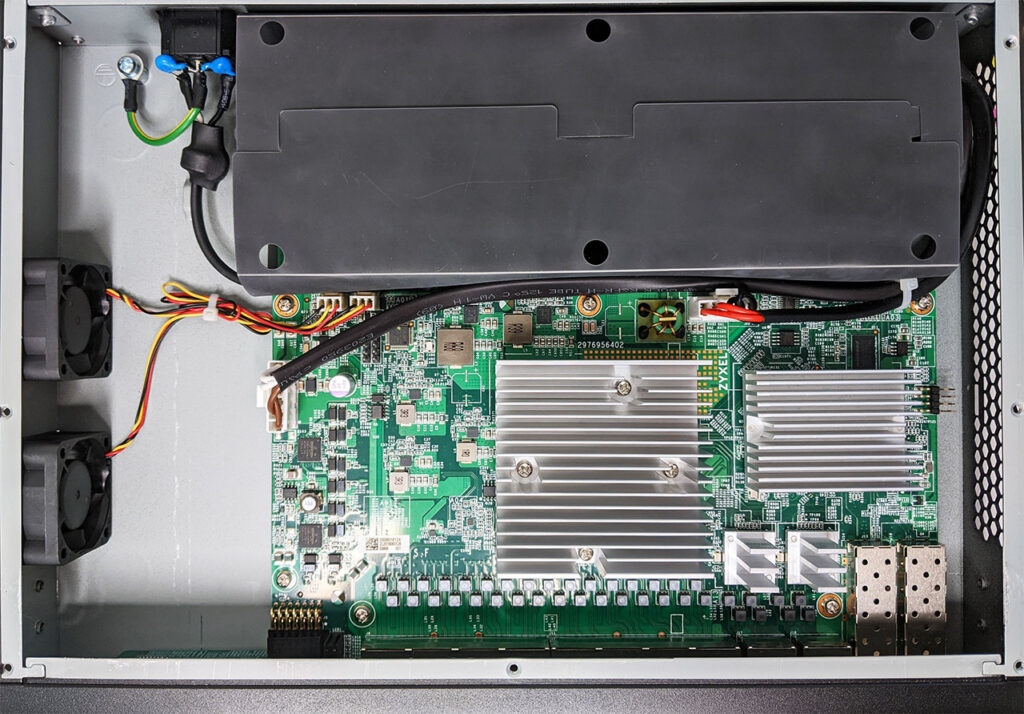
To open up the case, you need to remove the seven screws at the top, as well as the three screws from the rear side and then simply slide the top metallic panel to expose the internal circuits. I have noticed that Zyxel has covered the PSU section with a plastic sheet and on the main board, it has added a few large heatsinks to ensure that the heat from the chipsets is properly pushed outwards. Unfortunately, only the larger metallic heat sink can be removed (the other three seem to be soldered to the PCB). Underneath this heat sink, I saw an Aquantia AQrate AQR813-90-C (BANJ1700200A.01 1944 B0E TW) PHY.
On the PCB, I could also identify 256 MB of RAM from Winbond (W632GU6MB-12 690396400012 937WCA), 256 Mb of storage from Macronix (MXIC MX25L25645G M2I-10G 8F532800A1), 4Mb of storage memory also from Macronix (MXIC 25L4006E M1I-12G), a couple of Broadcom BCM59121B0KMLG highly integrated IEEE 802.3bt-compliant power sourcing equipment controllers, a couple of RTL8231 JCA58G16X02 IC chips and a 32F100 C8T6B 990HJ ARM micro-controller.
Setup and Features
After you have connected the Zyxel XS1930-12HP to a power source and to your router, you have two options available in order to configure and maintain your network: you can use it in standalone mode or along with other Zyxel devices using the Nebula Control Center (Cloud management platform). If you decide to use it as a standalone device, you will need to find out the IP address that it received from the router – you can check it in the client list from the router UI, but you also get the option to use the ZON Utility to change its IP address (in case it’s set to static).

Mark is a graduate in Computer Science, having gathered valuable experience over the years working in IT as a programmer. Mark is also the main tech writer for MBReviews.com, covering not only his passion, the networking devices, but also other cool electronic gadgets that you may find useful for your every day life.

